I shared this tutorial over at Tatertots & Jello last year and thought I would dust it off and post it over here, in case you missed it, or in case you have a memory like mine (which is non-existent these days…)
We had several old tomato cages laying around in our side yard. (Me? Creative? Absolutely. Green thumb? Not so much.) I had extra strings of icicle lights laying around too.
I thought I’d make a few lighted Christmas trees.

You will need:
- a tomato cage
- a string of lights (I used icicle)
- quilt batting or “Buffalo Snow”
- glue gun
- duct tape
- fresh fir tree clippings and small garden shears
- spray snow flocking
- glitter, ribbon, etc (optional)
Here’s how I did it.
Turn the tomato cage upside down and bring the spikes to a point. Wrap and secure with duct tape.
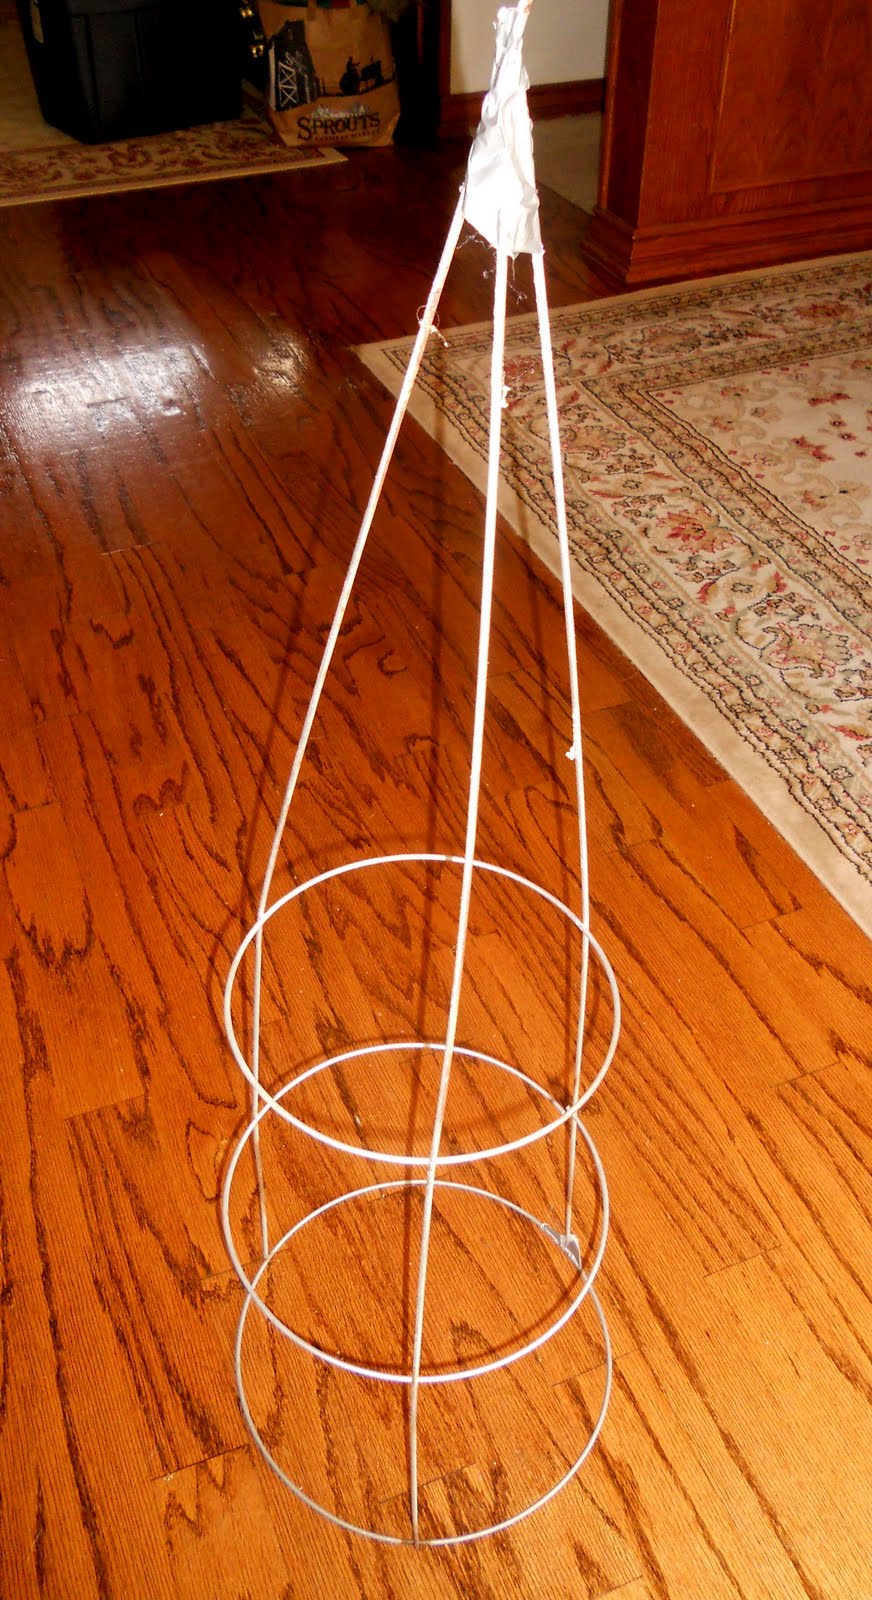
Starting at the point at the top, begin taping the lights to the sides of the cage. Make sure that you have the “female” end of the string of lights when you start. The “male” end that gets plugged into the socket will need to hang out of the bottom of the tree.

Make sure the “icicles” are hanging towards the middle of the cage.

When the lights are secured, fire up your glue gun.
This is the part where the photo-journalist in me took a coffee break. I don’t have lots of photos for this part of the process. (Why? Because I have great intentions to show you how I do it and then forget to… oh! shiny! Where was I? Oh yes! The glue gun!) But no worries, you can do it.
Lay your cage on top of batting or pre-made/buffalo snow material. Run a little line of hot glue on the bottom ring (formerly the top) of the cone. Press the edge of the material into the glue, kind of rolling the cage as you go. Basically, you’re securing the material to the bottom ring.

(Just so you know, a ratty looking well-worn glue gun is the sign of a Serious Crafter. Use it with pride.)

(Just so you know, ratty looking well-worn nail polish is a no-no. Get thee to a manicurist!)
Back to the tree. Much like my nail polish, it will be lumpy in places and thin in others when you’re done. That. Is. OK.

As I look at this, I’m already thinking this process would make for a cute ghost next Halloween…
Anyway, it doesn’t matter that it isn’t even, because you’re going to add greenery. Take tree clippings (your local tree lot will give them to you for free if you ask nicely…) and, starting at the bottom, you will run a bead of hot glue along the back if the branch and attach it to the batting.

You will continue adding greenery as you go up, making sure that the next layer slightly overlaps the layer underneath it. Your clippings should get smaller as you go up.

(Please note the plug hanging out of the bottom of the tree…)
When you’re finished gluing on the clippings, take that sucker outside and carefully shoot it with flocking snow. (You can get this stuff at any craft store this time of year.)

You don’t want to over-do it… just enough to make it look frosty and maybe camouflage some of the, um, less than perfect areas.

You can also wrap ribbon around it, or add any other embellishments to them. I left with just fir and frost.
You can set then directly on the ground, or wedge them into pots to raise them up a bit.
I like them. Shiny! Pretty! Cheap!
(And I solved the “What’s the deal with those rusty tomato cages!?” question.)
What a great idea! Love the snowy look 🙂
Very cute & clever. I made the mistake last year, of trying to cover a tomato cage with faux garlands & it took about ten of those cheapo ones from Michael’s so the cage wire wouldn’t show. You are so smart to cover the frame with batting first!
CAS
Way cool. Our stores only stock them seasonally, so when I went looking for tomato cages last Christmas season , the Lowes girl looked at me like she wanted to say “Lady, you know it’s Winter right?”
Was it LAST year that you posted these? I could swear it was yesterday…man, I’m getting so old!
That is a great look! I just posted a video tutorial yesterday about the tomato cage trees I made :). I like your snowy tree look- might have to go buy another tomato cage
I’ve thought those tomato cages were good for something besides tomatoes!! However, I don’t seem to be genetically inclined to figure out what!! Thank God for You!!! 🙂 I love this idea!!!!
Who knew tomato cages could be so decorative?
I was thinking “what on earth is she doing?” and then I see the end result. They are fantastic!
Blogger was not being nice today! This is my third attempt to leave a comment. I love your T. cage xmas trees. I’ve seen this done before sans the batting, faux snow, and greenery. Yours are so much better! I’m pinning!!
Great re-purpose!! I love them!
The definitely brighten up the outside space!
Hugs
SueAnn
Very clever!
Super cute idea!!!
That’s a great idea! Tomato cages around here would definitely be in the rusty, unused category–but if I had some I’d make them into trees pronto. Who knows? Maybe next year I’ll give tomatoes another try–and I’ll be sure to save the cages!
How creative, VIv! this is amazing!
Viv, I love it! Such a clever and creative idea!
Jenn