Do you do something a certain way, or have a little tip or trick you think is no big deal… then you tell someone and they smack their hands to their heads in an I-Coulda-Had-A-V8 moment…?
…And then you realize you were kind of on to something that woks great, but isn’t necessarily common knowledge…?
The response to my post about cleaning stove burners using ammonia fumes has been phenomenal! My tips on using Silica Gel packets in apothecary jars and on how to dry hydrangeas have been really well received too…. so what’s a blogger to do? Why look around for other handy tips to share with you, of course.
Have you met Handsome Hubby?

He’s pretty cute, right? He also has a great tip that he learned from his dad, about a clever way to store extension cords. I’ve never seen anyone else do it this way, so here is a handy-dandy step by step for you.
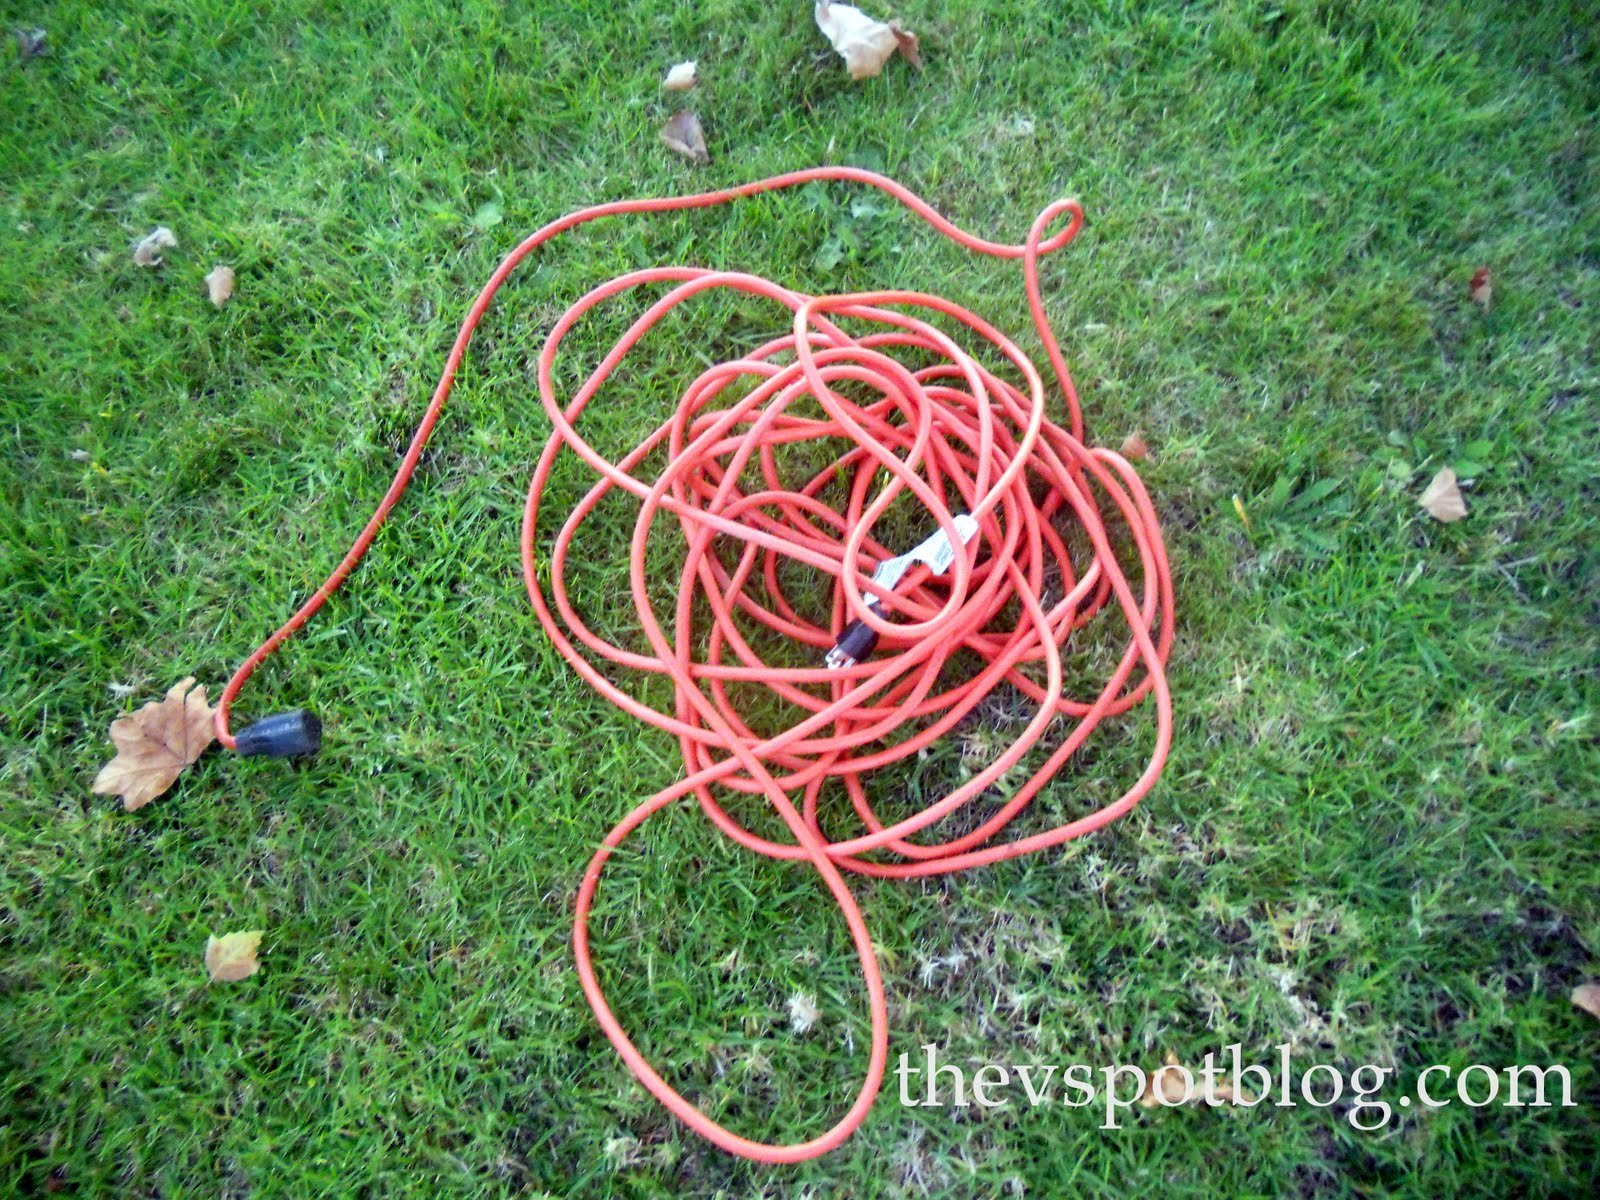
We’ve all got these big orange extension cords. Mine usually look like this…
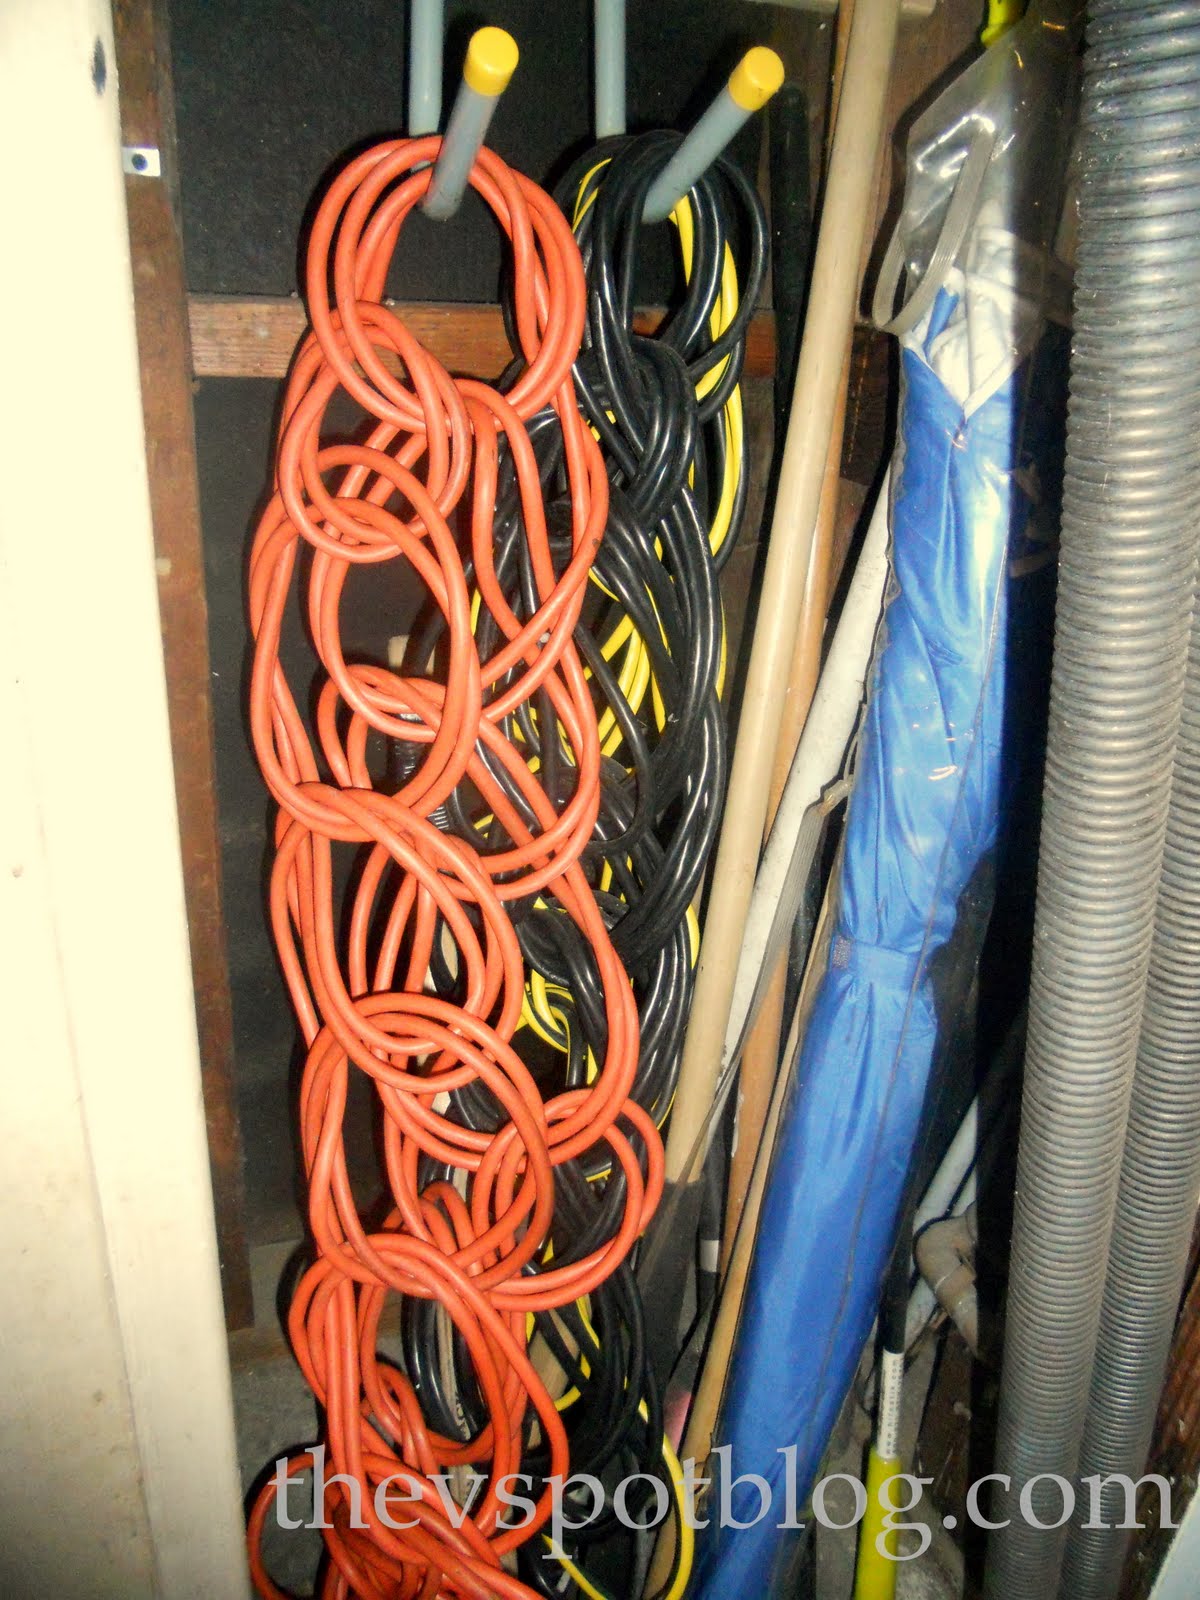
But HH’s look like this:
Here’s how he does it:

1. Untangle and straighten out the extension cord in one long line.
2. Walk it back up so that it is doubled in half.
3. Plug the electrical ends together.
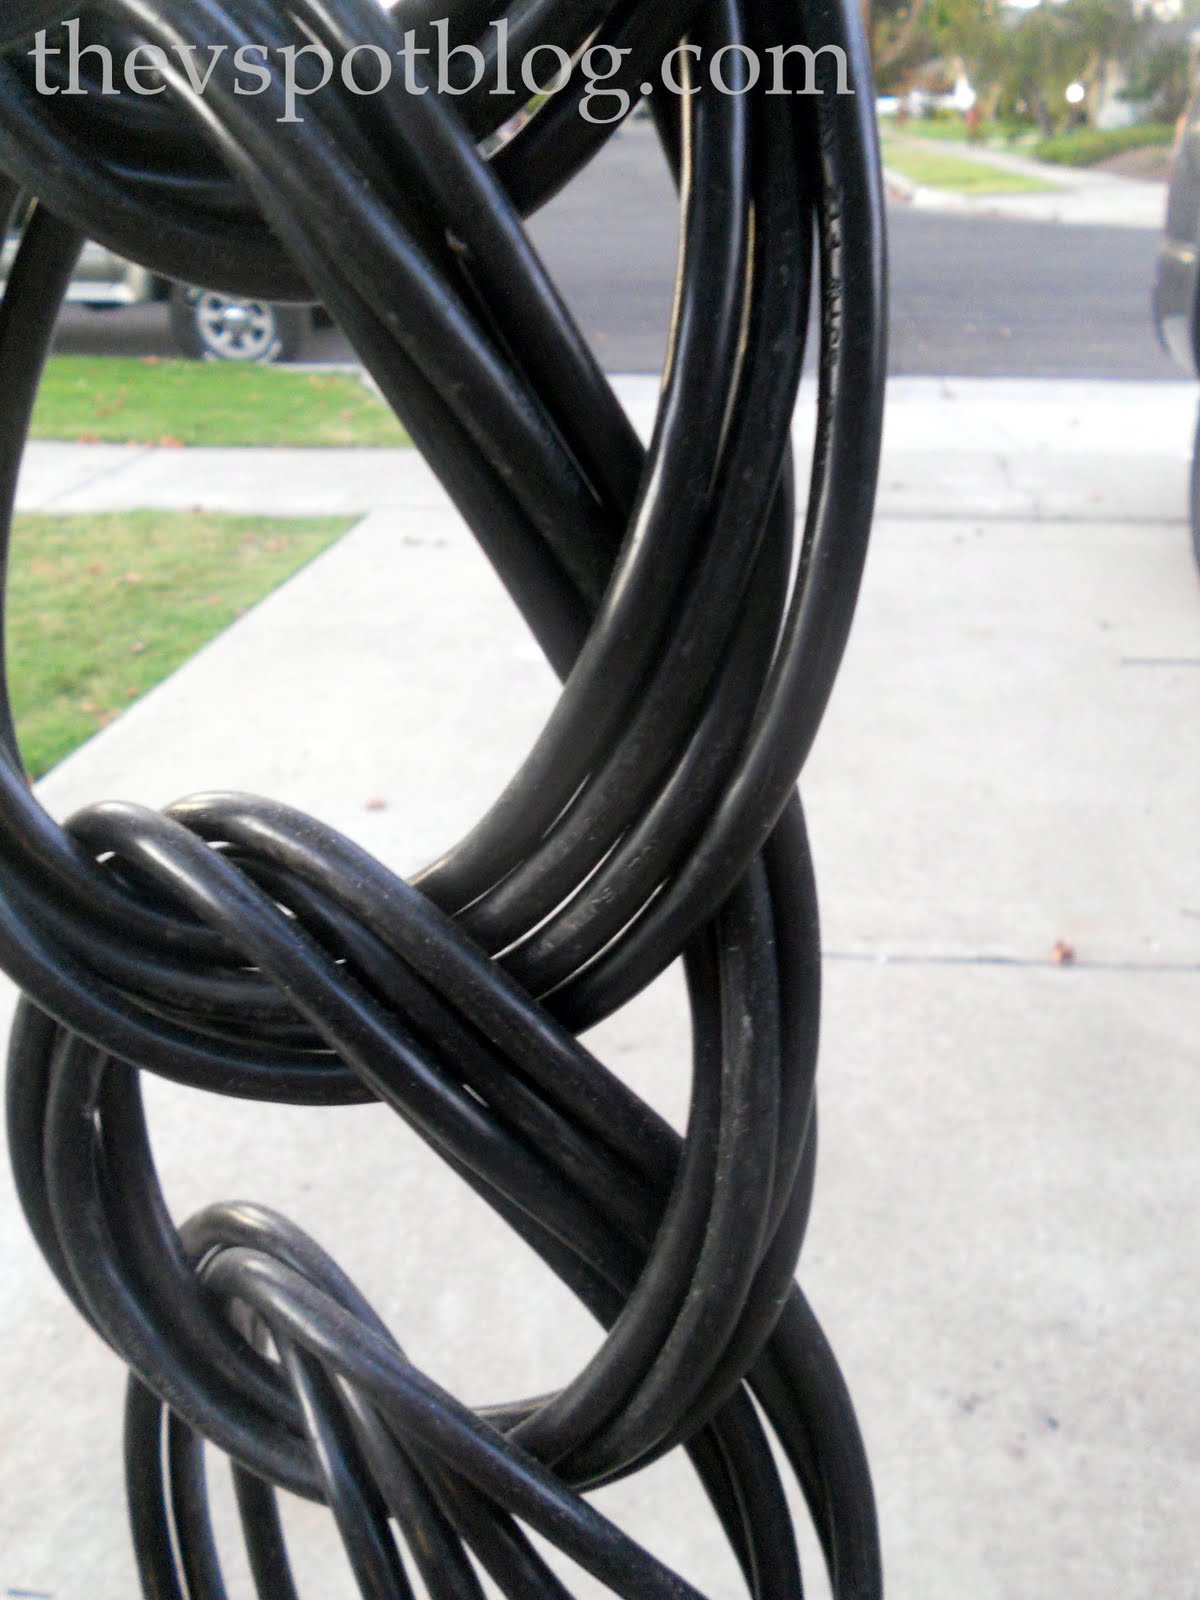
4. Holding that end in your hand, loop it through itself to make a basic knot.
5. While still holding the first knot, gather up a little more of the cord in your other hand.
6. Feed it through the first loop you created and make a second loop. (It may remind you of knitting or crocheting.)
7. Repeat step 6 until you come to the end of the cord.
8. You basically have created a chain of loops. When you come to the end, feed it through one last time.
9. Pull it tight.
HH hangs his on the wall. He also says that if you have a very long cord, instead of just doubling it as in Step 2, you fold it in half again, so instead of loops that are two cords thick, they are four cords thick.
These are really easy to un-do as well.
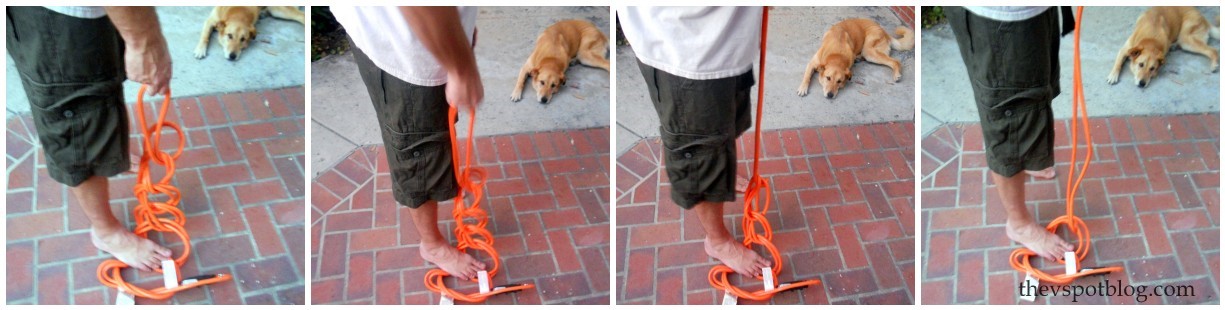
The following sequence took all of 3 seconds:
(updated 8/25/11)
Put the electrical socket end on the ground and place your foot on it. Grasp the last loop that you made in Step 9, reverse it back to Step 8, then pull straight up to unravel it. (The dog is just fascinated by this process, by the way….)
Easy peasy. You don’t need those extension cord spools or doo-dads. This is easy, efficient and free. Gotta love that, right?
check the bottom of the blog to see where I link this
also Home Stories A2Z

And it looks purty too. 🙂
my parents do this too. always wondered how!
love your blog! I became a follower! 🙂 Erin
http://www.healthybranscoms.com
Easy, efficient, and free? Yes, ma’am, I’ll take that! This is brilliant!
My mom taught me always to keep indoor extension cords nice and neat by coiling them and then stuffing them into an empty toilet paper roll. Works like a charm.
I used to do that with a curling iron I had. It had a super long cord, so I made a similar loop structure and then fed the end through so it would stay put. If I ever needed it longer again I would just undo the end and pull.
I keep our household extension cords separately wrapped around cardboard, but the outdoor ones are always a mess. I’m going to go drink that V8 now.
It’s an extension cord crochet chain stitch! Love it!
Viv, I see “Viv’s amazing tips and tricks” book in the future. This is the stuff you want to tell everyone about. I use extension cords every day, and every day I have a fit over how tangled they got overnight!
My dad does this but I never thought to try it myself – it always looked too complicated to do it!!
HH makes it look so easy!
~Becca
What a great tip and I love that your impressed your puppy!! Ha!!
Hugs
SueAnn
When the two of you make it down for a visit I have a huge box shoved in a cabinet in the garage that HH can work his magic on. We can sip on wine while he teaches Babe this little trick.
Always wanted to know how to make that pattern. Thanks for showing me!
Boy, do I need this. My cords are a mess!
Never in all my years have I seen this! Tomorrow you will find me out in the front yard making extension cord chains! Thank you, thank you, thank you!
That is awesome. My husband will thank me. Do you have a trick for Christmas lights??
I’m doing this to every single cord in our house. Thank you for sharing!
Very clever idea, Viv!!
Super cool tip, Viv! I definitely need to show this one to my hubby, who just leaves the extension cords all jumbled up in the backyard 😉
Jenn
It is imperative that all extension cords be kept neat in my house….thanks to my dad! Great tute!
My hubby is always tying things in these “knots”! Dangling strings from hoodies, or blouses. Shoestrings… my hair.. :-/
I don’t know why we never thought to do it with the zillion extension cords we have!! LOL
V-8 moment (as u say)
THanks! Just did it and I feel so much lighter!
If you start the loops from the other end you only have to pull out the amount that you need insteasd of taking the whole thing apart.
“Anon” beat me to it! I was taught that it’s an old electrician’s trick.
1. Start the loops from the bight in the middle, and pull out what you need.
2. It also helps to make the male (wall) end longer, so you have some length to reach around stuff to the plug.
3. Lastly, instead of starting by tying an overhand knot in the bight, just reach through it, grab the two or four cords, and pull the bight over your wrist to make a loop to start with that is easier to undo if you need all the length.