
Subway Art is all the rage in blogland. So are Family Rules projects. I liked both concepts, but needed to tweak things so that they fit my style.
I love the subway art that Lil Blue Boo did. You can read her tutorial on how she did this piece here. I went over and got great advice. However, most subway art seems too stark… too industrial for my tastes.
Then there are darling canvases like this one that Jen at Tatertots & Jello did. However, there is no. way. that I could put something this sweet in my house full of boys.
Inspired by two Ballard Designs prints that I love, but would NEVER pay $250 a piece for,
 I came up with my own subway art/family rules hybrid art piece.
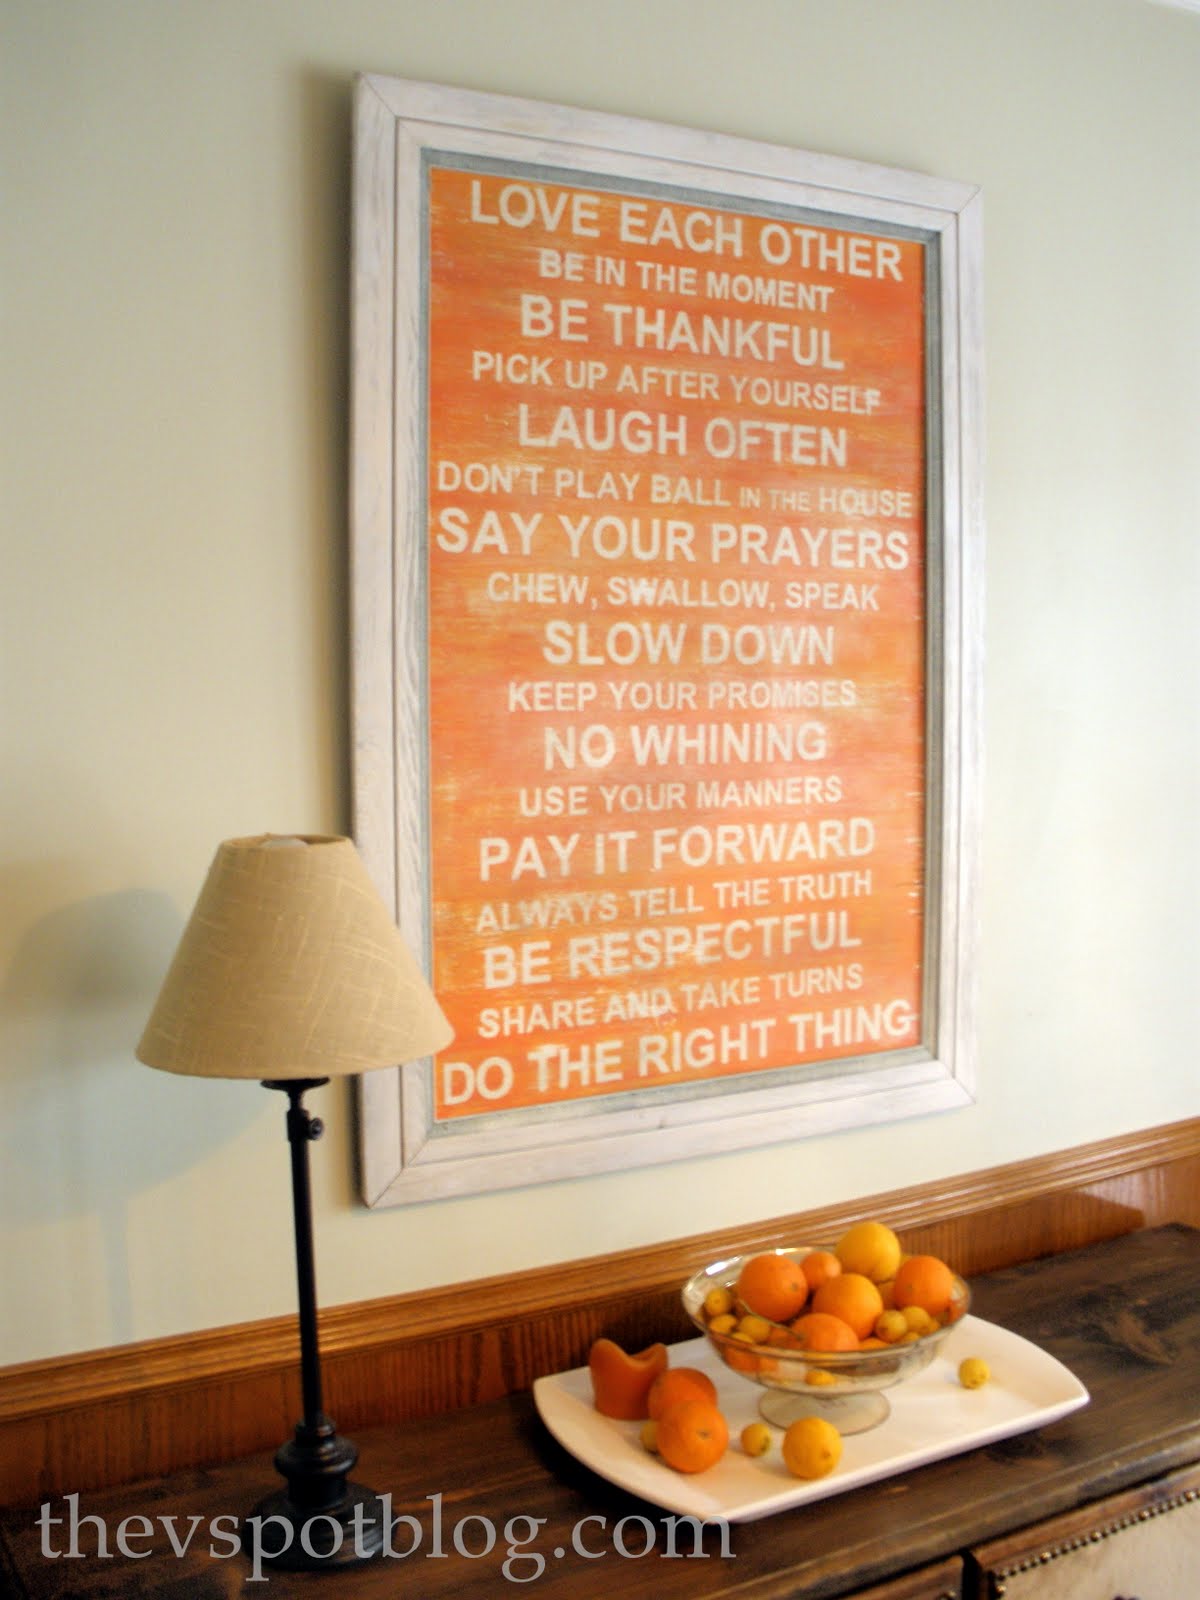

I had purchased a 24″ x 48″ pre-cut plywood board at my hardware store and had them cut it down to 24″ x 36″. I sanded it down, primed it and painted it white. I stood the painted board against the wall and taped my poster sized copy to it. Using a level, I marked guidelines across the board with a pencil.
I then cut the text into strips to make it more manageable and used a spray adhesive on the back of the paper strips to adhere it to regular old contact paper. (It doesn’t matter what color, print, etc.)

I used a brayer to make sure it was good and secure to the contact paper, then I cut it into individual lines of text.


Yes. I cut out each one of those suckers with an exacto knife. It was a suckfest and took me two days. I did one line at a time. Peel the backing from the contact paper off of the letter and place it on the board, rubbing it down securely with the brayer.

When all the letters were tightly adhered, I took the board outside and sprayed another coat of white paint over the entire thing.

I knew I wanted something with a lighter, kind of citrus-y feel, so I broke out the red and yellow acrylic paint and just started mixing. My intention was to sand it down, so I didn’t worry about it being perfect.


When the whole piece was covered, I made sure the paint application looked balanced….

then I let it dry a little bit before I started peeling off the letters.

Some of the brushed on paint seeped under the letter, so I cleaned the edges up by scraping it lightly with a dulled exacto blade.

Once completely dry, I sanded it lightly and then made a wash of 1 part champagne colored metallic paint to 3 parts water. I brushed it on and wiped it off several times to add an aged look to the piece.

I painted an old frame I got at an estate sale for $1 and popped the board into that. (It’s not perfect, and it’s held in there with duct tape, but it works. Shh. Don’t tell anyone.)

I LOVE IT! I’ve seen these all over the place but none of the others are just right for my home! This one is FANTASTIC! I am SO going to attempt to do this myself! Thanks for showing us how!
SO cute!
First I was like, “no, Viv did not make that sign at the top…she wouldn’t have put “recycle” and “hike often” on it. I mean, they are nice sentiments, but you have a little guy and I knew it was gonna be more “little guy” oriented.
Anyway, I love these ideas, they are all over the place and of course I’m gonna have to copy it.
I’m so gonna steal that “don’t play ball in the house” one. Cuz I say that 5 bazillion jazillion times a day.
Also, one question. What color nail polish is that?? Love.
I would need a mainline of Patron in order to do that. I have the patience of a gnat!
I love that!!! I’d love to do something like that but… yeah, it ain’t happenin in my house anytime soon anyways! I like the words you chose & LOVE the orange-ish color. Oh & I agree with Macey – love the nail polish! 🙂
It looks fantastic!!! You did awesome. And you have so much more patience than I do- you know, you could make these things and sell them for a bundle???
~Becca
What a great job you did. Only $15.00
Probably $150 worth of your time. That was a big project. I don’t know that I would have had the patience but I love the look.
Vivienne!!!
Wow – this is awesome! I am so impressed that you cut each of those out by hand. Wow!!!
It is awesome! Do you mind if I blog about it and direct people over to see it?
XOOX
Jen
Love it!! Wow you are patient to cut out all those letters. Great job! Love that you show not all projects turn out perfect the first time!!
BTW- you know I think you are awesome so I have passed along an award your way.
Have a great rest of the weekend!
OMG – I bought the stuff to make a canvas months ago and never got around to it – and now I want to do this! That looks FABULOUS. Hmmm, decisions…
So cute! I love that you just worked with all the imperfections {the gnats} and it turned out so great! I love the color too! I have had a huge canvas in my bedroom for years and nothing to put on..I guess I need to get busy:) Thanks for sharing!
holy crap that is outstanding! yours is the best one i’ve ever seen – seriously!
could you make one of these for me? is it for sell? please contact me at teegilvear@hotmail.com
thanks! i LOVE it!!
That it so awesome. I may try this but use my cricut to cut out the letters. I would love to add this as a rule sign in our playroom.
Viv!! I absolutely LOVE it!! I mean, seriously. This is my favorite of ALLLLL the many I’ve seen. I love the family rules & subway art combined. I am definitely going to have to do your version. But ya, I’ll probably be borrowing my cousin’s Cricut. 🙂
Happy day! ♥ ya friend!!
I LOVE IT. I am this close (fingers together) to finishing my Family Rules canvas and now I’m even closer to scrapping it and doing this instead. I love it. Augh, conflicted.
I love it….I too have wanted to do the family rules and also the subway art…but not really feeling the fit in my house. I would need to find away aroundt he “suckfest” I dont think I have the patience. But it sure paid off on your piece…its great!
I DO LOVE THIS PROJECT! Oh, and you cracked me up reading the process!
~Misti
Wow, you did an amazing job! I LOVE it! Yes, these have been all over blogland and on my project list. Someday…someday!
I absolutely love this piece! You did a fabulous job! I HAVE to make one now. And I loved all the rules you used. Thanks for sharing 🙂
Love this ~ you did such a great job and the colors are fabulous! So glad Jen from Tatertots and jello pointed you out to all of us 🙂
I LOVE this Vivienne!!!! It looks absolutely amazing! I can’t believe you cut each little letter out with the exacto…wow!
Hope you’re having a great week!♥
This is simply fantastic! And like others, I can’t believe you cut them all out – your rock!
Chelsea
That’s so great! I love the color … the final effect is fantastic.
that is so pretty Viv! I love the orange!!!
Man, were we on the same wavelength or what? This is what I had done: http://decorallure.blogspot.com/2010/02/vintage-family-rules-sign.html
But I love the color you chose! Beautiful. I’ve been wanting to do a robin’s egg blue one next. Great job!
I really, really, really love this! The orange is perfect. Your rules make me smile. 🙂
I’ve been sitting here for the past 1/2 hour reading your blog. Love it!
That came out soooo GOOD.. and for only $15.. wow! Thanks for sharing!
Yep, yours caught my eye on Tater Tots and Jello’s post. Wow I am so impressed with your patience and talent. It really was a fun post to read. You should get an award for your effort and time you put into it! Most of the subway art projects posted are done with a machine, you took it to the next level! The good old fashion way, I love your style.
Sweet website, I had not come across viv-spot.blogspot.com before in my searches!
Keep up the excellent work!
I love, love love it!! I actually haven’t seen this anywhere else before but your is awespme. I’ll be featuring it on my blog. Something this fabulous needs to be shared all over.
Amazing! I so love your family rules, project and jealous you can find such great deals like that frame to perfectly accent all your hard work! Never been good at any of the above but, so impressed with yours!
Hi! Love your blog and projects! I’ve featured you in my Friday Finds post this week on my blog! Go take a peek! Thanks for your amazing ideas!
http://sarahndipities.blogspot.com/2011/02/friday-finds-subway-art.html
-Sarah
This final project turned out really great. I just love the aged look. You just can’t beat saving alot of money with a little hard work!
This is AMAZING! I might have to add this to my TO DO list…
I couldn’t help myself and made a printable version using your idea. Yours is better, but this will do until I have the time to break out the paint: http://daniellebartran.blogspot.com/2011/03/attempt-at-organization.html
and here is the printable: http://daniellebartran.blogspot.com/2011/03/family-rules-printable.html
Oh my god! I can’t believe you cut out each letter! But it does look amazing. By the way, I really love your blog and all of your projects are wonderful. I completely plan on stealing this one!I’m following now!
Kim
http://www.kim-toomuchtimeonmyhands.blogspot.com
LOVE your color choice and how you decorated the space surrounding your art! Orange is yummy. I’ve had our house rules printed and hung on the microwave (because I was afraid my list wasn’t complete; I’ve added 3 more rules since posting them). Your project has given me inspiration to finalize the list and create an art piece! Thanks for the detailed tutorial 😀
Hey – I am certainly happy to find this. Good job!
I LOVE LOVE LOVE this!!! I got a frame yesterday & was looking for an idea….found it Thanks!!