The V Spot

Rants, observations, and home decorating... from a woman with no time for a blog.


  • Email
  • Facebook
  • Instagram
  • Pinterest
  • Twitter
  • Home
    • Privacy Policy
  • All Blog Posts
  • Crafts
    • All projects
    • By Project
      • Accessories
      • Artwork
      • Before & After
      • Cheap & Easy
      • decor
      • Floral Design & Centerpieces
      • Furniture
      • garden & outdoors
      • Glass
      • no-sew
      • Upcycle – Recycle
      • Wreaths
    • By Season
      • Spring
      • Summer
      • Fall
      • Winter
    • By Materials
      • corks
      • epsom salt
      • fabric
      • Mod Podge
      • Paper
      • Spray Paint
      • Sticks
    • Round-Ups
  • Holidays
    • Halloween
      • Pumpkins
    • Thanksgiving
    • Christmas
    • Valentine’s Day
    • St. Patrick’s Day
    • Easter
    • Cinco de Mayo
    • Mother’s Day
    • 4th of July
  • Food & Drink
    • All recipes
    • Breakfast
    • Appetizers
    • Side Dish
    • Main Dish
    • Desserts
    • Drinks & Wines
    • Tables & Decor
  • Real Life
    • Family
      • Grant
      • parenting
    • Tales To Tell
    • friends
    • Keepin’ It real
    • Tips & Tricks
      • cleaning
      • Health & Beauty
      • Let me help you
      • organization
    • Just Funny
      • No Mom wants to hear…
      • Exchange of the Day
      • Snarky
      • wacky strangers
      • Big Time Fail

Make your own frosted, icy branches.

November 21, 2011 64 Comments

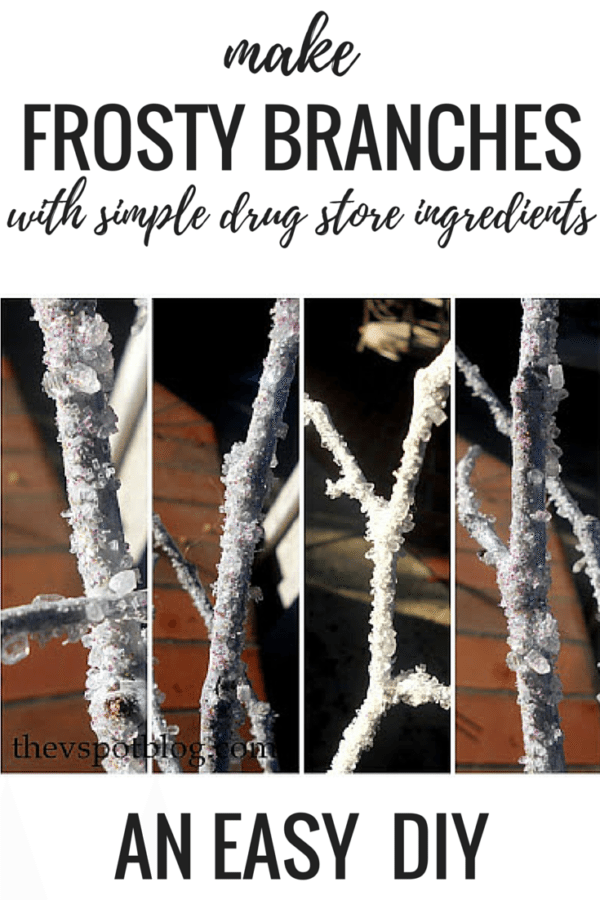
Today I’m sharing a quick and easy way to turn ordinary sticks and branches into frosted, icy ones for the holidays.  I love the pretty, frosty branches, floral picks and other accessories that are available this time of year.  However, they can be pretty darn pricey and I see no reason to pay for something that I can easily make myself for just pennies.
DIY FROSTY BRANCHES using simple drug store ingredients
Here’s what you’ll need:
Ingredients needed to make DIY frosty icy branches.

This post contains Amazon or other affiliate links.

  • sticks and branches
  • white spray paint (cheap-o is fine-o)
  • spray adhesive
  • epsom salt
  • coarse white glitter
  • fine iridescent glitter
Ingredients to make faux frosted branches.

When getting the salt be sure to use epsom, which looks like icy little crystals, as opposed to rock salt, which looks like, well… rocks.

The difference between rock salt and epsom salt.

Spray your branches with white paint.
When dry, spray a coat of adhesive onto the branches, then move them over an old cookie sheet and sprinkle the epsom salts onto them.

I do this over the cookie sheet so I can reuse the salt that doesn’t stick.
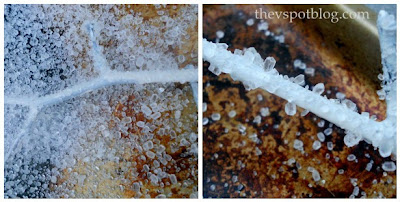
DIY frosted icy branches and floral picks

Scoop up any extra salt and put it back into the container.
Move the branches away from the cookie sheet and spray with adhesive again.  Move them back over the sheet and sprinkle with the coarse glitter.  Repeat the process with the fine glitter.

When dry you have some pretty, sparkly, frosty sticks.  Oh yeah, that were practically FREE!
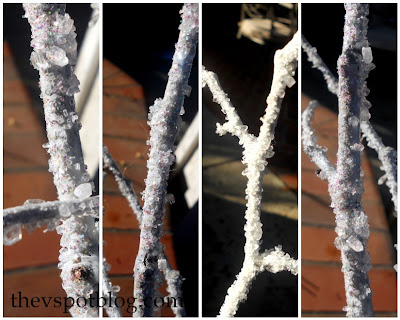
How to make diy frosted branches. Winter craft projects.

There are so many uses for them.  They look great alone in a vase,  or with smaller ones tucked into your Christmas tree or used in a wreath…  The only caveat: salt melts if it gets wet…  so this is NOT a good option for use outdoors.

Have fun!

Filed Under: cheap and easy, Christmas, Crafts, epsom salt, floral design, Holidays, spray paint, Sticks, tutorial, winter

Comments

  1. Heidi @ Decor & More says

    November 21, 2011 at 2:28 PM

    Yessss!! I just priced these last week and walked away. 🙂 Thanks for breaking it down for us frugalistas!! 🙂

    Reply
    • Mare says

      December 1, 2021 at 9:49 AM

      Does the salt fall off easily by someone touching or if A Vase/CONTAINER holding such limbs tips over?

    • Vivienne says

      December 1, 2021 at 11:00 AM

      Hi Mare, You shouldn’t put them in a high traffic area.

  2. Connie says

    November 21, 2011 at 2:31 PM

    CUTE!

    I need to find some branches this week!

    Reply
  3. Lesley says

    November 21, 2011 at 3:18 PM

    So I spray painted a bunch of branches white and then I quit. Because, I figured, ” That’s as far as I can go, right? “
    Thanks for showing me what to do next! These will look fantastic in a centerpiece!

    Reply
  4. Ashley says

    November 21, 2011 at 3:42 PM

    Epsom salt is totally magic. Holy yowza.

    Reply
  5. Vanessa says

    November 21, 2011 at 4:15 PM

    HI, Vivienne,

    Great idea! I am going to do this too.

    Vanessa

    Reply
  6. Shawn says

    November 21, 2011 at 4:28 PM

    I found out that Epsom salt turns to powder in heat. The Valentine’s day candles I made last year didn’t survive the heat of my attic.

    I will so be doing this project, there’s nothing like adding a little glitz and glam to Christmas!

    Reply
  7. Heidi@TheCraftMonkey says

    November 21, 2011 at 4:35 PM

    Love it! Thanks for sharing!

    Reply
  8. At The Picket Fence says

    November 21, 2011 at 4:39 PM

    LOVE this idea Viv and they look fantastic! 🙂
    Vanessa

    Reply
  9. Good Time Charlie says

    November 21, 2011 at 4:57 PM

    So awesome! Going to collect some good branches later this week. This is one project I can do.

    Reply
  10. Sara @ thesherlockshome says

    November 21, 2011 at 5:31 PM

    I’m so going to have to do this! They look great!

    Reply
  11. chris says

    November 21, 2011 at 6:01 PM

    These are so purty. 🙂

    Reply
  12. ~ Laura says

    November 21, 2011 at 6:09 PM

    Wow, super pretty!! And so much prettier in person I’m sure!! I love the idea of layering different glittery things!! Can’t wait to see what you do with them!! 🙂

    Reply
  13. The Answer Is Chocolate says

    November 21, 2011 at 6:14 PM

    So wonderful. You are brilliant and so are these.

    Reply
  14. MiMi says

    November 21, 2011 at 6:36 PM

    Those are so pretty!

    Reply
  15. Jen says

    November 21, 2011 at 9:46 PM

    WOW that’s fabulous – and the big old oak trees on our hill are ALWAYS dropping branches – now I can stop throwing them over the fence into the woods!

    Reply
  16. Jennifer @ The Brilliant Crafty Type says

    November 21, 2011 at 10:50 PM

    Love this! Can’t wait to give it a whirl after all the Thanksgiving madness has passed. Thanks for sharing!

    Reply
  17. Gigi Baby says

    November 22, 2011 at 3:13 AM

    Honestly I wish I could create snow branches but unfortunately I get the real deal smh!! Cute idea though!

    Loves and likes ya <3
    Gigi

    Reply
  18. Sunday says

    November 22, 2011 at 3:39 AM

    Oh my word – I can’t wait to go out and find sticks in the morning! Thanks for sharing!!

    Reply
  19. Impulsive Addict says

    November 22, 2011 at 5:18 AM

    Awww…what a cute idea! I love your icy side! =)

    Reply
  20. Rhissanna says

    November 22, 2011 at 8:03 PM

    Simple and pretty. Epsom salts are cheaper than glitter and, hey, you can’t soak sore feet in a bowl of hot water and glitter. (well, you can…but..) Thank you for sharing.

    Reply
  21. Carolyn says

    November 22, 2011 at 9:25 PM

    Love these. Fantastic idea. Pinned, tweeted and stumbled!

    Reply
  22. Kim @ Sand and Sisal says

    November 29, 2011 at 12:32 AM

    Very Pretty! I have branches planned this season too! I like how you combined both the salt & the glitter.

    Reply
  23. {twenty}something says

    November 29, 2011 at 1:42 AM

    Hopping over from your feature on A to Z!! I love this. I just pinned a cool ornament tutorial that uses Epsom salt…..what a great supply for our craft stashes!

    Reply
  24. Lisa @ Shine Your Light says

    November 29, 2011 at 3:33 AM

    I absolutely love this idea!!! I’m a big fan of using branches to decorate for holidays, and this is perfect for the whole winter! So pretty – thanks for sharing how to make them.

    Reply
    • Marion Brown says

      October 16, 2021 at 8:21 AM

      Just wonder how durable these are outside in a protected area though.

  25. Annie says

    November 29, 2011 at 4:09 PM

    Another great idea! Beautiful job!

    Reply
  26. Katie says

    November 29, 2011 at 4:36 PM

    I absolutely LOVE this idea!!!

    Reply
  27. Debbie refresh restyle says

    November 30, 2011 at 6:15 PM

    So pretty! love these!

    Reply
  28. Jennifer says

    December 1, 2011 at 1:47 AM

    You come up with the most clever ideas! I’m def doing this one.
    Jen

    Reply
  29. Faith, Trust and Pixie Dust says

    December 1, 2011 at 3:45 PM

    BRILLIANT! You’ve hit another home run. I can’t wait to try this.

    Warmly, Michelle

    Reply
  30. Colleen @ MuralMaker&More says

    December 2, 2011 at 8:40 PM

    Love it! This is now today’s project. Thanks, Viv!

    Reply
  31. Colleen @ MuralMaker&More says

    December 5, 2011 at 4:22 AM

    Hey Viv! I gave them a shot (just posted) but my epsom salts were really old so more granular than salt-like. Not to mention I sprayed my branches silver first. But I still love them.

    I think I’ll grab some new epsom salts tomorrow and follow your instructions better 😛

    Reply
    • Elaine says

      November 14, 2016 at 2:03 PM

      Where can i get epsom salt from please anyone no 🙁

    • Vivienne says

      November 14, 2016 at 4:46 PM

      Elaine, you can get epsom salt at almost any drug store or grocery store.

  32. Megan says

    December 9, 2011 at 3:21 AM

    what a beautiful idea! I love them!

    megan
    craftycpa.blogspot.com

    Reply
  33. Green Willow Pond says

    December 16, 2011 at 5:35 AM

    Great idea! Thanks for sharing. I’ve got some branches I used for Thanksgiving that would be perfect for this.

    Reply
  34. Korrie@RedHenHome says

    December 16, 2011 at 2:51 PM

    So fabulous! Pinning this!

    Reply
  35. Adena (aka cre82learn) says

    December 22, 2011 at 6:01 PM

    I wanted branches like these for my tree but didn’t want to dish out the cash. I ended up spray painting with white and glitter paint but they were missing something. I am going to take them down and add Epsom salt. Exactly that extra bling I was looking for!!! Thanks!!!

    Reply
  36. Free Pretty Things For You says

    December 23, 2011 at 6:34 PM

    such a lovely project, i Just HAD to share!! 🙂
    So glad i found you!
    Merry Christmas!!
    Xo,
    Keren

    Reply
  37. Holly- Cutie Pie Cottage says

    December 24, 2011 at 11:31 AM

    Awesome project! Thanks for posting. Well, let’s see, I have cheap-o white spray paint so I’m almost there-right?! 😉 I’ve never used spray adhesive. What a great product idea.

    I came here via Keren’s Free Pretty Things for You.

    Merry Christmas! ♥

    Reply
  38. Colleen says

    December 24, 2011 at 4:29 PM

    Very pretty.
    I have done this myself a few years ago,used styrofoam block, covered it, stuck in my branches,added some artifical red berry branches and stuck a cardinal or 2 on the branches and made a pretty center piece for my dining room table.
    The styrofoam block I put on kinda flat platter, added some battery operated little twinkle lights and covered with some of that fake snow; kinda like that buffalo snow you can buy in package and made very pretty center peice on table.
    ColleenB.

    Reply
  39. Maria Matter says

    December 25, 2011 at 10:56 PM

    this is such a cool idea, thank you for the easy how-to!!!
    I host a weekly linky party, Inspire Me Fridays…would love you to share this or ANY of your awesome ideas!!!
    Blessings!

    Reply
  40. Jennifer Beck says

    November 26, 2012 at 8:57 PM

    Have you ever tried to do this on a fake evergreen tree? I have small ones that are just plain green that I would love to spruce up. Thanks!

    Reply
  41. Ana says

    July 20, 2014 at 2:35 PM

    What a great idea for using epsom salts! I have done the same thing with sticks, acrylic craft paint, mod podge and diamond dust that I bought at Michaels. It is just what I had at home. Never thought about using glitter! So Pretty!!!!

    Reply
  42. Missy says

    December 4, 2014 at 9:14 AM

    Hi Everyone!
    LOVE THIS IDEA!! Thank you so much!
    Also, Do any of you know a safe and hypoallergenic way to frost your Christmas Tree DIY? I don’t want all those chemicals in my house…. It’s hard enough 90% of Christmas trees are sprayed with Pesticides before they enter your house and cause LOADS of allergies during the season. Any help ladies?!!
    Thanks 🙂

    Reply
    • Kathryn G Richter says

      November 15, 2021 at 8:11 PM

      Use the absorbant part of cheap disposable diapers and mix with water. i don’t remember the ratio of diaper to water but you can google it. that’s how i found it. just lay the mixture over the top of the branches. pls note that after a while the mixture gets smaller. you can apply more over the original batch or use a spray bottle of water and re-moisten it. A benefit is that if some does fall off the tree, it won’t get all over everything like spray snow does.

  43. etta says

    February 11, 2015 at 3:47 PM

    Turned out great… I even used some branches we had with a few leaves… soo pretty… making for a winter wonderland party!

    Reply
  44. Anita Kanabke says

    September 18, 2015 at 5:37 PM

    What kind of bush or tree should I use for the crystal coating look best

    Reply
    • Vivienne says

      September 19, 2015 at 2:10 PM

      You can use just about anything, but I like just plain sticks and branches the best.

  45. Michelle murphy says

    November 19, 2015 at 7:59 AM

    Th thanks so much for sharing this idea. I am so going to do this for Christmas this year!!!!

    Reply
  46. tiffany says

    December 2, 2015 at 9:54 AM

    This is such a great idea.. I so love it.. I’m doing a winter Wonderland theme party for someone and this is very inexpensive and creative and beautiful. Thanks for this info.

    Reply
  47. RebeccA says

    December 5, 2015 at 6:13 PM

    Thank you! Even at halF off the Ones i bought were still expensive. I kept thi king! “There’s got to be a way to make thEse.” Epsom salt is brilliant!

    Reply
    • Vivienne says

      December 5, 2015 at 6:31 PM

      Yay! Glad I could help!

  48. Sata says

    March 22, 2016 at 6:49 PM

    Can you spray with a clear sealant so thecsalt wont melt?

    Reply
  49. Dale Clapp says

    April 1, 2017 at 8:48 AM

    you can get epsom salt at the Dollar Tree for a buck a bag cheaper there than at any other store

    Reply
  50. Mj says

    March 3, 2020 at 8:05 PM

    Thankyou so much for making you are amazing-o i needed this for a shoe for a Costume im making XD (also im not going to be ouTside in the shoes xd)

    Reply
  51. Cindy says

    April 4, 2020 at 6:52 AM

    You can get all these suppl at everything is a dol store. Well except the branches.

    Reply
  52. Daisy says

    November 16, 2022 at 6:29 PM

    You can also use rwd glitter for a Candy type look!

    Reply
    • Daisy says

      November 16, 2022 at 6:30 PM

      Red*

  53. Donna Patterson says

    November 22, 2022 at 11:55 AM

    instead of epsom salt what other item can be used

    Reply

Trackbacks

  1. It’s Getting Frosty… | Craft Hackers says:
    December 3, 2015 at 11:13 AM

    […] holidays.  The best part it it glitters in candlelight. So everybody wins.  I found a tutorial here at The V Spot Blog, which I will use as a guide, and some of their handy photos, but as always, I […]

    Reply
  2. Rami decorati fai da te per addobbi di Natale : Blogmamma.it says:
    November 18, 2016 at 6:41 AM

    […] Spennellate con la colla i rami e spargetevi sopra il sale in due diverse consistenze: fino e grosso. Aggiungete, se volete un po’ di glitter e di porporina bianca o argentata. Otterrete un bellissimo ramo ghiacciato. Tutorial: rami decorati effetto ghiaccio […]

    Reply

Leave a Reply Cancel reply

Your email address will not be published. Required fields are marked *

you might also like:

twigs, sticks, branches, black pot, pumpkin, Halloween, porch, decorations
Black twig and pumpkin Halloween porch decor.
Quirky Christmas decor: a winter chair makeover with paint and epsom salt!

Make an easy scrap paper Christmas tree.
Holiday decorating using your own photos.

frosty, branches, berries, sticks, pumpkins, fall, autumn, winter, centerpiece
A transitional floral arrangement: Fall into Winter Centerpiece.
How to make a Haunted Tree. (With things you already have, of course.)

Simple, winter themed decor. (Using what you already have, of course.)
Let It Snow: DIY Glitter Christmas Sled

Pottery Barn Inspired Painted Holly Pillow
Faux rust technique using spray paint and salt
Create a faux-rust effect using spray paint and salt.

Recent Posts

  • Spooky porch decor and a Halloween Chair.
  • DIY Plaid Wine Glasses
  • Easy Sand-N-Sea Flower Pots
  • How to use an indoor chandelier outside.
  • Quesadillas made with slow cooker Carnitas. (Pork in a crock pot… nothing is easier.)
  • No Sew Project: How to recover your outdoor cushions using fabric and a glue gun.
  • Upcycle project: plain flower pot into decorative ceramic planter.
  • An easy Valentine’s Day globe.
  • Simple, winter themed decor. (Using what you already have, of course.)
  • Easy Goat Cheese Appetizer Recipe

Amazon Associates Disclosure

Vivienne Wagner is a participant in the Amazon Services LLC Associates Program, an affiliate advertising program designed to provide a means for sites to earn advertising fees by advertising and linking to amazon.com.

Popular Posts

  • Cleaning Stove Burners & Grates using Ammonia (The best...
    Comments (631) | Jul 07, 2011
  • Easy Dessert Recipe: Oreo Cheesecake Bites
    Comments (64) | Mar 04, 2014
  • How to store fresh produce – From A to Zucchini.
    Comments (111) | Jan 25, 2012
  • No Sew Project: How to recover your outdoor cushions using f...
    Comments (109) | Mar 03, 2018
  • DIY wine bottle crafts.
    Comments (10) | Aug 22, 2013
Privacy

Copyright © 2023 The V Spot · Website by Houndstooth Media Group