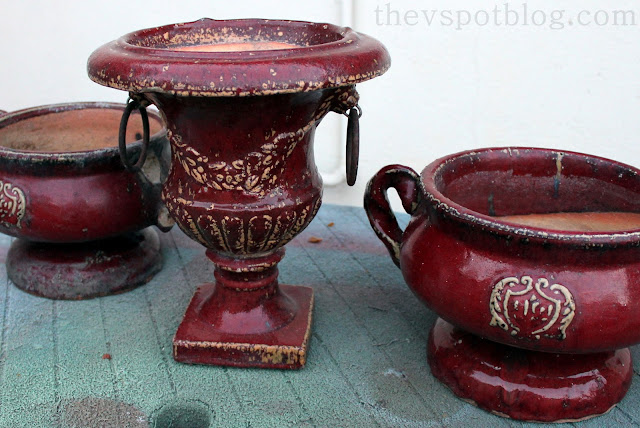
I was going to do an April Fool’s post today, but that just seemed like to much work, so I thought I’d share this super easy tip for re-vamping a few ornate planters I had. This is the latest in my vow to work through my pot addiction… a shabby chic flower pot make over.

I have had these three coordinating pots for several years. I bought them back when I had a lot of reds in the house, but hadn’t used them much lately. I decided they needed to be repainted, but I didn’t want to completely lose the chipped and weathered look that they had.

The key to protecting some of the raised “unglazed” areas on these pots? Vaseline.

Take Q-tips and dab the Vaseline over the surfaces you want to protect from the spray paint. I did not want all of the “chips” to show, just some to bring out the details in the pots. The thicker the dab of Vaseline, the easier the next step will be. Once you have used the Vaseline to protect the details you want to keep, spray the whole thing with paint. I used an Heirloom White, but you can use any color you want.

After you have sprayed your pots the color you want and have let it set enough where it is dry enough for you to handle, take a dry paper towel and gently wipe off the areas where you applied the Vaseline. I actually let mine set a little longer than I should have, so there were some areas that I needed to scrape with my fingernail a little bit. (Which explains my always impeccably manicured hands. pfft.) This is where it matters how thick the Vaseline is. If it is too thin, a high quality spray paint will still stick to it if you don’t wipe it off fast enough.
Once the paint was wiped off, I decided to add another little layer of color to the project. I took a bit of beige acrylic paint and a teeny drop of blue and watered it down. I used the same “slap the paint on” technique that I used on this project.

Then I immediately sprayed a thick coat of a clear gloss over everything. I didn’t care if it was so thick that the gloss ran or dripped. That helps create a look of glazed pottery. There were also some metal rings on the sides of the urn. I didn’t bother to tape them up when I spray painted. I just touched them up with black acrylic paint. Easy.
Pop in some succulents or whatever you would like.

Cheap, easy and chances are you already have your supplies on hand.
Have fun!

Brilliant! I love how you break down the process and always make it look do-able, and the end results are always amazing! You’re quite right; the drips that happen with too much enthusuastic spraying(one of my many sins)are just perfect for rustic-looking ceramics.
These look great Viv!
What a great idea, thanks for the tutorial.
CIndy
Great idea, and way easier than trying to break out the sandpaper and get it “just right” where you want the paint to come off. Like the pots much better in White. Not that there was anything wrong with the red…
I LOVE that update! So crisp and pretty! xo, Kimberly
Another gorgeous makeover! Love it!