Pardon the pun, but everything that Maggie at Midwestern Sewing Girl does is sew cute, I knew right away that she needed to share one of her projects with you. (Enjoy, peeps! The Lord only knows when you will ever see a sewing tutorial that actually uses a sewing machine instead of a glue gun around here again!)
Here’s Maggie!
OK, I nearly fell out of my chair when Vivienne asked if I would be willing to guest post for her while she was on vacation…I mean, seriously…that, to me, is like Oprah asking her assistant’s cousin’s neighbor to host her show…how could I possibly say no?!?!? So here I am…at The V-Spot…super-excited…
Let me tell you a little bit about me…
My name is Maggie & I write a little blog called Midwestern {Sewing} Girl where I write about a whole bunch of stuff…home decor, furniture makeovers, sewing projects, and tons more! I’d love love love for you to come visit sometime!

Today I’m sharing a tutorial that I posted on my blog a few months ago…
Here it is!
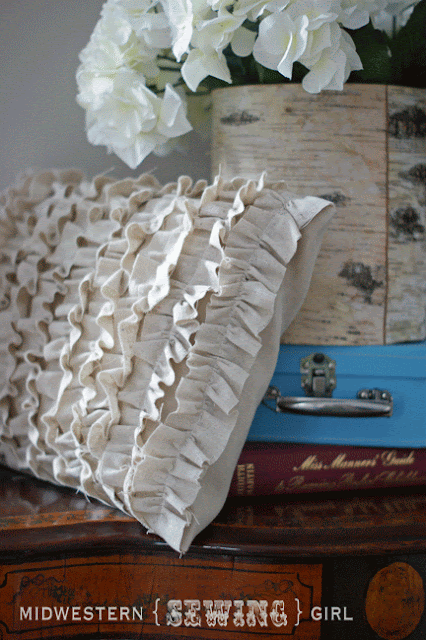
The Springtime Ruffle Pillow tutorial!
OK…let’s do this…
Here is what you’ll need:
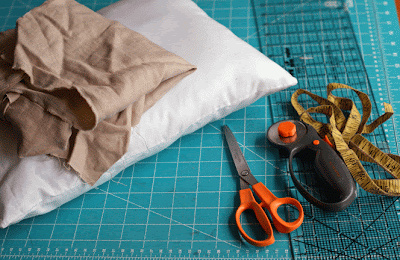
*Pillow or pillow form you want to cover. I’ve used a pillow form that is 12″x16″ for this tutorial, but you can use any size pillow you like…the measurements adjust easily…
*Fabric: for my pillow I needed only 1/2 yard, and I had fabric left over. But if you’re using a larger form, you’ll (obviously) need more fabric…smaller form, less fabric. I always think having more on hand is better than having less…if you make a mistake, or decide you need more ruffles, you’ll be set. Plus, you can always use the leftovers for other projects.
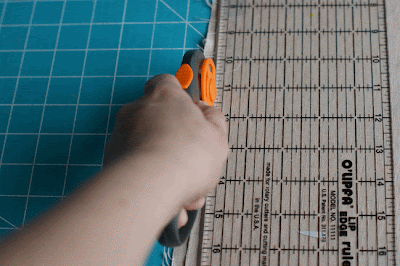
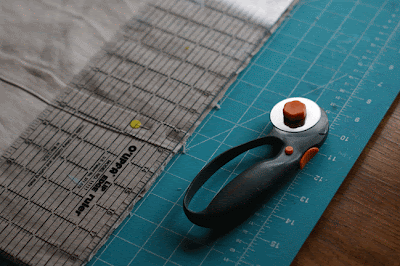
*A rotary cutting tool (or scissors)
*Straight edge (so you can achieve perfection in cutting your fabric…{smile})
*Tape Measure (this will really help when measuring the pillow’s circumference…trust me – a ruler just doesn’t cut it in this instance).
*Straight pins (nope, they’re not in the photo, but you’ll need ’em)
*Sewing machine (or needle & thread)
*Iron (yes, this is a must!!!)
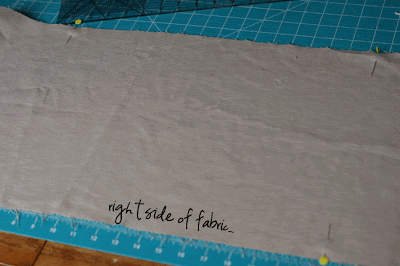
*SEAM ALLOWANCE: 1/2″
STEP 1:
IRON, IRON, IRON your fabric! This is just so important to ensure correct measurements, to make the project easier to work with and to make your finished project pretty…
STEP 2:
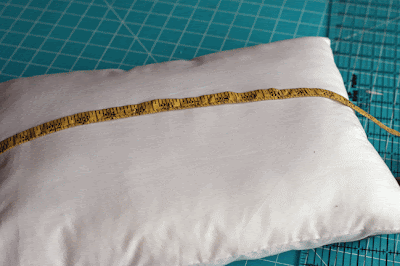
Measure the circumference around the width (longest dimension) of your pillow – try not to squeeze the pillow while you’re doing this. Better to have a circumference that’s too large than too small.
STEP 3:
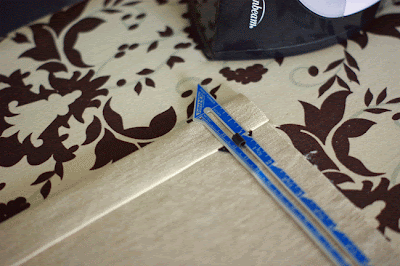
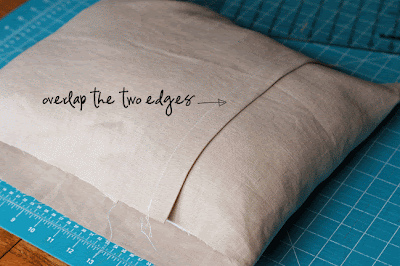
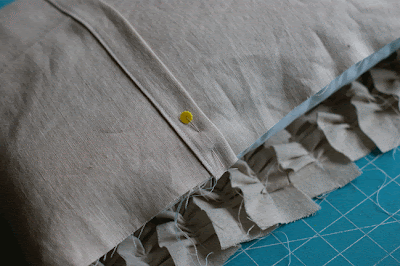
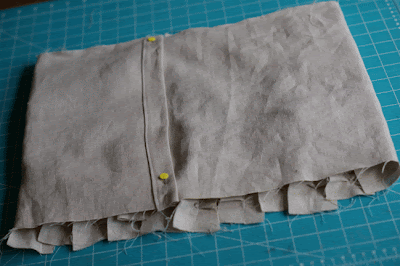
Take your circumference measurement and add roughly 6″ (this number is just a matter of preference…this extra fabric will be what forms the overlap on the back of the cover. I like to have a fairly large overlap…this way it will lie flat on the pillow).
 |
| …this is what your fabric will look on your pillow after you have overlapped the two ends on the back… |
**You can also avoid any measuring at all by simply wrapping your fabric around your pillow, overlapping the ends a little and cutting it (make sure your cuts are straight!).**
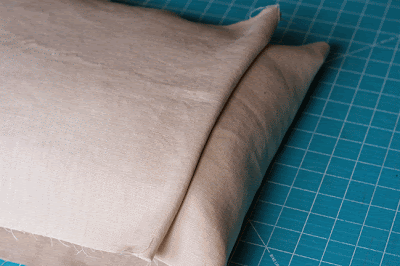
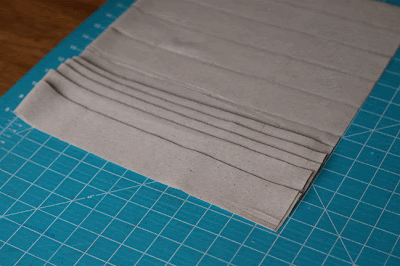
STEP 4:
Cut your fabric. You should end up with a rectangle…the long side should be your width circumference + 6″, the short side should be the height of your pillow + 1″ (for your 1/2 seam allowance on each side).
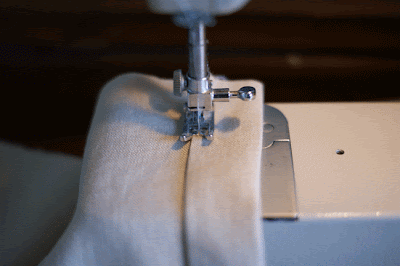
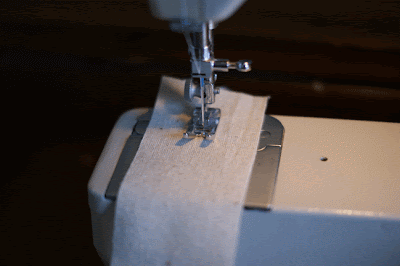
STEP 5:
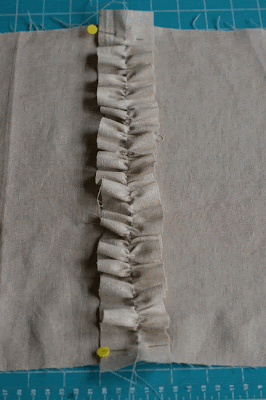
Working on the short sides of your rectangle, with the right side of the fabric down, turn down your raw edge 1/4″ and then again 1″ to form your hem. Iron flat and sew 1/8″ from the inner edge of the hem.

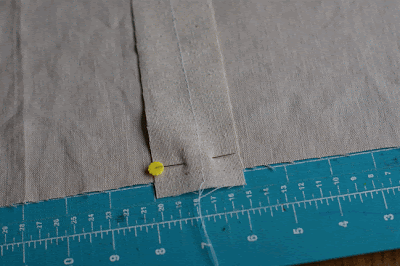 |
| …this photo doesn’t show it, but pretend there is a pin along the right side of the ruffle strip – |

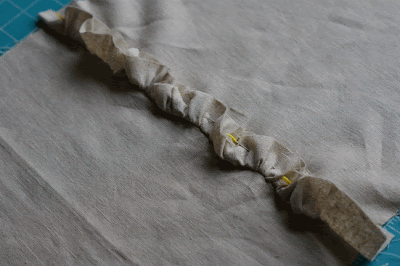

 |
| …looks like these edges could stand to be ironed again!!! |
 |
| …umm, iron, please? |


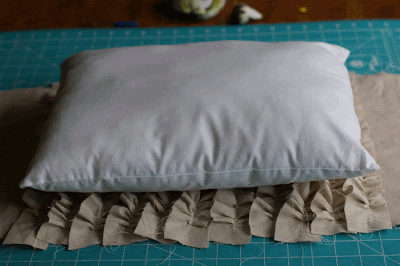
Love this pillow! I’ve already told Maggie but I thought I would just say it again 🙂
I love that pillow! I’m going to make it!!! Thanks for the DIY!
Thank you so so much for having me as your guest today, Viv!!! You completely rock.
Oh my gosh This is so pretty! I want one! 🙂
So cute! I could even do that! BONUS!
Followed Maggie over… so glad I did! Viv, you have a great blog!What a beautiful pillow and great tutorial. Maggie is so talented!! Thanks for sharing with all of us. AJ
queenofmynest(at)gmail(dot)com
Such a beautiful pillow, and Maggie really makes it look do-able, even for someone who is sewing-challenged like me!
Thanks for the detailed instructions! I am teaching myself how to sew again after 30+ years! I thought you might like to know that I pinned your blog post. You also might like to know about a vintage fabric giveaway I’m hosting on my blog: http://livingvintageco.com/2015/02/sewing-ideas-using-vintage-linens-giveaway/.
thank you…awesomness!!
Do you hem strips before making into ruffles or leave raw?
If you are on your top mattress, you can use it on your front or side and this pillow is very comfortable. You can also use it on your back, although there are few pillows that can be used on this.