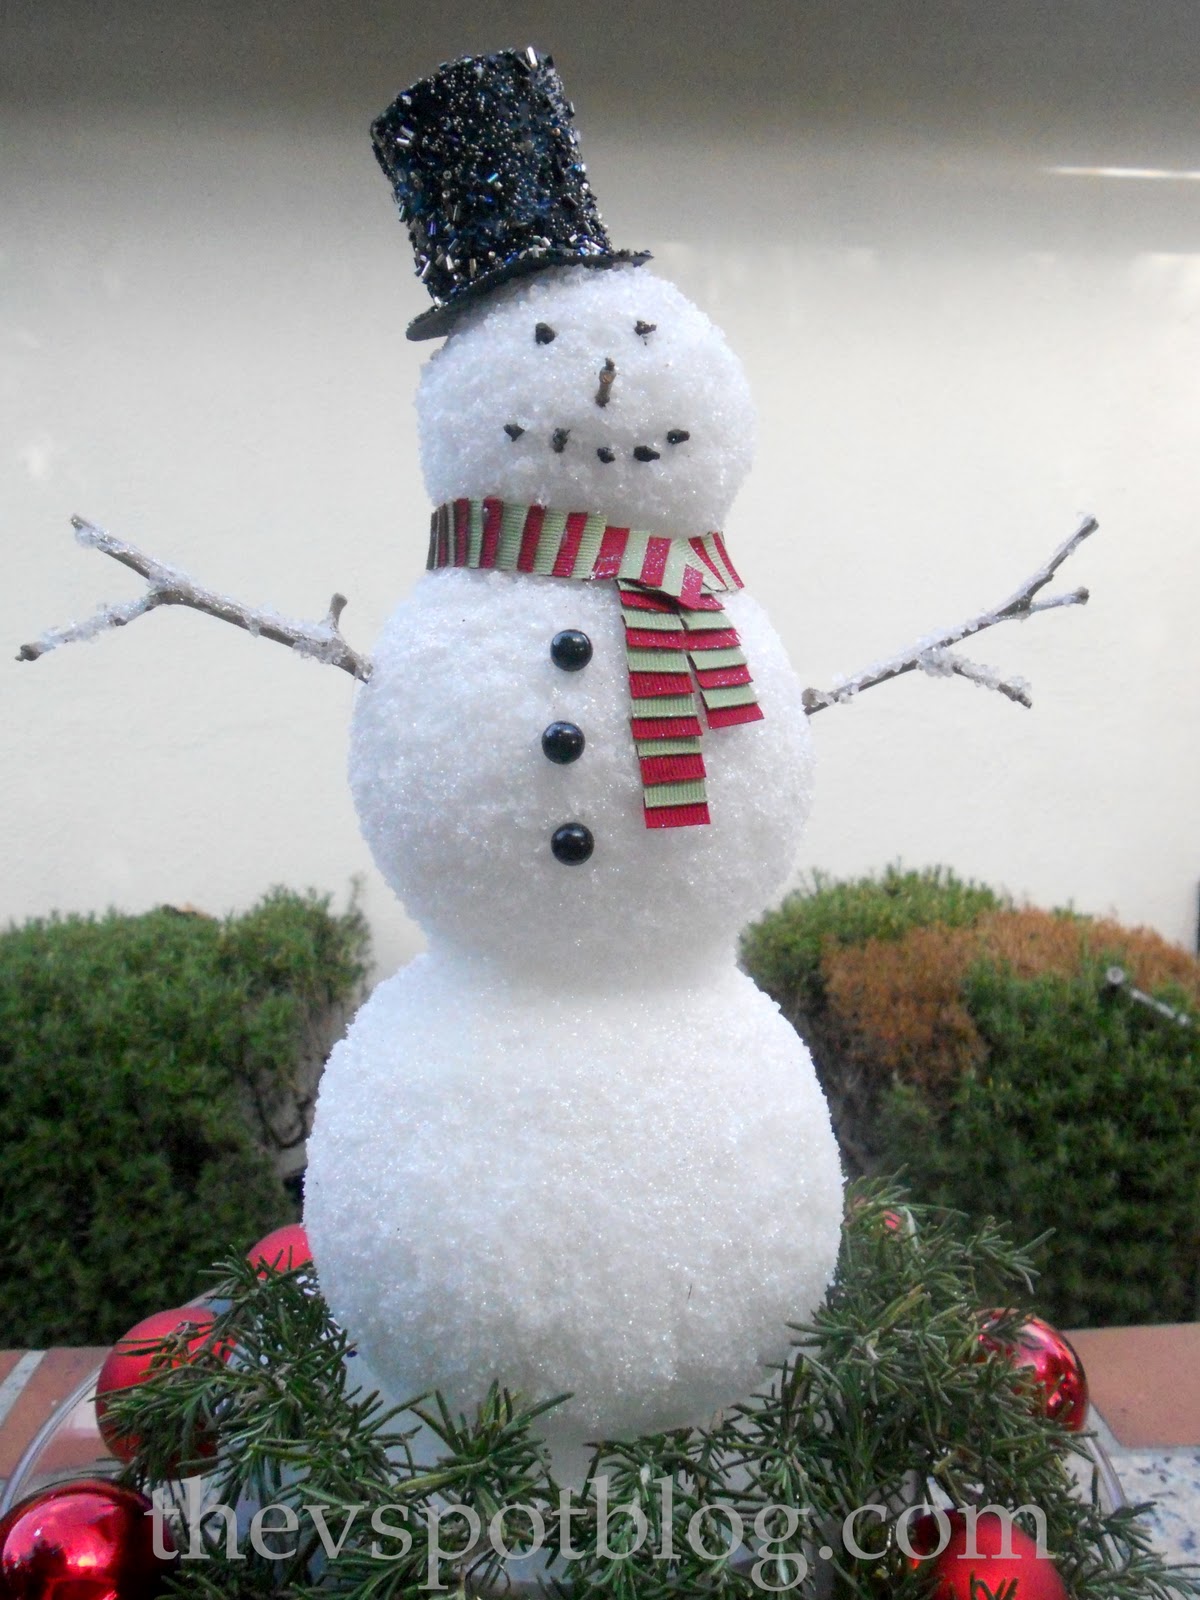
Today let’s make an easy DIY snowman using a little glitter, epsom salt and some round spheres from STYROFOAM TM Brand Foam.
I love, love, love Under The Table and Dreaming and am in awe of Stephanie Lynn’s projects. So when I was invited to make a project for her STYROFOAM TM Brand Foam series, I did a little happy dance. I’ve used STYROFOAM TM Brand Foam on previous craft projects. It comes in handy for so many things that I actually had a hard time deciding what to make. Then I decided a snowman was in order.
The materials you will need for this project are:
from STYROFOAM TM Brand Foam
- one 6″ white ball
- one 5″ white ball
- one 3.5″ white ball
- one 2″ white ball
- one 8″ x 2″ white disc
- one wooden skewer
- low melt glue gun and glue sticks
- white craft glue
- spray adhesive
- black cardstock
- epsom salt
- coarse white or clear glitter
- fine iridescent glitter
- red grosgrain ribbon
- green grosgrain ribbon
- misc black beads
- black buttons
- two small sticks
- an ice pick
To begin, take the 6″, 5″ and 3.5″ balls of STYROFOAM Brand Foam and push the ice pick through the center of each one, creating a hole through the middle.
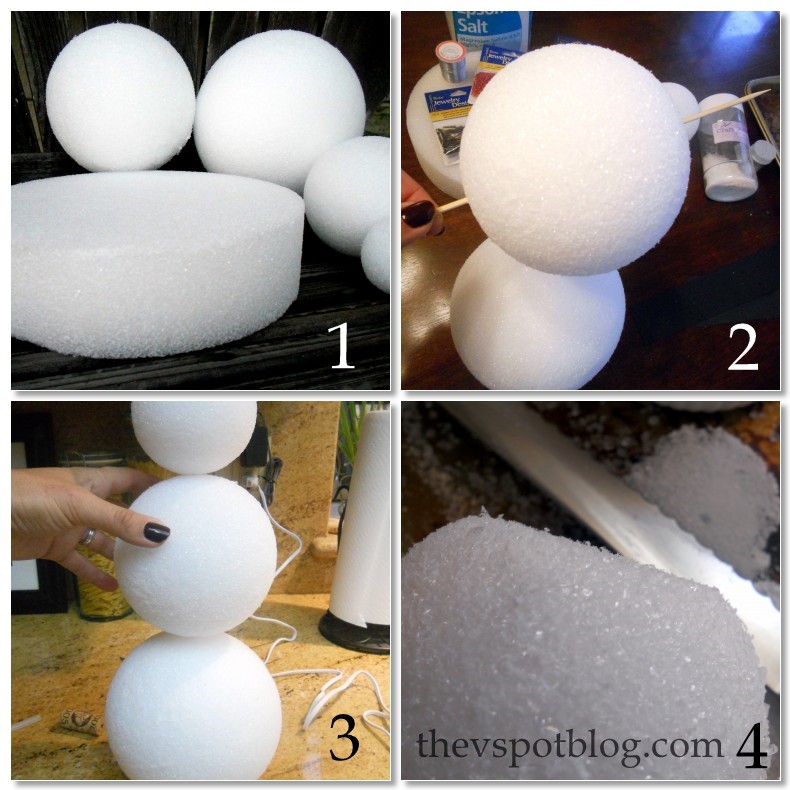
Slide the bamboo skewer through each of the balls of STYROFOAM Brand Foam to ensure that they line up nice and straight. No one wants a slouchy snowman. Once sure that he’ll have good posture, slide the balls of STYROFOAM Brand Foam back off of the skewer and take a bread knife to trim off a bit of top and bottom of each ball. Reinsert the skewer and squeeze good sized amounts of the low melt glue in between each portion of the snowman’s “body”.
It’s time to start adding the “snow”. First, let’s make sure we have the materials. Epsom salt looks like little bits of ice, while rock salt looks like, um, rocks. We don’t want rocks.

Take your snowman and lay him down on an old cookie sheet (to catch the excess salt and glitter.) Support his head in a shallow bowl or ramekin if necessary to keep him from rolling. Brush craft glue over the top half of his body and sprinkle generous amounts of epsom salt over the glue.
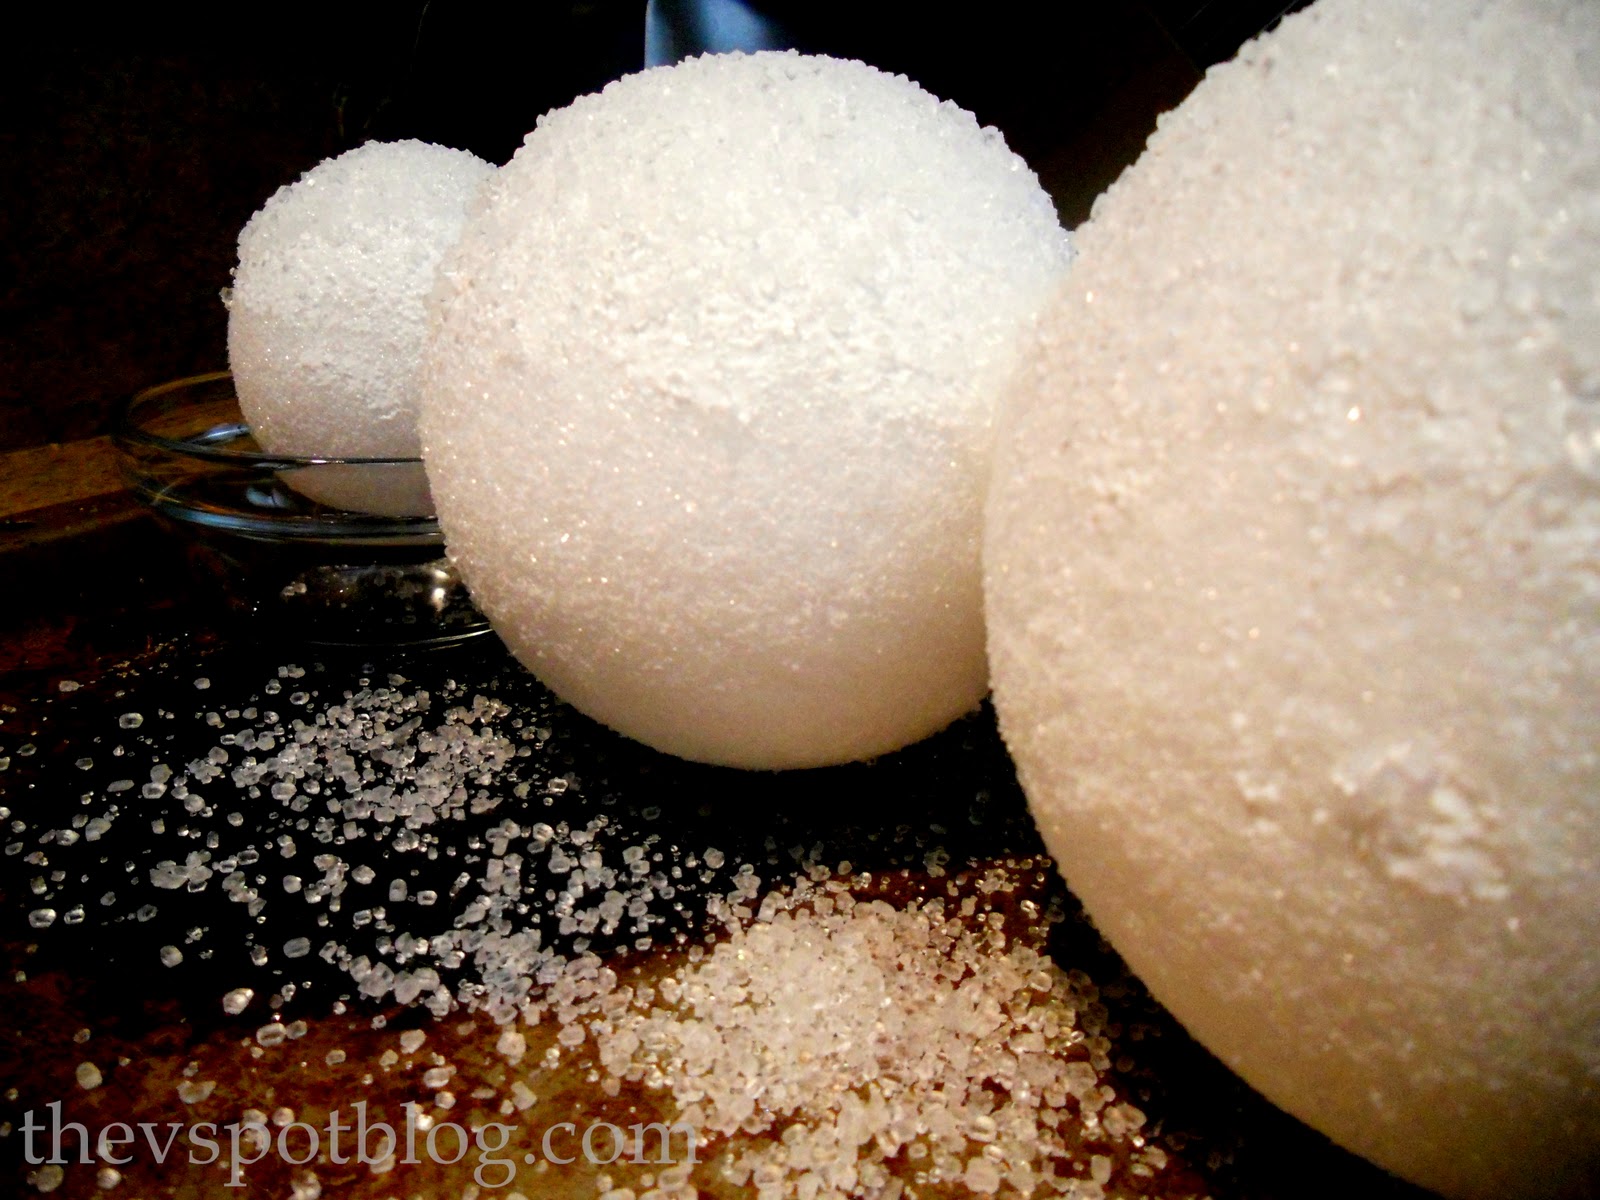
When dry, turn him and continue the glue and epsom salt treatment until he is completely covered in the epsom salt.

This may take several hours.
Once he’s completely dry, take him outside or to a well ventilated area and give him a nice coating of spray adhesive. Sprinkle coarse glitter, then the fine, iridescent glitter all over him.
When he’s dry, bring him back inside so we can dress him and give him arms and a face.
Your snowman will need to stand up so that you can display him nicely. This is where the 8″ x 2″ disc of STYROFOAM Brand Foam comes in. It is the base for your snowman. Apply a generous amount of low melt glue to the center of the disc and press the snowman down on top of it. Brush the surface of the disc with craft glue and sprinkle more epsom salt. For the sides of the disc you can add more glue and epsom salt, wrap with ribbon, or cut strips of glittery cardstock and glue it on, which is what I did.

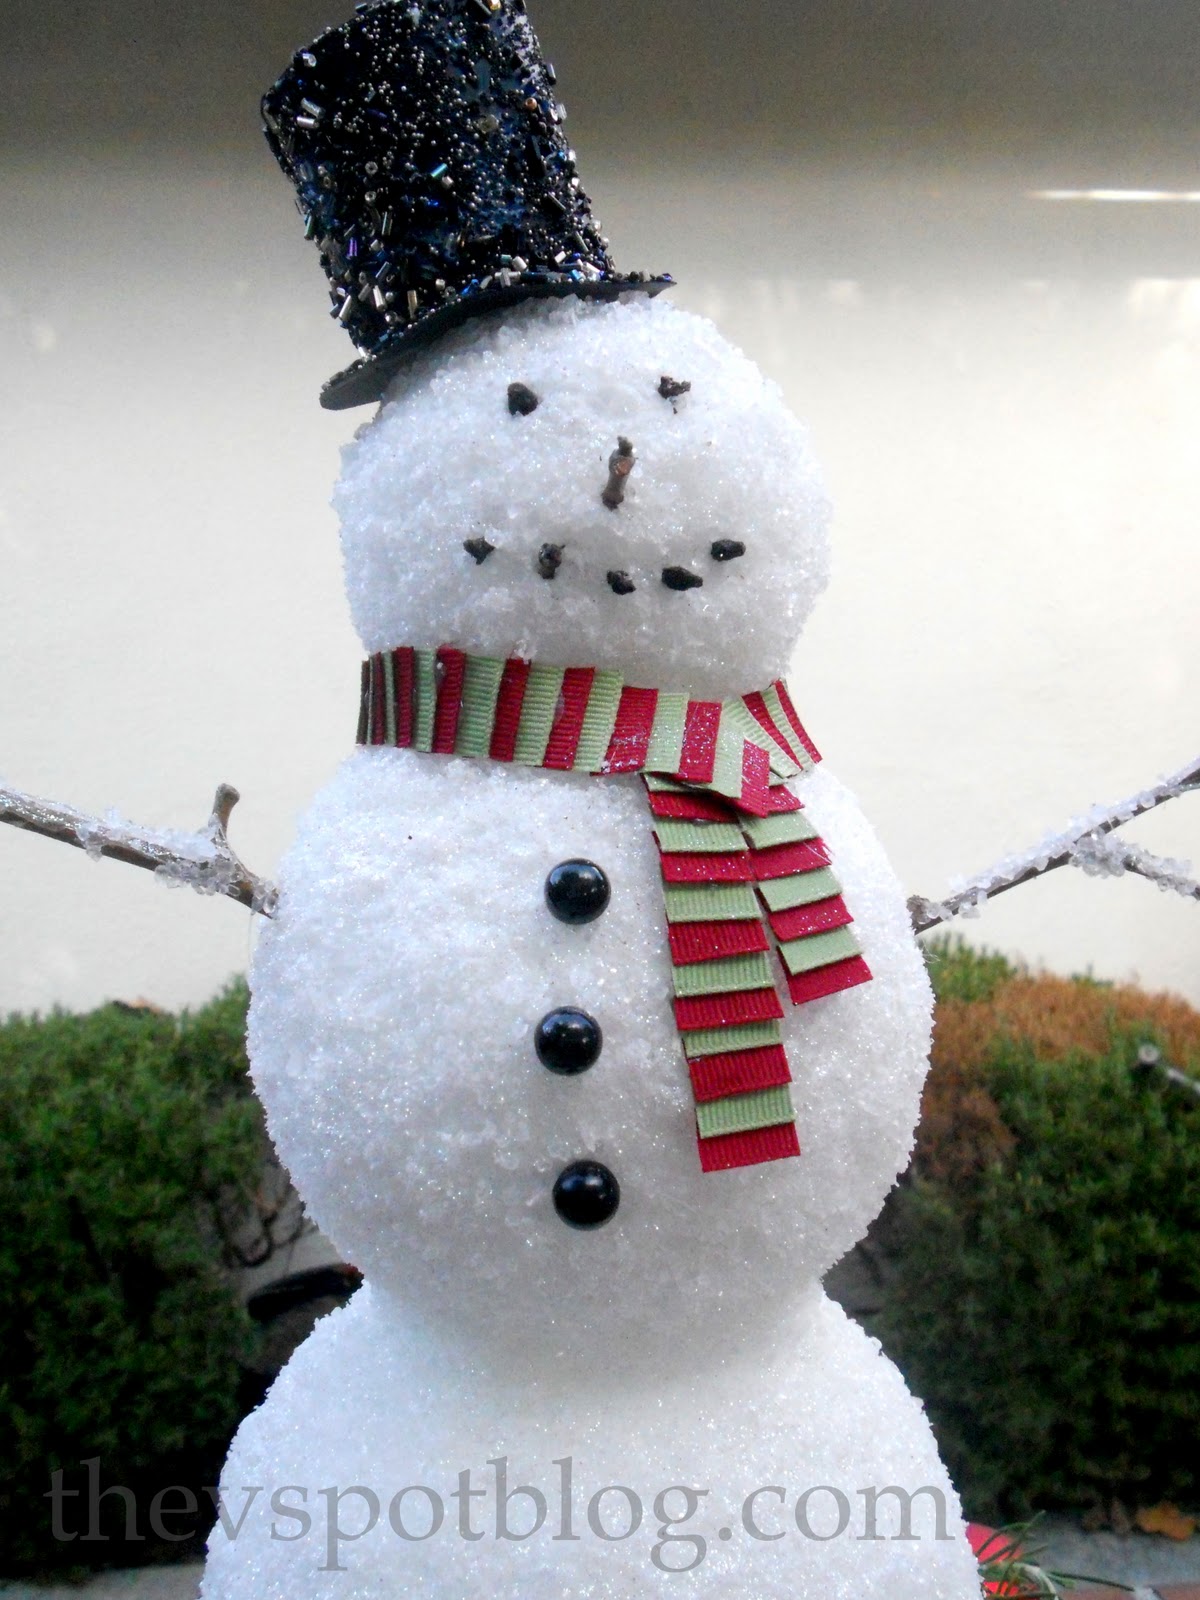
Take the black buttons and use the low melt glue to attach them down the center of the 5″ ball of STYROFOAM Brand Foam.
To make his scarf:
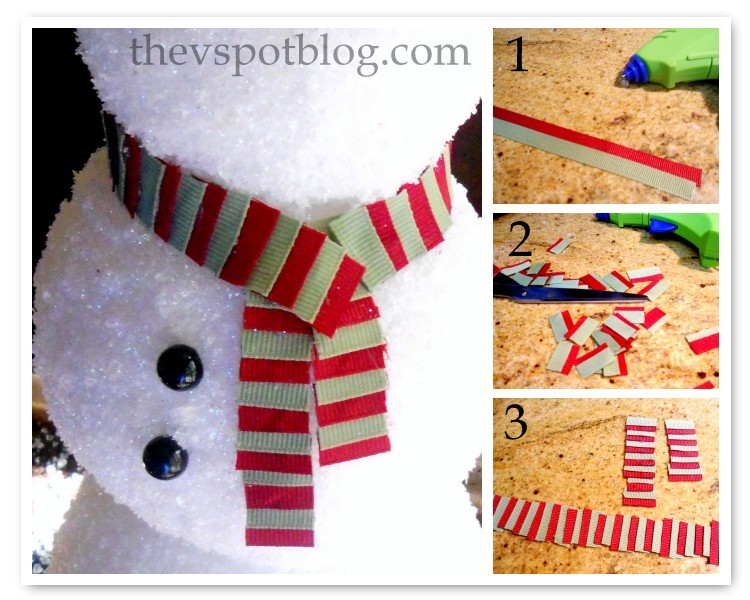
Take the red and green grosgrain ribbons and cut them to length. (about 18″ or so.) Run a thin line of glue and glue them together length wise, overlapping them slightly. When dry, cut them into little pieces (about 3/4 inch) and reassemble them with more glue. (Again, you’re overlapping them slightly.) Trim them up so that the edges are nice and straight. You should have one long piece to go around his neck, and two shorter pieces to hang down as if his scarf is “tied”.
Slightly off center, glue the longer of the two hanging pieces, then the shorter piece, slightly overlapping. Glue the long piece around his neck and secure with glue.
For his arms:
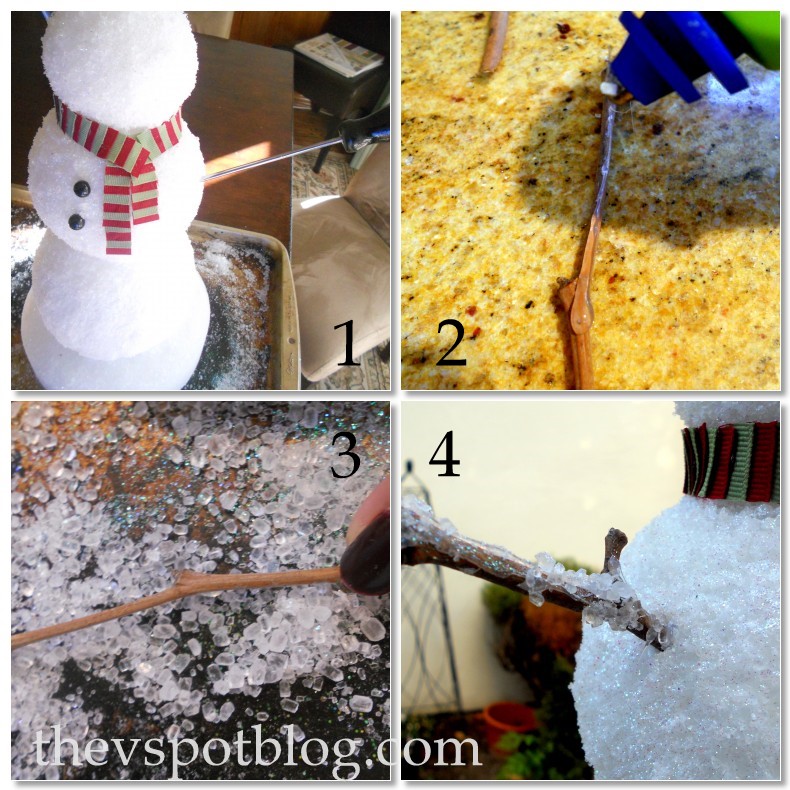
Use the ice pick to create pilot holes for the stick arms. Run a bead of glue along the stick. Immediately turn the stick glue side down into the epsom salt. Sprinkle on a little iridescent glitter, add glue to the end of the stick and insert into your pre-made pilot holes.
For his face, you can use beads, more buttons, whatever you like. I used the ends of little sticks and dotted them with a black marker. It is important to make your snowman very happy. Depending on the angle of his arms, if his smile isn’t big enough he will look like he’s under arrest as opposed to being jolly. (Don’t ask me how I know this.)

Every snowman needs a hat.
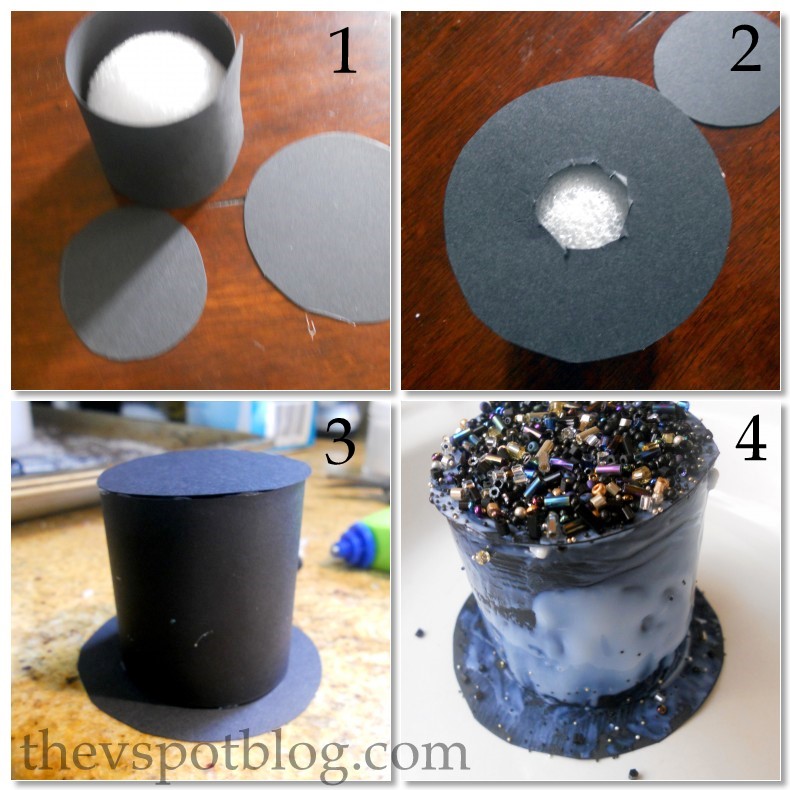
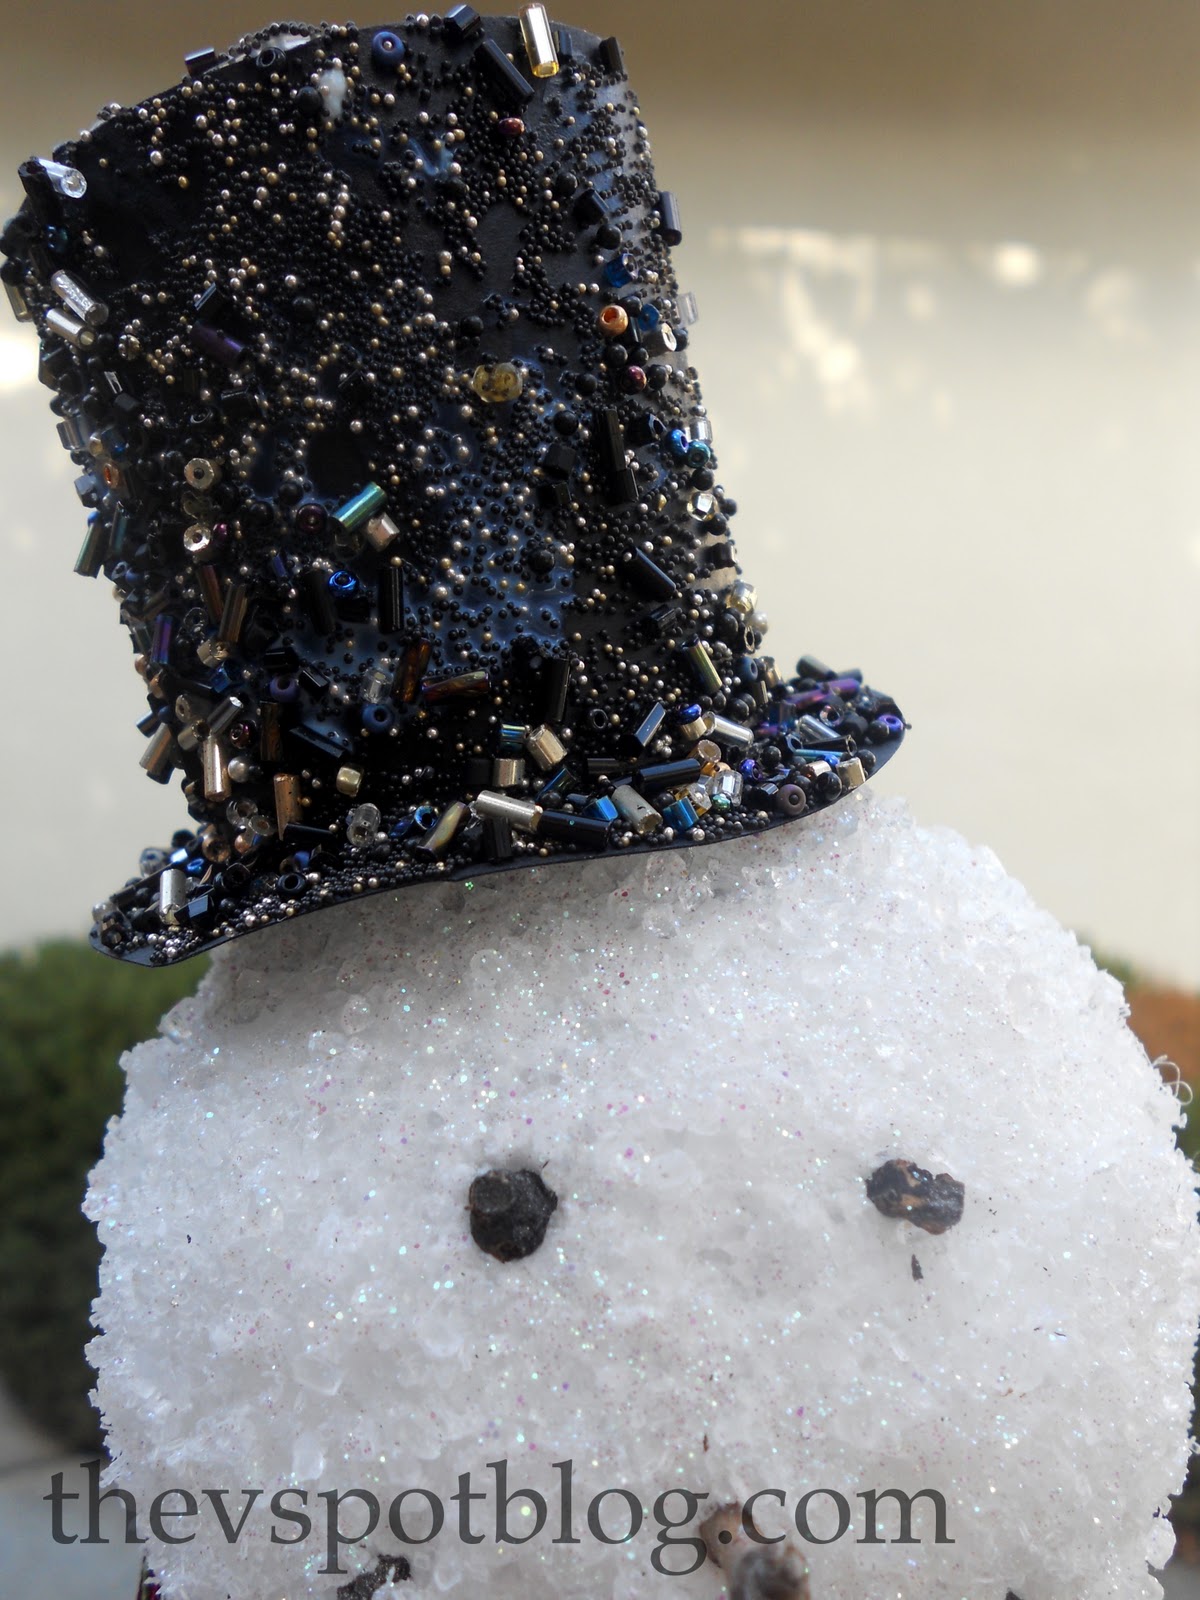
Take a strip of black cardstock and wrap it around the 2″ ball of STYROFOAM Brand Foam. Secure with glue. Cut two circles out of the same cardstock to create the brim and the top of the hat, making sure there is a little hole in the center of the circle for the brim. Glue together with low melt glue, then brush with craft glue and sprinkle black beads all over it.
While the hat was still slightly wet with the glue, I applied low melt glue to the bit of the STYROFOAM Brand Foam that was still peeking through under the hat (#2) and attached it to the top of my snowman’s head. The damp cardstock curved around his head just right and dried looking like it was meant to be there.
You’re done! Add a few sprigs of greenery and a couple of ornaments around his base and you have a cute, sparkly snowman!
Thank you, Stephanie Lynn and STYROFOAM Brand Foam for the fun crafting opportunity!
Happy Holidays!
He’s adorable Vivienne! I just love snowmen.
What a great snowman!!! The salt is a great effect!
Smiles!
Jami
http://www.blackberryvine.blogspo.com
Supper cute! Love the little details!
That is amazing! He is adorable!
~Becca
I need some balls.
I wanna make some snow balls. 🙂
This comment has been removed by the author.
Cute!
SO cute! I wonder if I have any epson salts laying around… 🙂
Ooooohhhhh sparkly!!!! I love anything that glittters and I think this guy is a cutie!! 🙂 I especially love his hat!! I like how natural he looks, too!!
Awww….I love your snowman! How fun! I made a real one out of snow in Michigan over Thanksgiving. It melted 2 days later. Emma was very sad.
He’s a cutie, that’s for sure! Adorable decoration.
Awww he’s adorable!
Great Tutorial!
Your snowman is fabulous! Never thought about using Epsom salts!
Good idea
Hugs
SueAnn
Oh I have Epson salt! So going to have to do this!!
This is what began my obsession with Epsom salt ! Even though I haven’t made the snow man ….YET…I have been loving playing with it for other crafts.
Seriously cute and creative!!!
This is to die for! Love the use of Epsom salt. All of the little details are fabulous!
Gabby
The…Late, Young Family
I love how this turned out! Such an adroable decoration! Plus, you can keep it out into January since its both Christmasy and wintery!
Michaela @ coveredinmodpodge.blogspot.com
It’s amazing how real the “snow” looks!
Love this! So adorable. Thanks for posting!
Love him so much I featured him
http://www.eclecticallyvintage.com/4/post/2011/12/stylin-and-profilin-snow-people.html
Kelly
Will the epson salt melt outside if it gets wet? How do you seal it to make it weather proof?
Can I do THIS on plas