I love Christmas time and I love making our home a warm and welcoming place during the holidays. For a variety of reasons, I have not been as deep into Christmas decor as I normally would be, but I could not pass up the opportunity to make this DIY glitter Christmas sled.

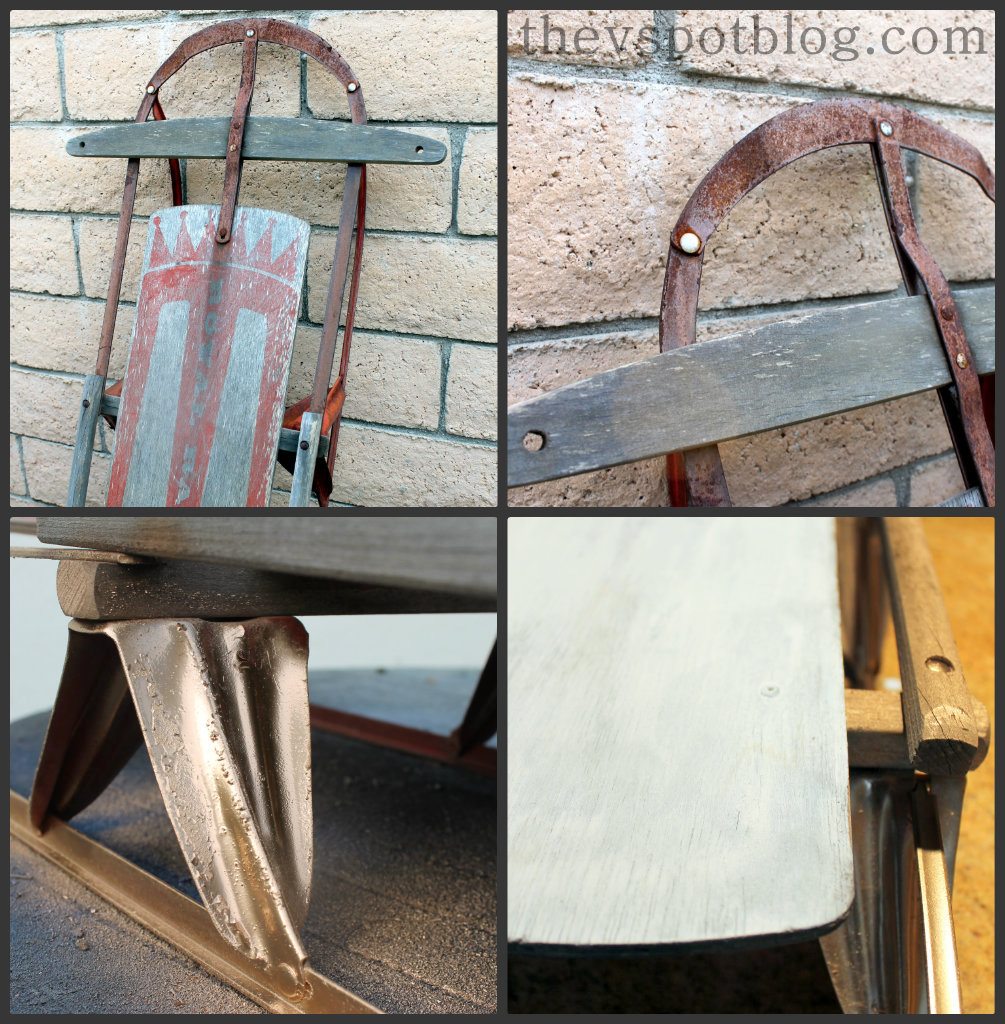
Every year I need at least one Christmas project, and when I spotted this old sled, I knew I had a winner. It was battered and rusty, and I guess technically I could have left it alone and it still would have looked cool…. but I also had an opportunity to try out the Recollections Glitter Collection from Michael’s, and knew that the sled was the perfect canvas for a little sparkle.
So I got started, making over the old sled just in time for Christmas.
This project is super easy. You will need:
- an old sled. (OK, so you might not have an old sled, but you could always do this on an old board and get the same effect.)
- gold spray paint
- white acrylic craft paint
- gold acrylic craft paint
- glue or Mod Podge
- Recollections Glitter in gold and white from Michael’s craft stores
- alphabet and snowflake stencils or make your own with contact paper and an electronic cutting machine
- pouncer or stencil brush
The first thing I did was knock off some of the flaking rust with a wire brush. It didn’t need to be perfect, I just wanted to have the loose flakes gone. Then I sprayed the entire thing with gold paint. When the gold paint was dry, I gave the wooden part of the sled a coating of white acrylic paint.
I have a Cricut Mini, which I love, and I used that to cut out the words “let it snow” and to cut out my snowflakes on contact paper. If you don’t have an electronic cutting machine, please be sure to ask Santa for one. In the meantime, you can use a store bought stencil.

Adhere your stencil to the sled (or board) and mix a combination or 2 parts gold acrylic paint to 1 part glue and dab paint onto the stencil. I use a paper plate to mix the paint and the glue, then make sure I don’t have the brush overloaded with paint. If you have too much paint on the brush it can seep under your stencil and you won’t have a crisp line. (Note, check out the top “let it snow” on my finished project… I had too much paint and the T and the W ran together. Just keepin’ it real. Don’t be like me and use too much paint.)
Can I just say that I loved the Recollections glitter? It’s available only at Michael’s, can be bought individually or in kits and starts at about $4. Bargain! It has a great shaker top, or you can pour it as well. I used very fine glitter on this project, but it also comes in chunky glitter or tinsel.
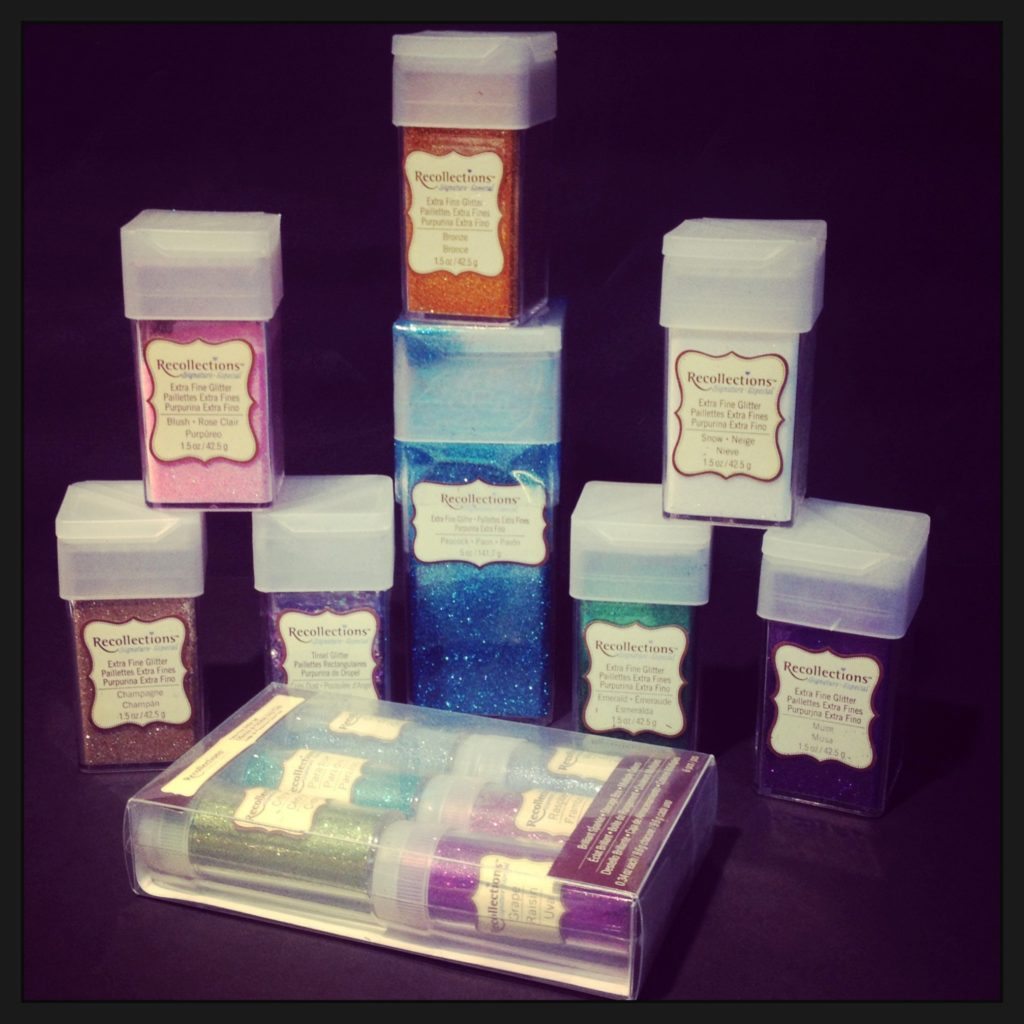
If you follow me on Instagram, you may have already seen this. I was very excited the day I received this glitter in the mail. Look at these great colors!
Anyhow, while the paint/glue mixture is still wet, sprinkle the Recollections glitter over the top of your letters.
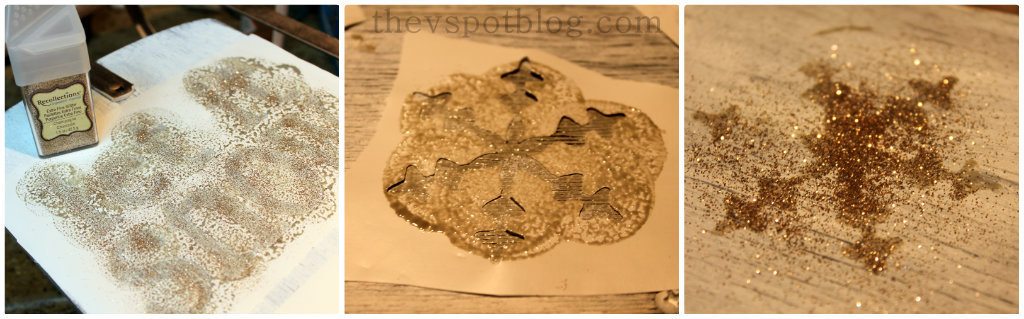
When your letters are done, go ahead and place your snowflake stencils where you want them, then add paint and glitter.
I wanted more sparkle on the sled, but I decided against adding more snowflakes. Instead, I used a dip dot technique with glue on the handle of a paintbrush.
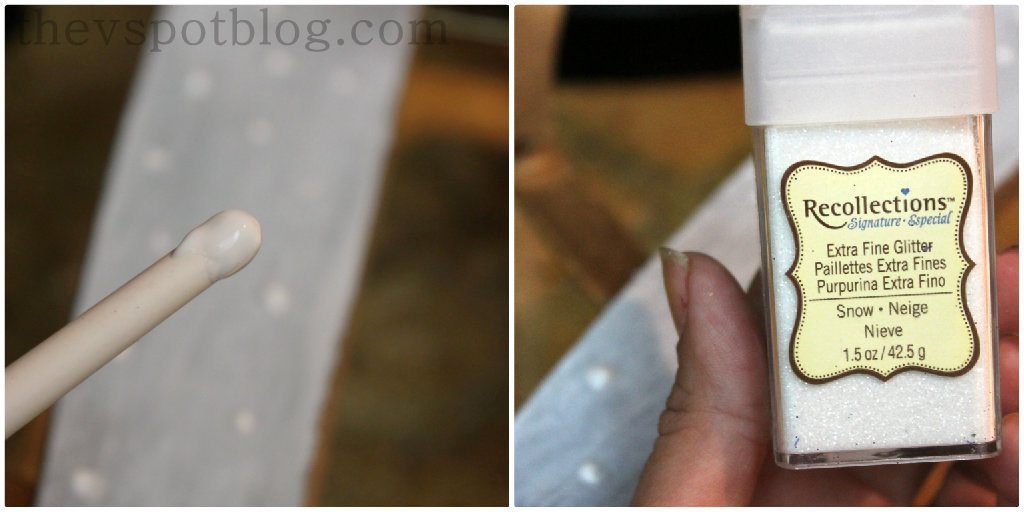
Dip the end of the paintbrush in the glue, make little random dots, then sprinkle white glitter over the dots. Let it dry, shake off the excess glitter and put that cheerful sled in a place where it will make you smile.

I love how this project turned out. How fun to be able to upcycle a battered old sled and turn it into a Christmas sled! Happy decorating!
Disclosure: I received Recollections Glitter and am being compensated for this post. All opinions are 100% my own. (This glitter is great stuff.)

[…] DIY Glitter Christmas Sled from The V Spot […]