The V Spot

Rants, observations, and home decorating... from a woman with no time for a blog.


  • Email
  • Facebook
  • Instagram
  • Pinterest
  • Twitter
  • Home
    • Privacy Policy
  • All Blog Posts
  • Crafts
    • All projects
    • By Project
      • Accessories
      • Artwork
      • Before & After
      • Cheap & Easy
      • decor
      • Floral Design & Centerpieces
      • Furniture
      • garden & outdoors
      • Glass
      • no-sew
      • Upcycle – Recycle
      • Wreaths
    • By Season
      • Spring
      • Summer
      • Fall
      • Winter
    • By Materials
      • corks
      • epsom salt
      • fabric
      • Mod Podge
      • Paper
      • Spray Paint
      • Sticks
    • Round-Ups
  • Holidays
    • Halloween
      • Pumpkins
    • Thanksgiving
    • Christmas
    • Valentine’s Day
    • St. Patrick’s Day
    • Easter
    • Cinco de Mayo
    • Mother’s Day
    • 4th of July
  • Food & Drink
    • All recipes
    • Breakfast
    • Appetizers
    • Side Dish
    • Main Dish
    • Desserts
    • Drinks & Wines
    • Tables & Decor
  • Real Life
    • Family
      • Grant
      • parenting
    • Tales To Tell
    • friends
    • Keepin’ It real
    • Tips & Tricks
      • cleaning
      • Health & Beauty
      • Let me help you
      • organization
    • Just Funny
      • No Mom wants to hear…
      • Exchange of the Day
      • Snarky
      • wacky strangers
      • Big Time Fail

How to make a Haunted Tree. (With things you already have, of course.)

October 10, 2010 7 Comments

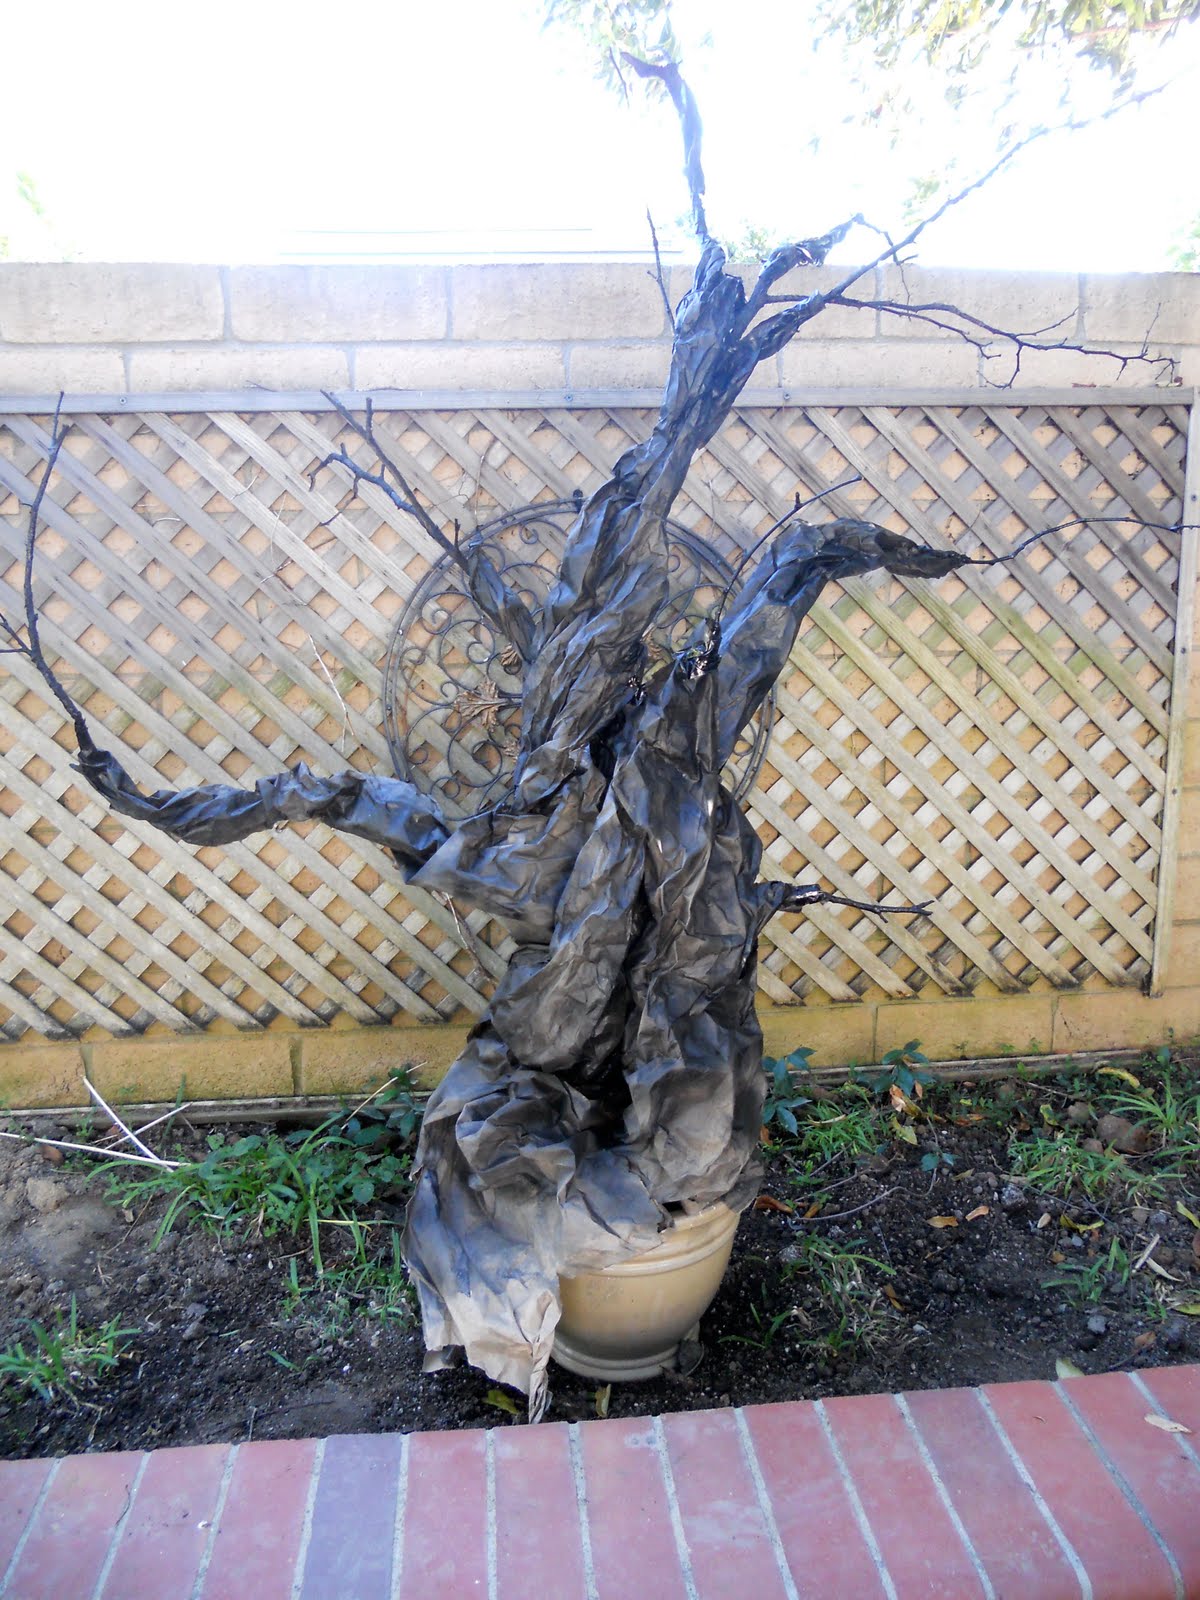
I’ve mentioned that we’re throwing a Halloween Party and I am trying my best to decorate for pennies on the dollar. So far I’ve spent about $38 on supplies ($30 of which went to black spray paint) and I think I’m in pretty good shape.

We have a bare planter that is right off our patio (aka The Dance Floor for the night of the party.) I wanted to do something with it to gussy it up. A Haunted Tree and lots of candles the night of the party should work well.

Here’s what you need:

  • An old heavy pot
  • An old tomato cage
  • Branches
  • packing tape
  • craft paper (or paper grocery bags)
  • black acrylic paint
  • a spray bottle
  • black spray paint
  • child laborers (optional)

Turn the tomato cage upside down and wedge it into the heavy pot. Take your first branch and wedge it in there too, securing with tape as you go.


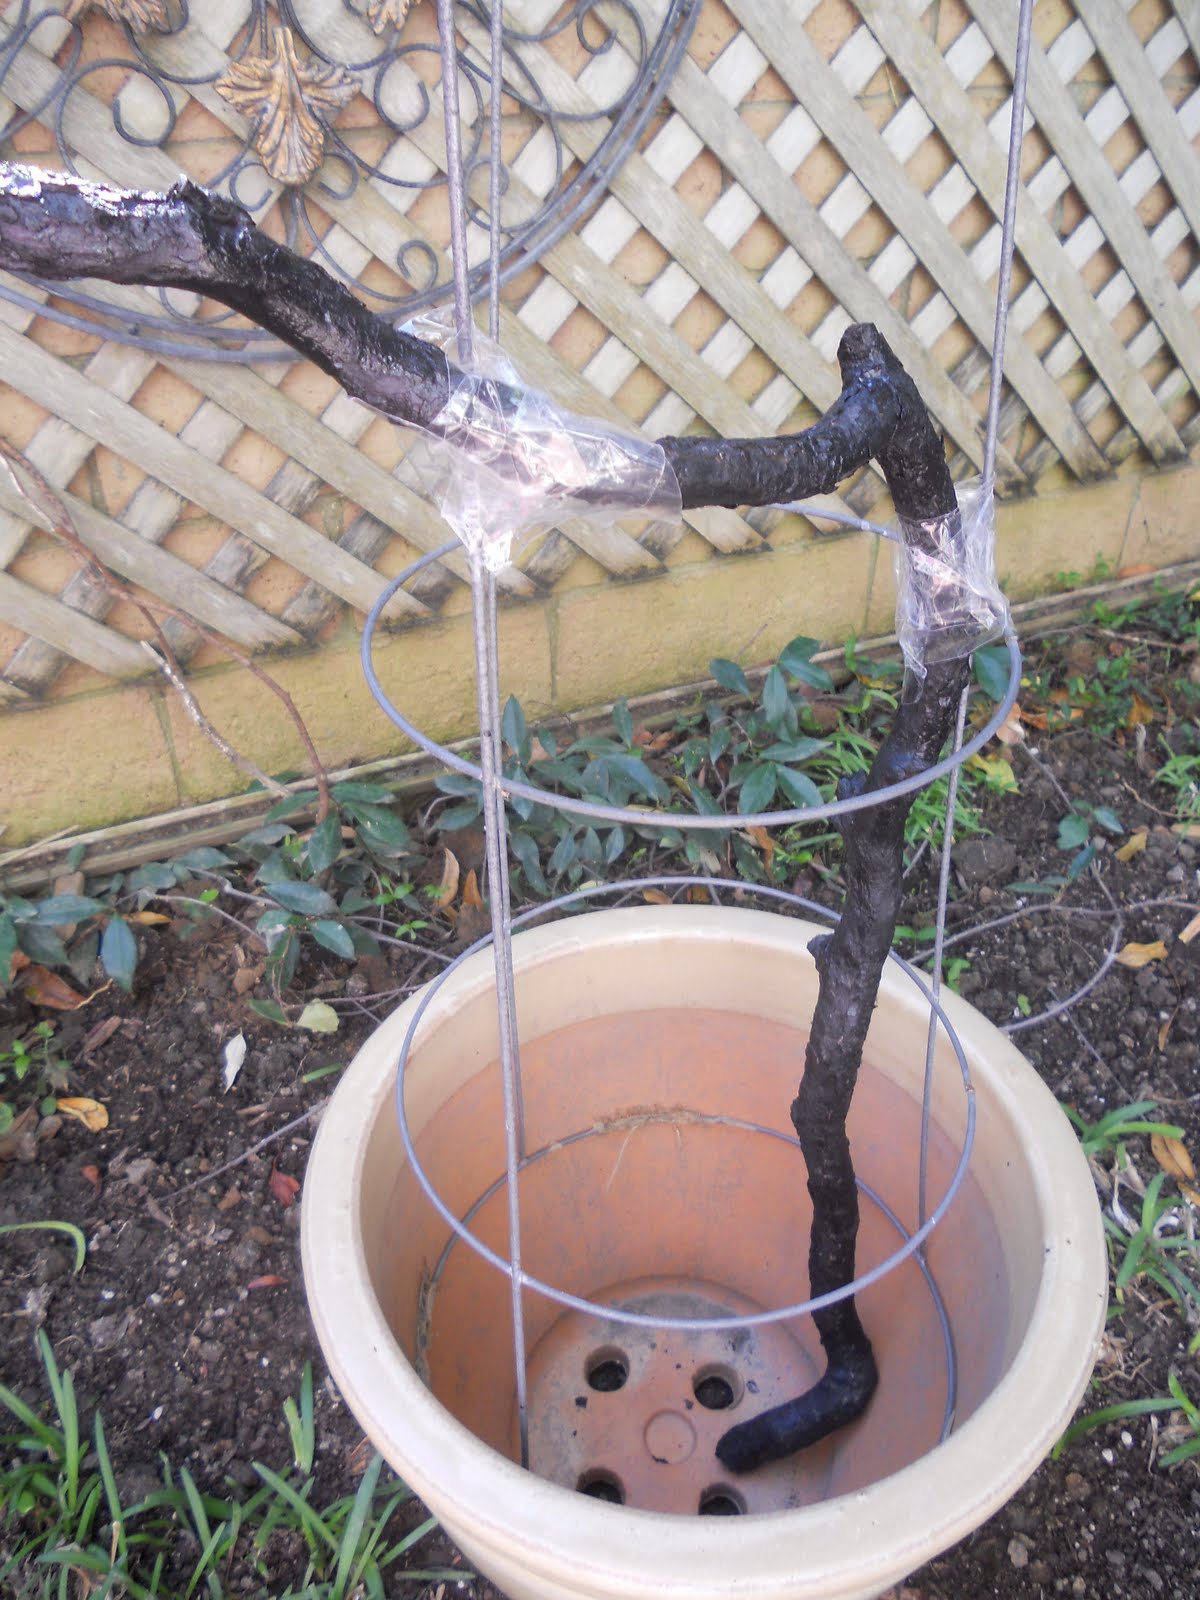
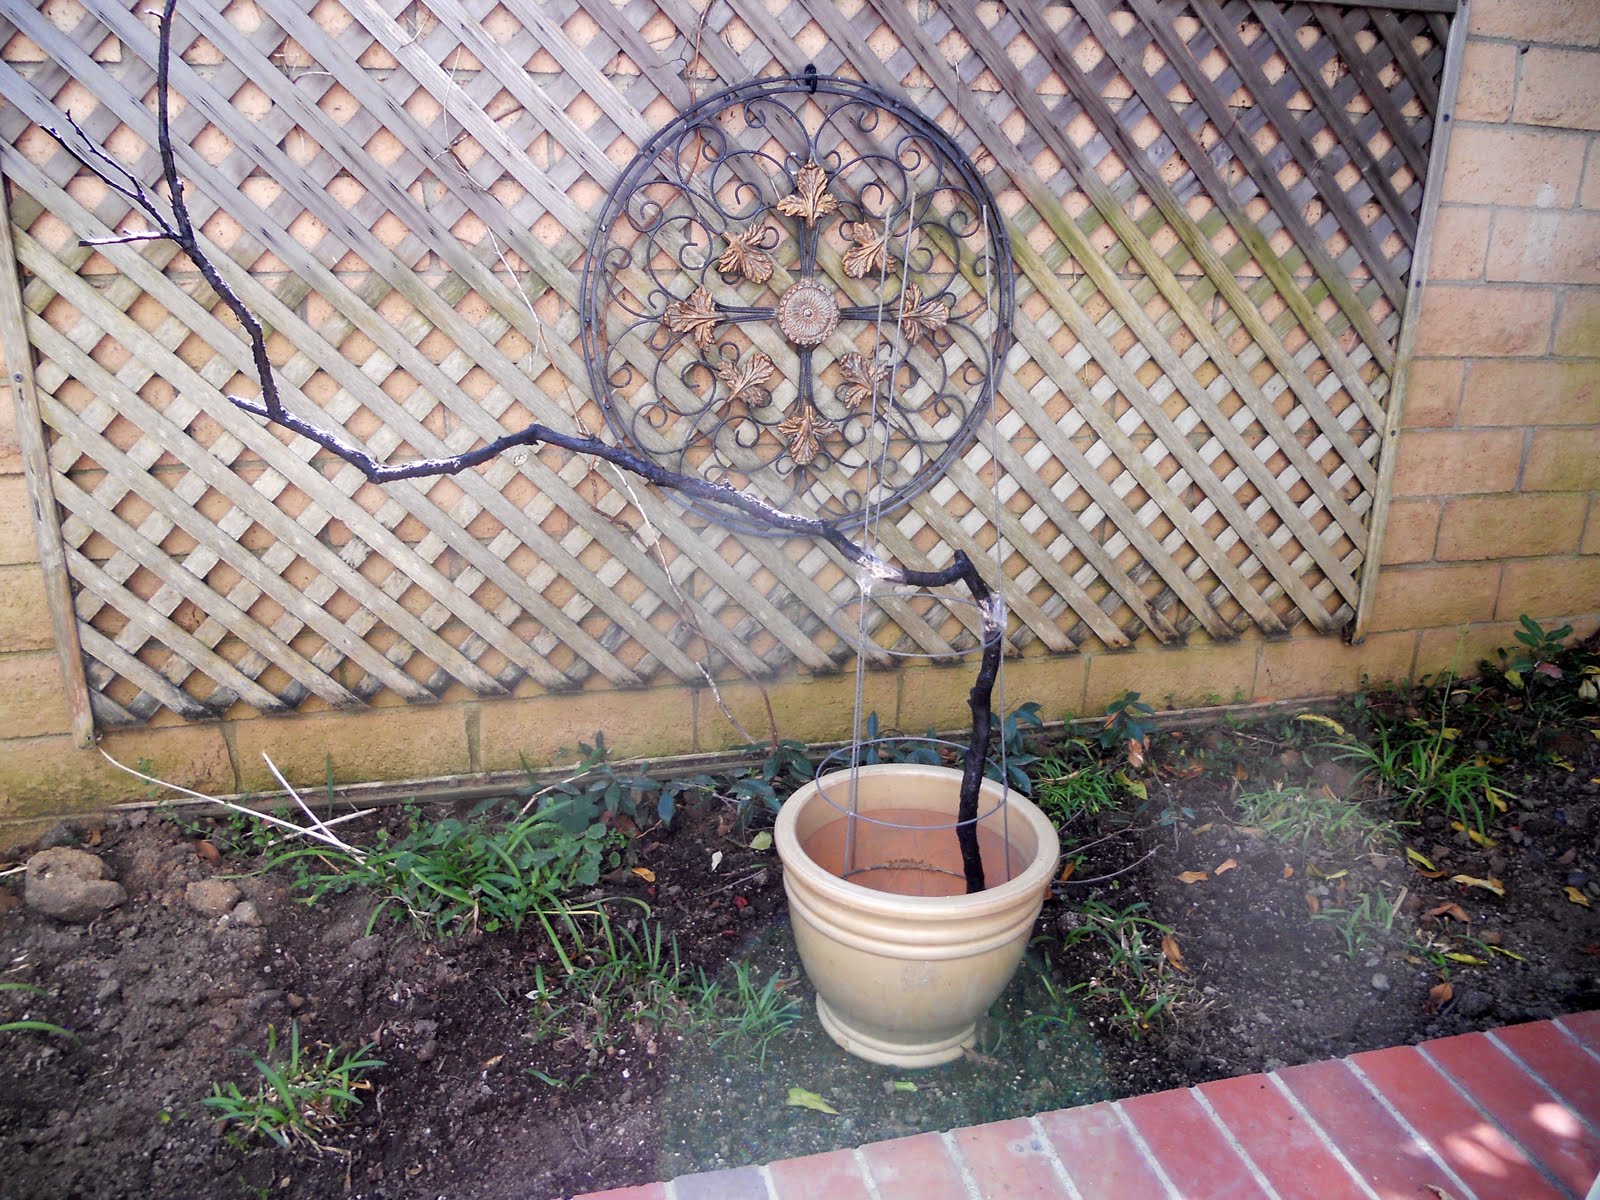
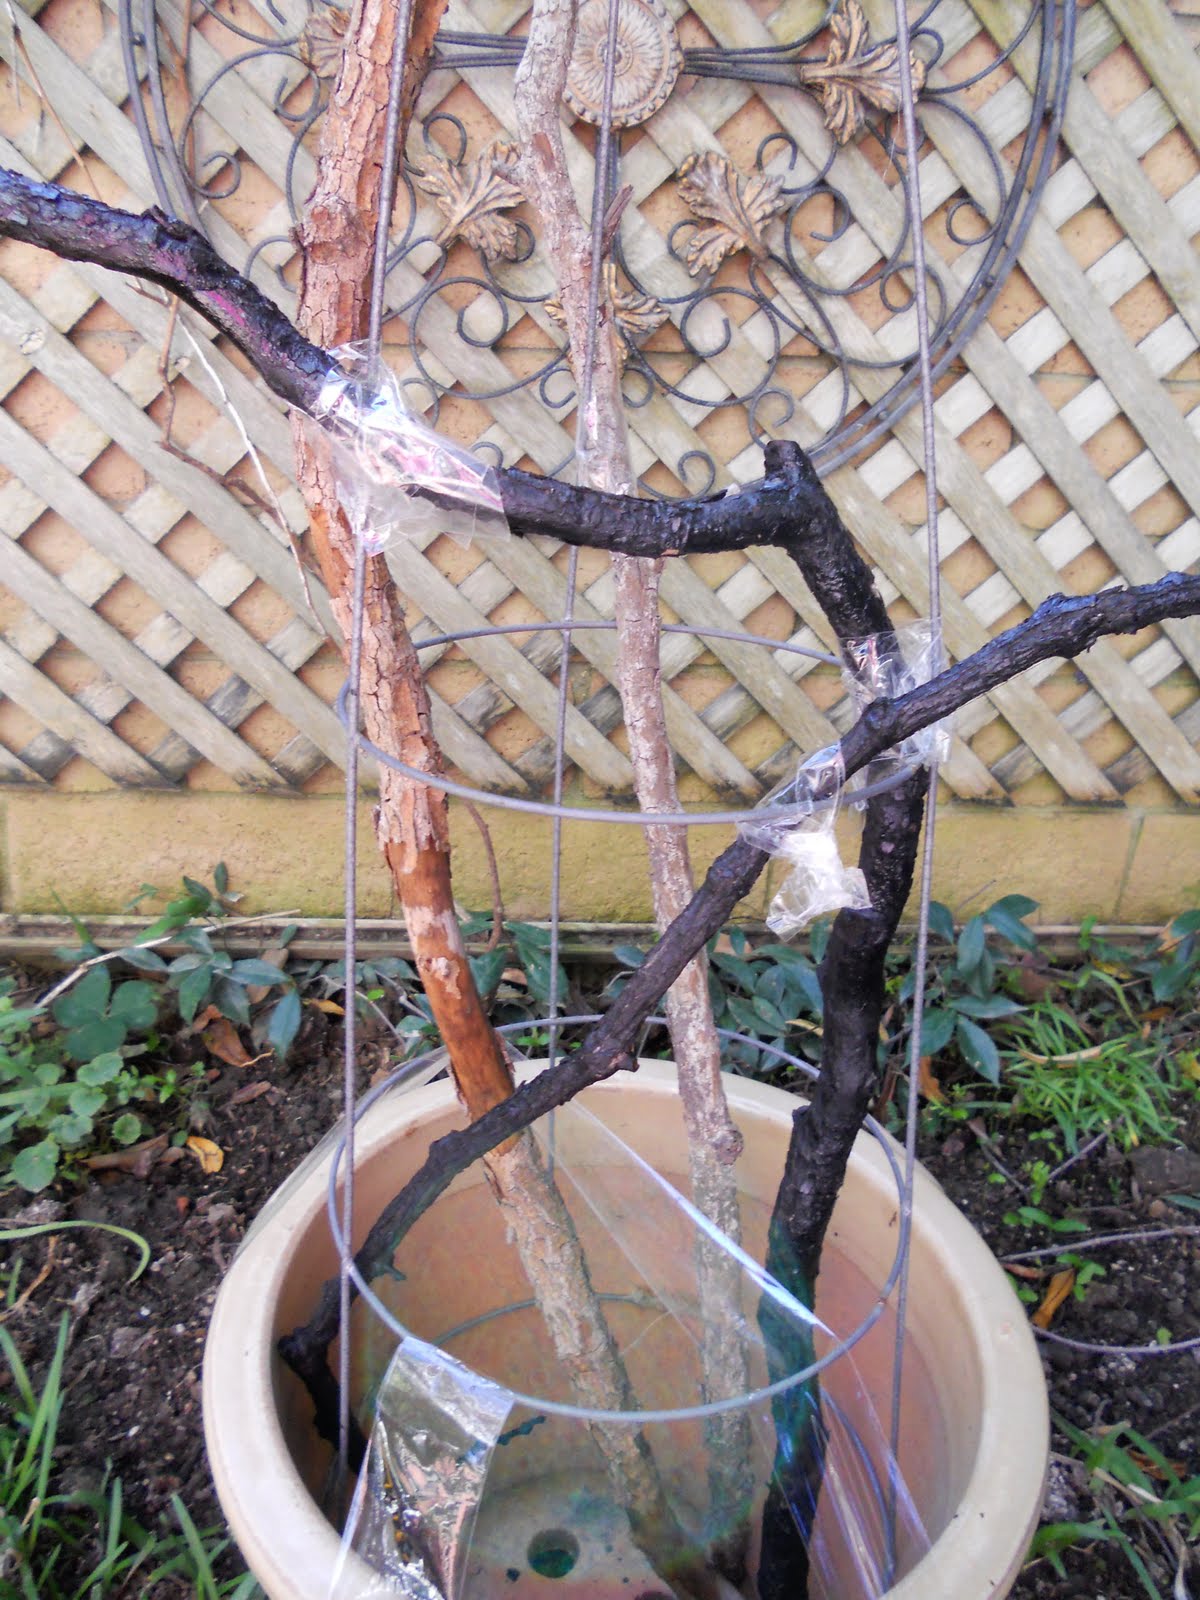
Add more branches, making sure that you arrange them in a creepy, spooky way… like they might reach out and grab ya or something. 🙂 Secure them with tape too.

Here’s where the child laborers come in. Roll out your craft paper (or spread your grocery bags on an already embarrassing portion of your lawn. Take black acrylic paint and water it down. Fill a spray bottle and hand it to one of your kids.

This serves three purposes.
First, by using the acrylic paint first, you won’t need as much spray paint later. (This saves money.)
Second, it helps to soften and “age” the paper you’re using.
Third, your child laborer will feel like they are helping to decorate for Halloween and you won’t feel as guilty about crafting instead of taking your kids to the park or something.

When the watered down paint has dried, rip the paper into big chunks and crumple it up. Don’t be shy… really smash it and crumple it. Start tucking it into the bottom of the pot and winding it around the tree “form” you created with your branches.

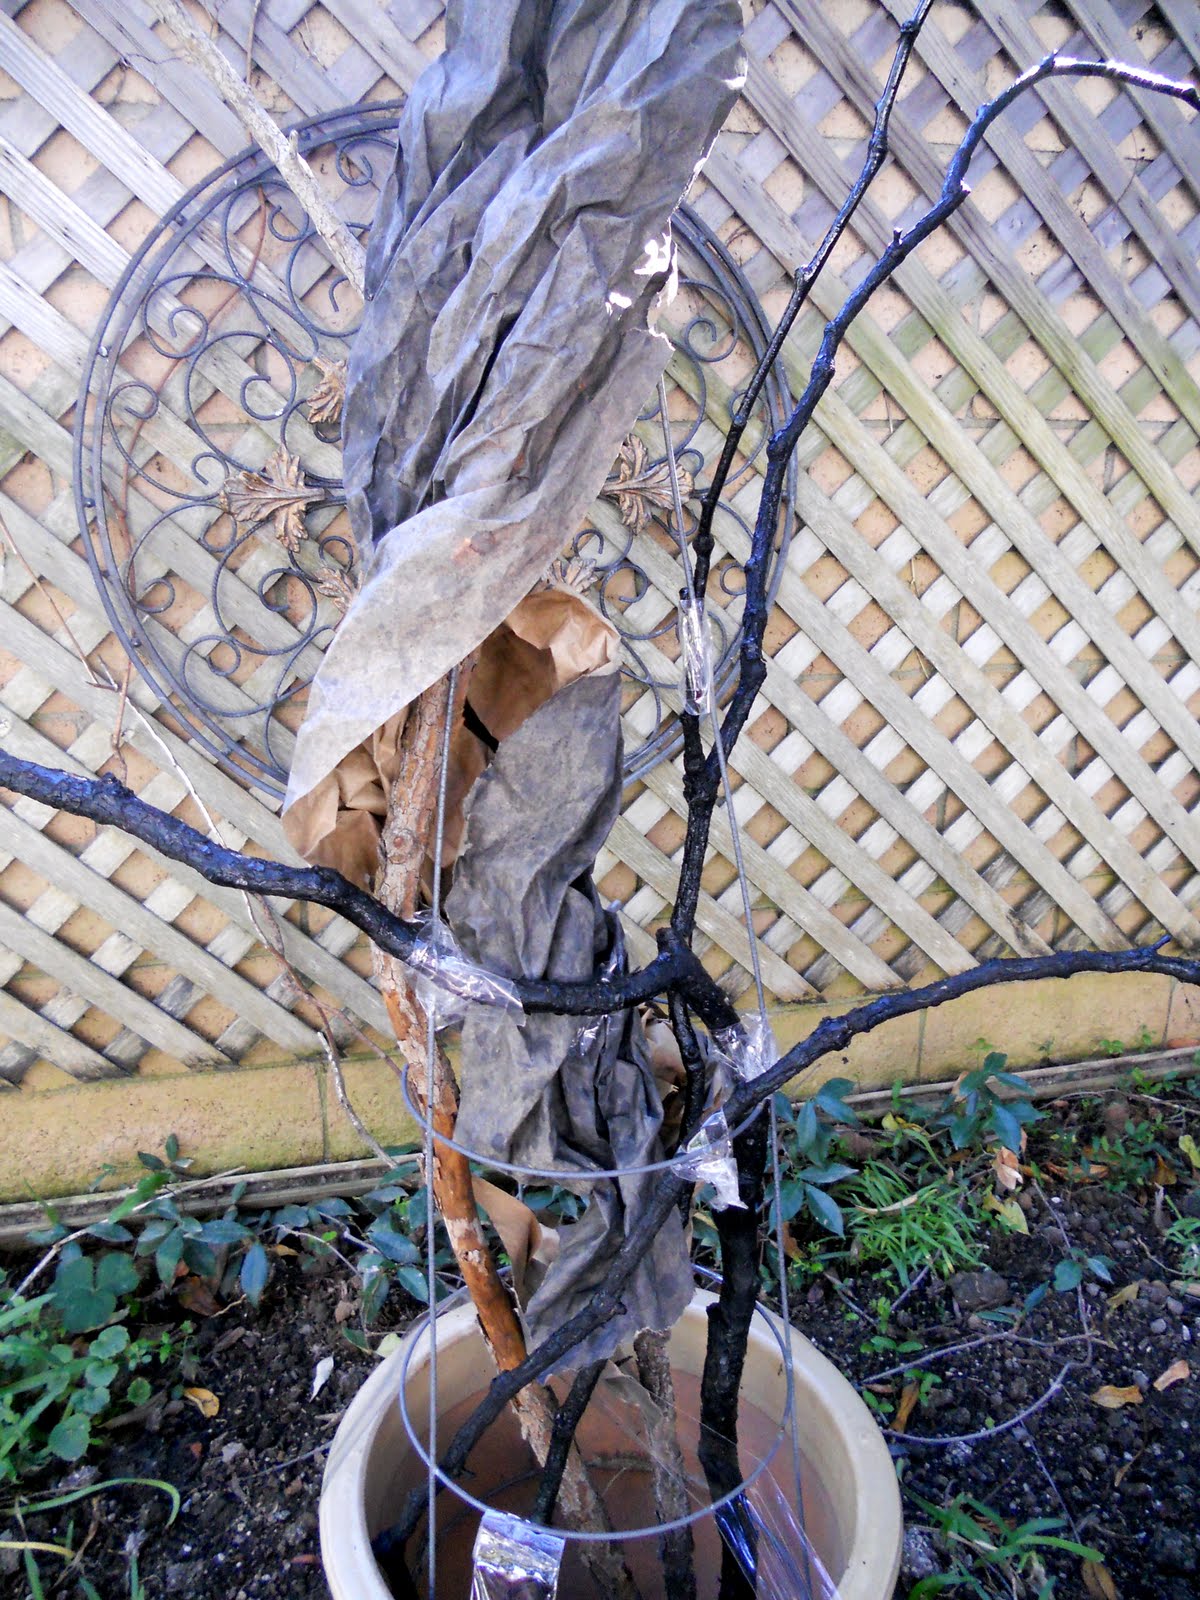
Use more tape to secure it. It’s OK to do a messy, crinkly tape job. In fact, I think it’ll look better overall when you’re finished if you do.

When you’re satisfied with the way it looks, break out the spray paint. I only partially painted mine. I will do the final coat and make the necessary adjustments the morning of our party. No sense in getting it “just so” and then leaving it outside another 20 days.

Now I just hope the dog doesn’t knock it down. Part of the reason that nothing grows in this planter is that squirrels run back and forth across the top of this wall and it drives our dog crazy. She runs through the planter chasing them. Oh well. I’ll keep my fingers crossed.

Filed Under: Autumn, cheap and easy, child labor, Crafts, decor, Franken-Crafts, garden & outdoors, Halloween, Holidays, Mitch, Paper, project du jour, spray paint, Sticks, tutorial

Comments

  1. shortmama says

    October 11, 2010 at 12:05 AM

    You are so stinkin creative!

    Reply
  2. Becca says

    October 11, 2010 at 12:56 AM

    Looks so good!

    Have I mentioned how much I want to be a guest at your party???

    ~Becca

    Reply
  3. Shawn says

    October 11, 2010 at 2:23 AM

    I made a tree similar to this for teacher appreciation week last year and hung it to Peanuts teachers door with a recycling bin. It said “Be cool go green…Go Mr. Green” I never would have thought about making it like this! Once again I am in awe of your craftiness and agree with Becca, I want an invitation!

    Reply
  4. blueviolet says

    October 11, 2010 at 6:44 AM

    How incredibly creative! You should submit this to a magazine!

    Reply
  5. Myya says

    October 11, 2010 at 7:45 AM

    How has no one snatched you up to be their party planner??? You are the list gal, you have ideas gahhh-lor, you don’t mind sticking to a budget & you are clearly a crafy genius!

    Reply
  6. Connie W says

    October 11, 2010 at 2:26 PM

    I love that!

    I hope you don’t have the po po at your house because of your spray paint consumption!

    Reply
  7. MiMi says

    October 11, 2010 at 10:17 PM

    That’s cool lookin’!

    Reply

Leave a Reply to Shawn Cancel reply

Your email address will not be published. Required fields are marked *

you might also like:

twigs, sticks, branches, black pot, pumpkin, Halloween, porch, decorations
Black twig and pumpkin Halloween porch decor.
Easy Halloween Decor – Sticks, spray paint and pumpkins, oh my!

My Halloween wreath….all it’s missing is a whip.
punk pumpkin, black, leather, studs, studded, safety pins, Halloween
Make a leather studded punk Pumpkin for Halloween. (“Mom…? Why did you make an S&M pumpkin…?”)

Cheapy, Creepy, Halloween Party Invitations
cream, elegant, pumpkin, green, bling, ribbon, thanksgiving, paint
Turning plain pumpkins into elegant pumpkins for Thanksgiving.

Make an easy scrap paper Christmas tree.
frosty, branches, berries, sticks, pumpkins, fall, autumn, winter, centerpiece
A transitional floral arrangement: Fall into Winter Centerpiece.

Upcycle: easy DIY faux hammered metal planters (with spider web topiaries.)
Turn Dollar Store beverage napkins into easy Halloween hurricanes.

Recent Posts

  • Spooky porch decor and a Halloween Chair.
  • DIY Plaid Wine Glasses
  • Easy Sand-N-Sea Flower Pots
  • How to use an indoor chandelier outside.
  • Quesadillas made with slow cooker Carnitas. (Pork in a crock pot… nothing is easier.)
  • No Sew Project: How to recover your outdoor cushions using fabric and a glue gun.
  • Upcycle project: plain flower pot into decorative ceramic planter.
  • An easy Valentine’s Day globe.
  • Simple, winter themed decor. (Using what you already have, of course.)
  • Easy Goat Cheese Appetizer Recipe

Amazon Associates Disclosure

Vivienne Wagner is a participant in the Amazon Services LLC Associates Program, an affiliate advertising program designed to provide a means for sites to earn advertising fees by advertising and linking to amazon.com.

Popular Posts

  • Cleaning Stove Burners & Grates using Ammonia (The best...
    Comments (631) | Jul 07, 2011
  • Easy Dessert Recipe: Oreo Cheesecake Bites
    Comments (64) | Mar 04, 2014
  • How to store fresh produce – From A to Zucchini.
    Comments (111) | Jan 25, 2012
  • No Sew Project: How to recover your outdoor cushions using f...
    Comments (109) | Mar 03, 2018
  • DIY wine bottle crafts.
    Comments (10) | Aug 22, 2013
Privacy

Copyright © 2023 The V Spot · Website by Houndstooth Media Group