This might be a little silly (or a bit TMI) for some folks, but I think it’s cute.
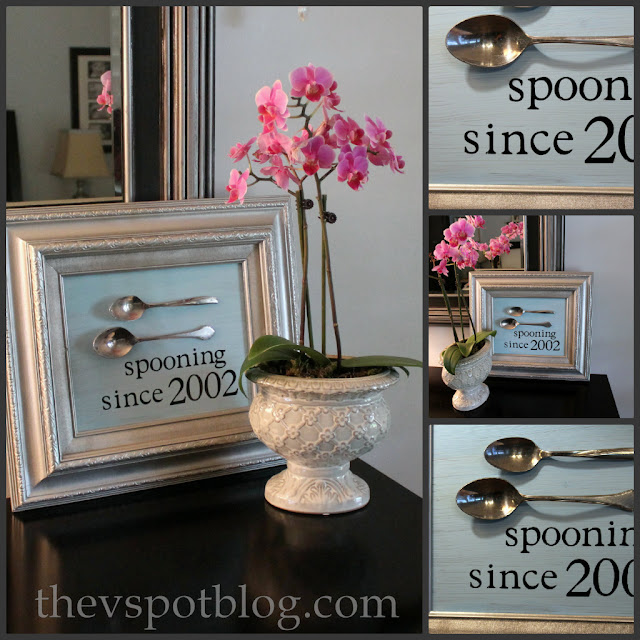
Today I’m going to show you how to make an easy piece of “couples” artwork for less than $20 and in under an hour (not counting drying time.)
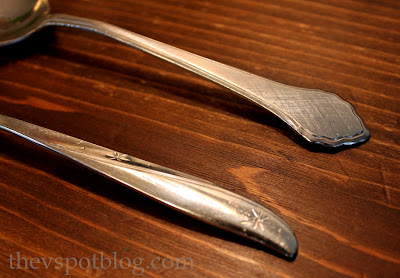
When I was at SNAP! I saw spoons that had been hammered flat and had text hammered into them. (I cannot remember the vendor that had them, so sorry.) I think they were designed to be little plant or garden markers. Anyhow, a few weeks later I saw a big bin of spoons at my local Goodwill and found two that I thought had a kind of cool design on them. And for .29 cents a piece, why not?
Supplies needed:
- Old frame and glass
- 1 can silver and 1 can black spray paint (I used Krylon)
- adhesive letters (I used my Cricut and Contact paper)
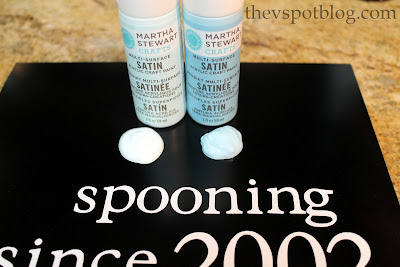
- acrylic paint (I used Martha Stewart’s Sea Lavender and Blue Sky)
- strong adhesive (I like Amazing Goop)
- 2 spoons (best if one is a little bigger than the other)
The colors I used match our bedroom, but obviously, you could choose whatever like. If you wanted to, you could also make this work for the kitchen.
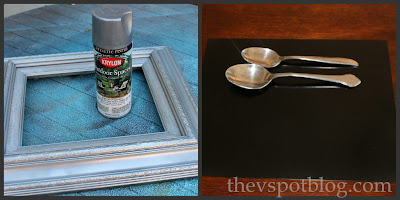
I took an old frame that I had laying around and spray painted it silver.
Then I took the glass from the frame and I spray painted it black. (Yes, you can spray paint anything, including glass.)
I played around with the placement of the spoons and the contact paper letters.
At the end of the day, I thought our names made it too busy and opted to leave them off of the project.
I figured out where the spoons would go and adhered the letters accordingly. Once the letters were pressed on, I added the two blue paint colors I wanted. (Just squirt the paint directly onto the glass.)
Apply the paint, making sure your brush strokes go in one direction only. (I chose side to side, horizontally.) When the paint is set (but not totally dry) go ahead and carefully start peeling up the letters. I used the tip of an exacto knife and tweezers to pull them off.
When all of the letters have been peeled away and the paint is dry, apply the adhesive to the lowest part of the back of the spoon (basically where the bowl of the spoon rests when you set it on the table) and also on the back of the handle where it hits the table.
Once the glue is applied to the spoons, carefully position them where you want them and let them sit. I let mine cure overnight, just to be sure it was nice and secure.
I love how it turned out. I think it’s fun and whimsical, and it is certainly unique.
What do you think? Happy crafting!
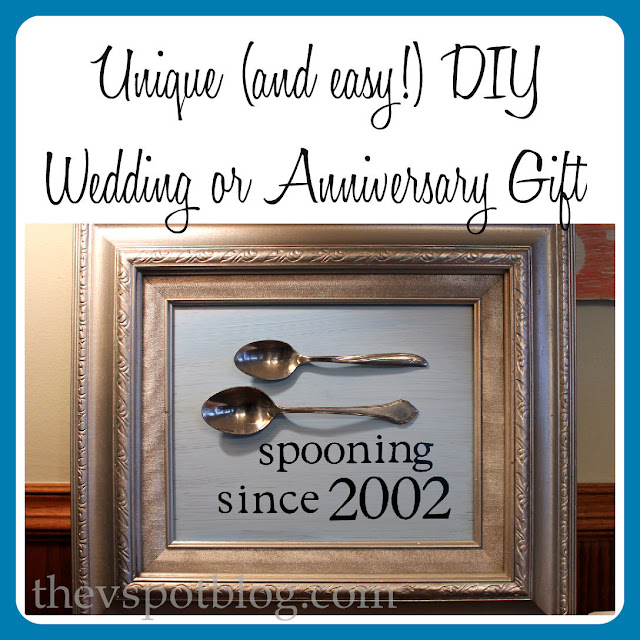

Cheesy and adorable. I want. 🙂
Great idea! Love it!
This is way too cute!!
Ahhaha!! I love it so much! Thanks for the great idea!
That is adorable.
I think I might do it with forks.
Because we’re that classy.
I laughed way more than i should have at tHIs comment!! An oldie, but still a goodie!! 😀 Love the cute diy gift also. Gonna try it today <3
That is adorable.
I think I might do it with forks.
Because we’re that classy.
That is adorable.
I think I might do it with forks.
Because we’re that classy.
Cute! Reminds me of the old saying…”Spooning leads to Forking!” Ha! Could not resist…
I think it’s fun!
~Bliss~
Super cute! I would love this with old monogrammed spoons, like the one I had made into a ring!
My Anniversary is TOMORROW and I have old monogrammed spoons! Perfect timing!! 🙂 it’s adorable!
Clever and cute!!
Adorable!
i totally love this.
i’m so going to do this.
xoxo
kellie
LOVE!!!!!
Hahahaha! This is great!!!
Ahhh! I love it–so stinking creative!!!
This is FABULOUS!!! 🙂 What a great idea! I’ll be keeping my eyes open at yard sales for sure. 🙂
~Stacy @ Stacy Makes Cents
LOVE LOVE LOVE – that is too cute!
Soooo cute! I love this idea. Pinned it!
Heather
Don’t have a cricut so I’m going to print the words using black ink on white card stock, glue on the spoons, and frame it in a shadow box. May not look as sharp but I won’t have to dust the spoons!
This is adorable. How clever and unique. Great job!
Haha This is SO funny! Great job! 🙂
Happy Day!
Michelle
http://www.daydreambelievers.net
Hehehe! So fun!!
This is AMAZING! Thank you so much for sharing and thanks for the inspiration.
🙂 blessings,
karianne
I think it’s hilarious! I have a friend who’s getting married in a month and I can’t make the wedding. She’s just goofy enough to enjoy this too. Thanks so much for sharing the idea!
I absolutely love this! I have just the spot to add one to our home, thank you so much for the inspiration!!
Cute idea!
Such a cute idea. I would love if you came and linked up some of your great posts to my link party @ Show Off Monday on Kampen Lane. http://www.kampenlane.com/2012/06/show-off-monday-9.html
~Taylor-Ann
This is absolutely adorable! I just saw Karianne did one almost like it, and so wished I would have seen this inspiration before our Anniversary in May. Maybe next year:) I have to pin it to remember.
I don;t know how I missed this post- but it is just darling!! What a great idea!
xo Becca
Okay I’m trying not to leave you a raving comment about how frustrated I am after trying to recreate this as an anniversary present for my sister, but I’m on a tight budget and just spent that said budget on the supplies for this.
After waiting for the acrylic paint to set I pulled off the letters only to have the layer of black spray paint and much of the surrounding acrylic paint peel off as well, leaving a clear spot of glass where my letters should be.
Was I suppose to paint one side black and then use the acrylic paint on the other side? If so, your tutorial did not specify. Or perhaps I should have let both the black spray paint and the acrylic paint dry longer? I don’t know… but I’m very disappointed.
I cannot wait to make this for my daughter’s shower! Love.love.love! Great blog too!
How can you this much creative?Awesome idea and in a less span of time!!!!Definitely want to try this because it’s an affordable rate.
Thank you!
I am making this as we speak for mine and my husband’s anniversary. He loves my corny projects; thanks for posting!!!
I am going to do this as décor for my kitchen. I would like to make a frame with my son’s baby fork in it and put it right below the spooning one. I need a cute saying though. I thought of putting “Spooning since 2005” on one and putting “Forked in 2008” on the other one for my son.
what size is this? An 8×10 or 5×7?
Thanks!
Hi Amber, it is an 8 x 10.
Hello!
Hello!
How ADORABLE
Too cute! What size letters did you use?
Thanks, Shea. I don’t recall what size they are, but that’s part of the beauty of this project… no rules, no exact measurements. You can totally make it yours. 🙂
Some of us need the extra help! Lol. Frusterating when just starting tO craft and INSTRUCTIONS are Vague. KNOWING The letter sIze would be of Great help
HAHA, THAT WAS AMAZING DIY IDEA EVER. SO CHEAP AND SIMPLE TO MAKE ONE. THANKS 🙂
There is a great pleasure on giving a handmaiden gift. Loved your idea 🙂
That iis a very good tip particularly to those new to the blogosphere.
Shrt but very accurate info… Thanks ffor sharing thijs one.
A must read post!
If not, then just how much will the company chaarge you foor where your gift is going*When will your ift arrive.
This article provides some golf presents, and explains using some common golf accessories that may be seent as gifts.
Let your imagination rrun wild and anything you find will certainly be
enjoyed.
This is a great idea. I loved your idea. Thanks for the sharing great idea!
This is an AMAZING idea! Thank you so much for sharing and thanks for the inspiration.
We have some friends that are getting married soon and will be making the spooning gift for them. As in addition to the spooinging to lay next to one another they also love playing the game spoons so it works for both!
believe me i’ve never thought like this. it is the cheapest and quick personalized gift that you can give to any close friend’s anniversary. thanks you helped me. pinning this
I’m glad you like it!
Wow, this is a very good idea. i giggled while reading. Loved your post. thanks for sharing
I’ve never get idea before like this. but you have done a great job and give me idea to give something different to my hubby on this anniversary
That’s great! Happy anniversary!
The amazing design I love it. It’s looking very nice. Thanks
really I love these wood gift and your ideas are very good, I will appreciate you for this kind of post. thanks
great
“His work is perfectly suited for my farmhouse! Do you maintain a blog featuring the white card catalog on the desk? I’m in search of one. By the way, thank you for sharing, and please continue to share more useful information.”