Even though the trend might be winding down a smidge, I do still love a nice starburst mirror. At the recent CHA trade show, I was fortunate enough to check out some fun new products and get the chance to play around with some of them. FloraCraft was kind enough to send me some supplies to try out at home, and I decided to create a faux barnwood starburst mirror.

Yep! Believe it or not, that is not old, rough wood… it is STYROFOAM! Here’s what I used to make this mirror:
- 3 sheets of Styrofoam
(I used 7/16 x 11 7/8 x 35 x 7/8 inches but you could use any thickness)
- FloraCraft Styro Cutter
- 2, 8oz tubs of Smooth Finish
- 12″ round mirror
- FloraCraft StyroGlue
- Strong adhesive glue such as E6000
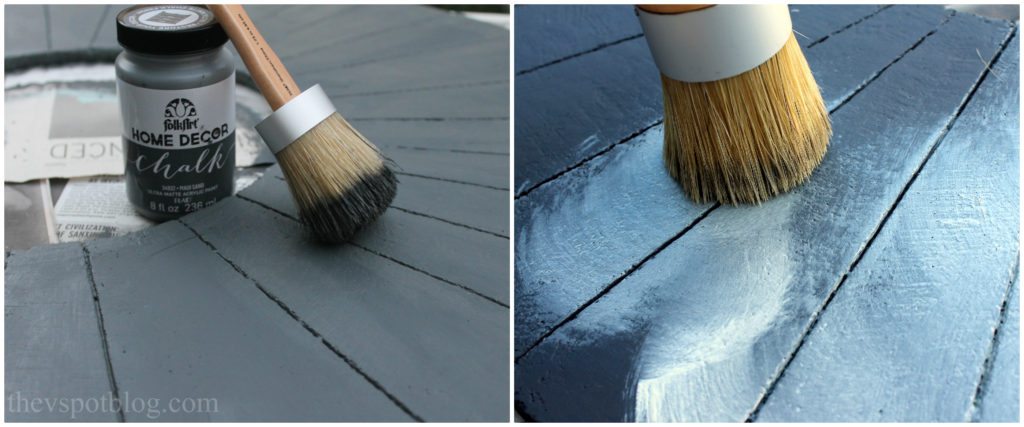
- Chalk paint (I used Folk Art Home Decor Chalk Paint in Maui Sand
.)
- Chalk paint wax (I used Craft Folk Art Home Decor Wax Sealer
in White.)
- wax brush
- wire for hanging
- sandpaper or sanding block
- putty knife
On a tabletop, I lined up the 3 sheets of STYROFOAM so that they formed a square. I determined the exact center of the square by stretching a ribbon from opposite corner to opposite corner. X marks the spot. Mark the middle and draw the circle. (I used the ‘ol tie a string to a pen and pin the other end of the string to the center point, making a compass.)
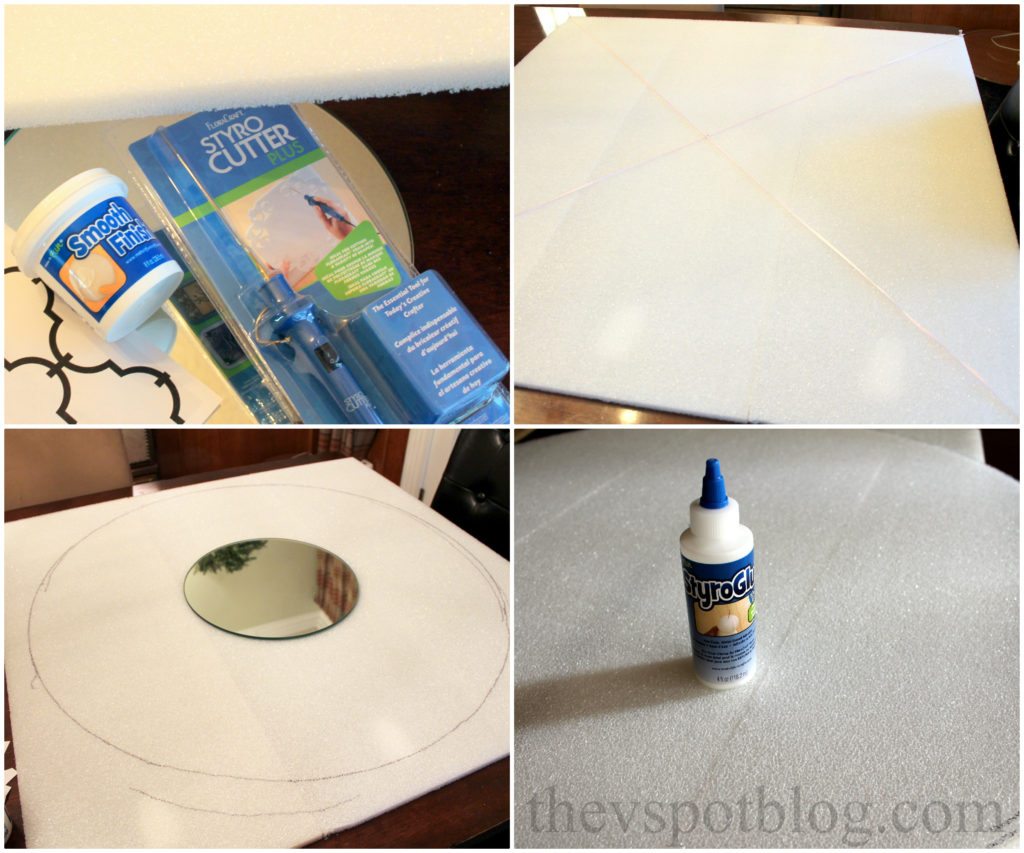
Once you’ve created the circle, use the StyroCutter to cut along the curved line of the individual pieces. It is much easier to handle the individual sheets. (You can see how easy it is to use the Styro Cutter by watching this quick video.) Once the circle shape is cut into the STYROFOAM sheets, go ahead and apply the Styro Glue to the edges and set the edges together, gluing your circle. Let dry several hours or overnight.
When your edges are dry and you have a nice circle to work with, take a straight edge and a pen, creating spoke-like marks all over your circle. I pretended mine was a pizza and drew lines accordingly: halves, quarters, eighths, etc. They do not need to be perfectly spaced or perfectly even. Since I was going for a primitive folk art look, it did not need to be perfect.

Once the lines were drawn, I used the Styro Cutter again to lightly “score” the sheets of STYROFOAM. I wanted the finished product to look like lots of little pieces of wood that were glued together.
The next step was to center the mirror, mark around it and cut the center hole out of the circle. (For some inexplicable reason, I failed to take photos of this process.) NOTE: Be sure to cut a hole that is smaller than your actual mirror’s diameter. My mirror is 12″ so the diameter of the center hole should be about 11″.
Once the hole is cut, take the Smooth Finish and lightly spread it on with the putty knife. Let dry overnight and lightly sand.
Following the directions on the chalk paint, apply and let dry.
Apply the wax sealer, letting dry between layers to determine the amount of coverage desired.
When the wax has completely dried, flip the painted side down, carefully apply the E6000 along the back edge of the center hole and position the mirror on top of it. The weight of the mirror will help assure an even spread of the glue. While the mirror sets and adheres to the frame, apply a dollop of glue and a wire loop to serve as a hanger on the back of the mirror and let dry.
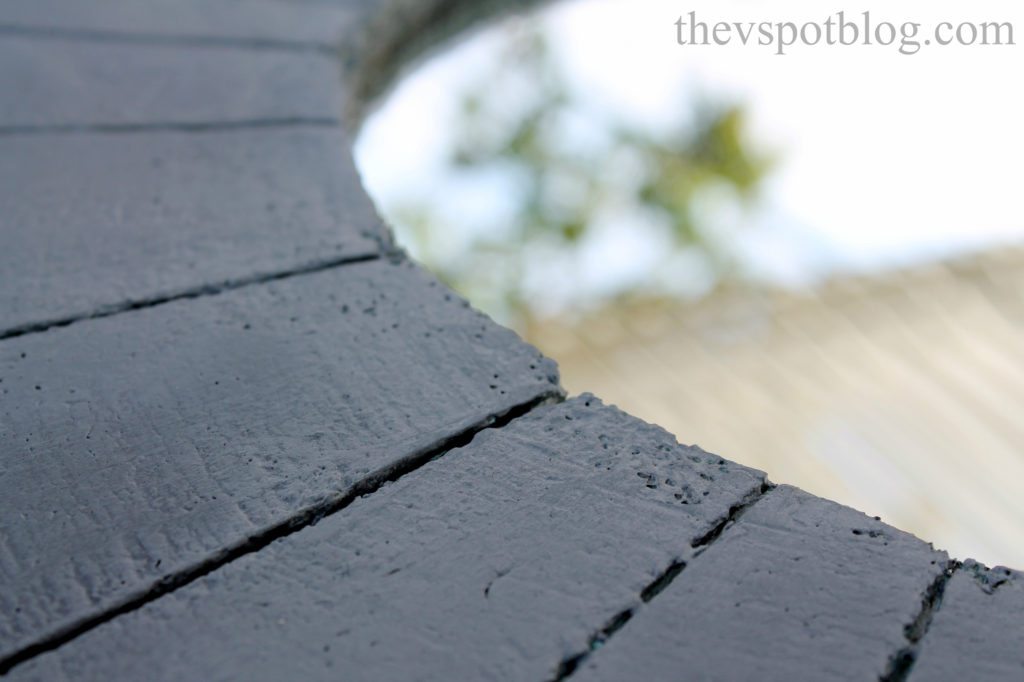
I’m pretty happy with the way it turned out. It really does look like wood, and you’d never know it started out as STYROFOAM sheets!

I haven’t decided where it will ultimately end up, but being as it is so lightweight, I have a lot of options available.
Have you tried any of these fun products from FloraCraft yet? What did you make?
Disclosure: This post is sponsored by FloraCraft. All opinions are 100% my own. This post contains affiliate links.
Okay that just seems like magic! I still can’t get over how foam can look like that.