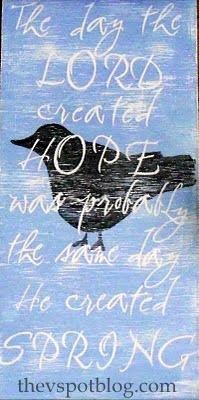
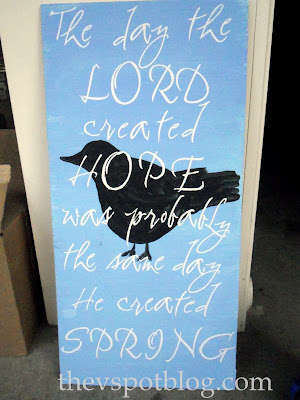
was probably the same day
He created SPRING.
I love that!
Let’s make some artwork based on it!
- Grab a piece of wood. In this case, I used 1′ x 2′ scrap of 1/4″ plywood.
- Grab a paintbrush and some good white primer. ( I like Kilz.)
- Put 2 generous coats on.
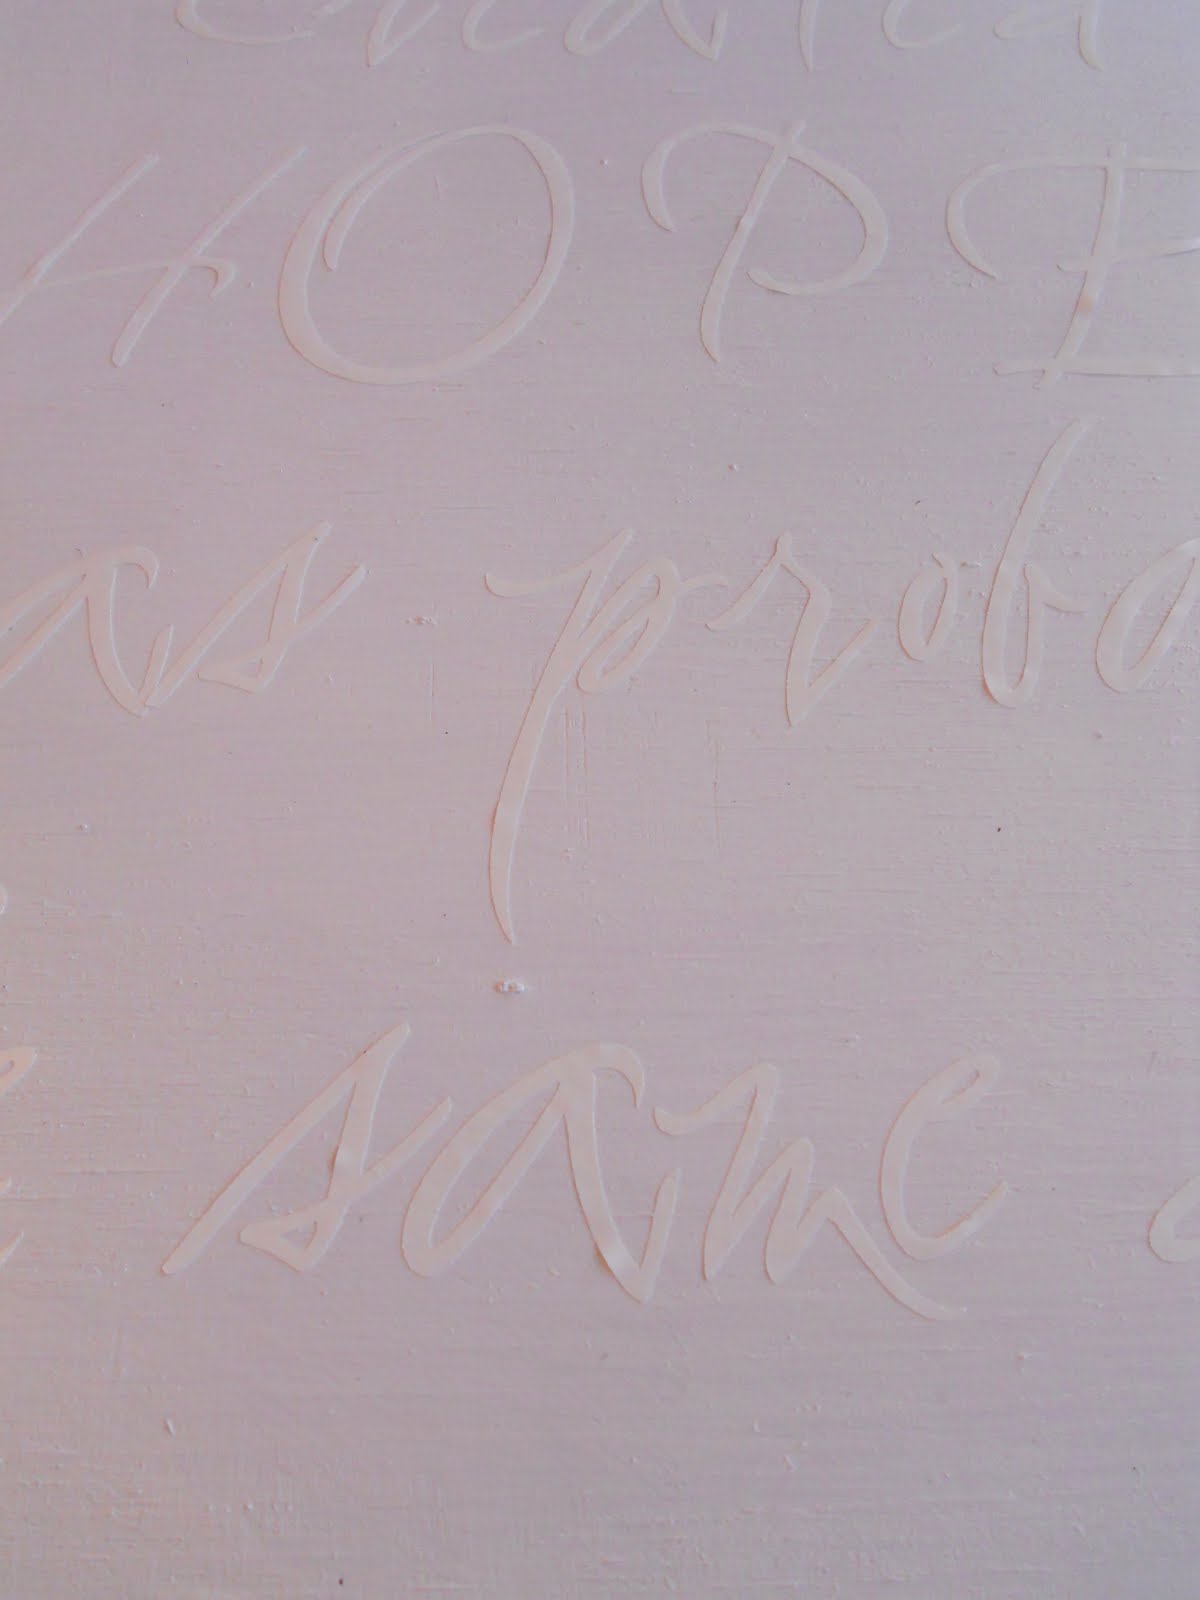
Once your primed board has dried, you’re ready to put on your letters. I used my Cricut to cut out the letters for the Spring quotation that I chose. You could also use pre-cut adhesive letters.
(Tip Of The Day: You DO know you can use regular old household contact paper/shelf-liner instead of the expensive vinyl, right…? And that it comes in black…?)
So using some of the contact paper I had on hand, I cut out my letters and kind of eyeballed where I wanted them to go. I just played around with the spacing until it worked for me.
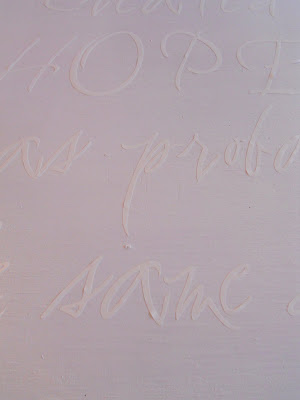
- Once you know where they’re going, peel off the backing and stick them down on the board.
- Rub them on with your finger until you get a good adhesion, then take your primer and put another thin coat over the top of the letters. (This ensures that you’ve got a good seal over the letters)
- Once dry, take the paint color of your choice and paint the entire board. In this case, I chose a Robin Egg blue.
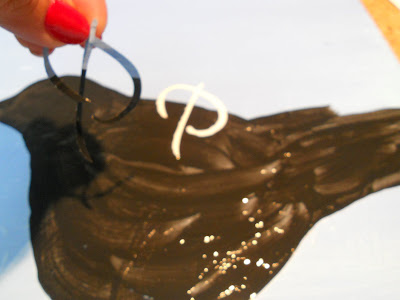
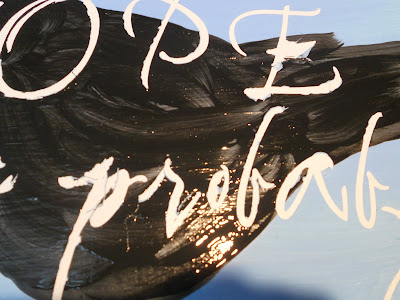
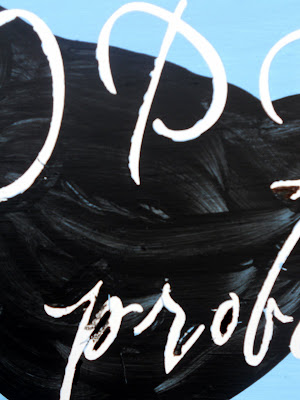
- When your color base coat is dry, paint your bird (or leaves, flowers, bunny, whatever…) onto the board. I did this free-hand (and boy does it show) but you could use a stencil too.
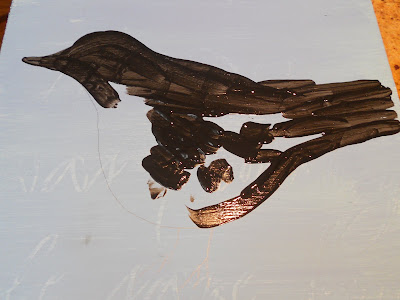 You will be painting the bird (or whatever) over the top of your letters. While the bird’s paint is still wet, start pulling off the letters under the bird. If you let the paint dry, it winds up pulling off the blue base color as well and you want the edges of the letters to be as crisp as possible.
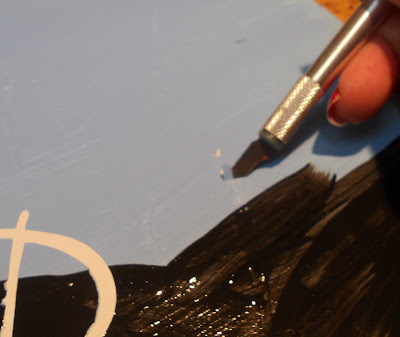
See? Sometimes it pulls up anyway.
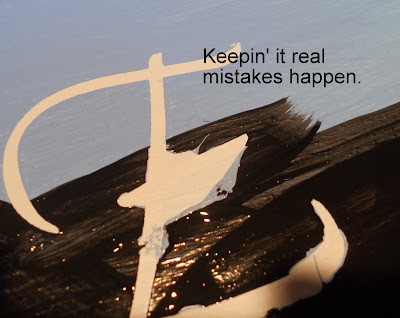
No worries. Once I’m done I will take a smaller paintbrush and touch up the black paint. (Possibly a Sharpie if it needs to be really detailed.)
Let it dry overnight.
- Toss it on the floor of your garage.
- Dig around on your husband’s workbench for an orbital sander because yours is buried somewhere on Your side of the garage under arts and craft supplies, holiday decor and other thrift items you bought but haven’t put away properly or finished working on because you have decorating A.D.D. and. Oh yeah….
- Sand it really well.
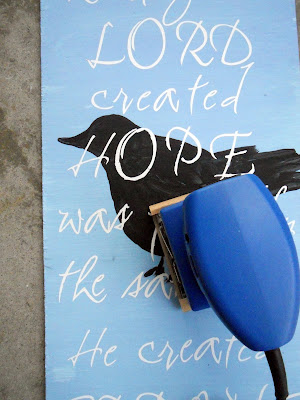 It’s OK to distress it really heavily. I would have done more, but I worried the script I chose wouldn’t stand out enough if I kept going.

Mix a few drops of a pearl or silver acrylic paint with some water and lightly brush it over the artwork. (Think: brushing egg on a pie crust. It just finishes it off.)

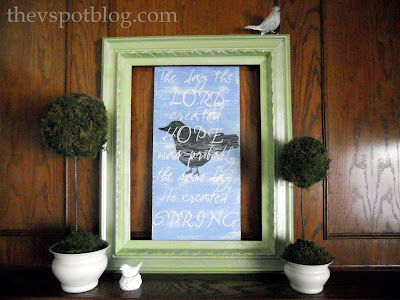
Try to figure out where you’re going to put it since you have the asymmetrical mantel from hell.
Like it? Give it a try!

I love the saying and the result. I always forget about the contact paper.
I love the saying! You did a nice job!
love the artwork great job.
This looks so professional that it could be in PB or Ballard.
Thanks for the very easy and well written instructions and pictures.
Wonderful!!!!! I would love to make a big board for 1 wall that needs something other than a picture.
Thanks!!! What a great and inspiring stop.
Yvonne
I use the ‘eyeballed’ measuring method all the time. Rules are so overrated 🙂 This is a gorgeous project thanks for sharing
mistakes make it all better in my opinion and most people never know. Your project looks great! Thanks for sharing.
Cherie
Gorgeous as usual. I love that blue color…it screams Spring. I always love how you keep it real 🙂
looks beautiful, you did a great job on it. thanks for sharing this at my party!!!
I love this and have the perfect place for it!
Super, one more thing to add to my to-do list!
This is beautiful!
Do you know the things I would damage by trying to use a sander? I may sand some skin off my leg! Me+tools=disater.
But good job to you!! =) I like it a lot!
What an awesome piece of arkwork…I love it!
Blessings,
Linda
I’m really sorry if this posts about 12 times because for some reason, it keeps disappearing (or “redirecting” to nowhere), but just wanted to say that I’m so glad you found my blog so I could find yours! This artwork is AMAZING! I seriously thought someone made the quote in Photoshop and cannot believe you made it – very impressive! : )
This is beautiful!
Thank you for stopping by the Back Porch.
That’s gorgeous and the saying is lovely.
LOVE THIS! Come on ova’ and link up to my Linky Party! xoxokara
*ENTER LINKY PAR-TAY Here! *
I love the scripture!
What a great project, I finally opened my Cricut a couple of weeks ago and I’m going to give your project a try. Thanks for sharing and for the great tutorial.
OH! Me love!
Wait. Contact paper you say? CRAP.
Very cute, love it! Great idea!! Thanks for linking it up at my party:)
I love that quote and the blue you chose is so fresh and “springy”! I do use contact paper, but the cuts don’t do so well. What settings on your Cricut do you use to cut it?
So cute. You are so talented!
Ashley
http://www.TheThriftyWife.com
So cute!! In from Kara’s to say hi!! Love this project, very springy
I had NO IDEA about the contact paper! Good tip!
I love anything with birds right now….not sure what’s gotten into me.
this is absolutely beautiful!! would love if you ever have a chance to come link up to handmade tuesdays @ ladybug blessings. http://www.ladybug-blessings.com
I absolutely love it! And the saying is just so perfect. I was going to say that you should totally offer these for sale. And you are! 🙂
Absolutely love this. Thanks so much for sharing this, I’d love to give it a try!
Oh my gracious! This is beautiful! I absolutely love it! Thanks for sharing!
This is so gorgeous! Thanks for the tip on using contact paper vs vinyl. I just got a bunch @ Dollar Tree and will have to try this!
Feature Alert! Feature Alert!
That’s right! You were featured today over at Today’s Top 20!
Hope to chat soon!
Amanda
http://www.todaystoptwenty.blogspot.com
I love this saying. Great job. I would love for you to link it up at our week long link party
Amy
@ SistersoftheWildWest.blogspot.com
I LOVE that! It’s so pretty…and spring-y!
WOW! Such a nice piece! That is one awesome statement!!!
I love that! Love the colors and especially the distressing. 🙂
I love this! Thank you so much for sharing!
Love this! So fresh and springy!
i am so impressed by your patience and attention to detail…i want one, but i could never do what you do.
i love the family rules one you did a while back, i think about it often. wish i had that kind of patience and talent.
Beautiful quote and darling art piece! I love the technique you used! The distressing just sets it off! Great job!
Michelle 🙂
Love it! Great job!
LOVE!
You know what I really want though… one like your family rules one. oooohhh how I love that one!
Terrific DIY artwork! Love what it says too!
–Katie
http://www.blah2beautiful.blogspot.com
Creatively LIving Outside the Box
Wonderful project! I love the phrase. SO cute. I am a new follower from today’s hops. I hope you enter this in my Thrifty Thursday hop next week.
Blessings…
Johnnie
Hey Viv this is beautiful! You are so talented. Thanks for linking this up to the party this week.
Love this it is SO cute.
abranconier.blogspot.com
Really cute! I’m working on a project with contact paper too 🙂
I heart this idea! I have never thought about using contact paper for that. Here’s an opportunity to share you etsy shop with others too… Undeserving Grace Monthly Features
have a great weekend
{tara} from Undeserving Grace
Just Beautiful…. Have a wonderful weekend
Cheryl
This is absolutely beautiful!! 🙂
beautiful
painting and post
xoxo from argentina, mely
Hi Vivienne…
Ohh my gosh…you are just full of great spring project ideas, my friend! I was in awe of your yard chandelier and know this…this pretty spring plaque! I love this saying too! It’s gorgeous, my friend! Thanks for sharing it with us! It certainly is looking springy at your place…just beautiful!
Happy spring wishes,
Chari @Happy To Design
This is so gorgeous!! I love it!! I don’t have a cricut but may try it with contact paper and stencils. Thanks for this tutorial.
Ruth
beautiful artwork…you are one creative and talented girl…this blue is just the right shade…thanks for linking it up!
blessings,
alison
stuff and nonsense
That is such a cute plaque! I love the bird, the message and the color. Very well done.
Visiting from Tatertots and Jello. It’s great to find your blog.
Have a great weekend.
Pam
I love love LOVE this! And this technique could be used for so many different things. Thanks for sharing!!
I love this! I have some materials for this type of project but am still gathering ideas. Great directions.
You gave such a good explanation of the process that I’m fairly certain I could tackle it. I just realized that I may need to get a manicure before I attempt to post a how-to at Brambly(your hands look so nice in the photos).Thank you for the inspiration. Have a terrific evening!
Ann-Marie
WOW! You make it look so easy too. Very pretty. 🙂
This is so pretty. I love teh bird behind.
Thanks for the tip about the contact paper.
megan
craftycpa.blogspot.com
I love it! Beautiful words and a beautiful painting. Thanks so much for linking this one up too!
Vanessa
This is so sweet! I love the quote and I totally love that blue color.
This is so cute! Love the quote you chose. Thanks for the tip about contact paper. I have a Cricut machine and didn’t know this. I’m going to look for some on Monday!
Beautiful quote and art piece. Thanks for sharing!
thanks for linking up to “say what saturdays” Your stuff is SOOO cute!!!!!
BEAUTIFUL!!!!!! I’d love for you to check me out too 🙂
http://runwithglitter.blogspot.com/
I love the quote and you did an amazing job – perfectly spring. Love every detail! 😉
Happy Spring!
Roeshel
Cute piece of artwork 🙂 Love the font that you used – I need to get a Cricut!
LOVE this, you did a wonderful job, and thanks for linking up with VIF!
hugs,
Debra
loving this! I love Spring!
great tute,
“catching” you this week @ ccc
gail
Awesome tutorial! Thanks for sharing 🙂
I LoVE LoVe LoVe this. I wish I could free hand that well. I have tried to free hand birds (which seem easy) but mine always look 9 months pregnant. I am your newest follower and I would love a visit from you over at fineandhandy.blogspot.com.
Very very cute!! I love this!!
Ashley
http://www.simplydesigning.blogspot.com
This is a lovely art piece. I am happily your newest follower!
Please come by and sign up for my giveaway!
It turned out beautifully!! I would love it if you would link this up to my Marvelous Mess party. Each party I pick one project to feature on my sidebar for a week!! Here is the link: http://bit.ly/i5BHt8
Love it! And a great tute too. 🙂
Wow. I really love this! I would like to invite you to post this at my link party Masterpiece Monday, at my blog, Boogieboard Cottage. Have a great week! Mary :O)
Love this! Such a great idea! Thanks for sharing!
Simply gorgeous!
*hugs*deb
Very nice! I saw your link over at Not Just A Housewife’s “Show Me What Ya Got” and now I’m a new follower to your blog. I loved your profile description! 🙂
http://educatorssoliloquy.blogspot.com
so beautiful. thanks so much for sharing this at my party!!
Oh I just love this, awesome work!
hiya i came visiting form night owl craftand i am so glad i did , this tutorial is very simple but detailed thanks for sharing x maybe i will see you at mine /
xmaggiex
This is so creative! I love it! I can’t believe you did it yourself, awesome!
I did not know that a normal Cricut machine can cut contact paper! What an awesome tip!
So, it was cool before, but it is really really neat now with the distressing job. I love anything “birdie.” 🙂 Beautiful work!
Very beautiful…love your blog page thank you for your inspirations…Sincerely Rachel
http://ourcreativehands.blogspot.com
http://www.ourcreativehands.com
I just found your blog and am your newest follower. This is fabulously stunning! You are one talented woman.
I love the way this looks! So spring and fresh!
Deanna
http://deelitefulcreations.blogspot.com/
Wow, this looks amazing and I love Spring, so this is a great craft.
P.S. I am having a giveaway on my blog, the cutest and most practical diaper bag you have ever seen!
This is so precious! Great tutorial! (I’m your neighb from Funky Junk 🙂 )
So very cute!
Love this! Thanks for sharing!
I love this. Great idea to use the letters under the paint. Thanks for the tip on the contact paper hadn’t thought of that one. DUH..
Great project! Thank you so much for linking this creative project up to Saturday Spotlight hosted by SAS Interiors and Green Door Designs. I loved your project so much that it was my pick of the week. Please grab the ‘I’ve Been Featured’ button the right sidebar of http://www.sasinteriors.net. Can’t wait to see more of your amazing creations!
Jenna, SAS Interiors
Neat project. Thanks for the tip about the contact paper!
That turned out great! Fabulous quote! Thanks for linking this up as well! Would you please add my party button to your post? Thanks!
Great tutorial…I look forward to trying something similar! Do you have any good ideas if I don’t have a Cricut?
Michael in Sweden
So talented! Thank you for linking up to my K.I.S.S. blog bash last week. This weeks blog bash is in full swing again!! If you haven’t already please be sure & link up more of your creativity, I look forward to seeing all your great ideas. 🙂
Drop by The Tattered Tag
VIvienne,
I love this! … beautiful saying.
And thank you for the helpful hints you gave my yesterday … I have since opened up my email AND added a button!
Thank you for linking up with me!
~Bec
Great tutorial girl and your painting is too cute!
What a completely awesome tutorial! I’ve been dreaming of creating my own similar art projects, but thought I might have to come up with some kind of screen printing system. I SOOOO have to get a cutting machine…been wanting one a long time! Thanks for sharing 🙂 Lisa
What a great project! Thanks for posting this!
This is lovely. Hope to see you at My Dream Canvas!
Wow! I wish I had a cricut or sillhouette…someday. But I will definitely be using contact paper! Love this project! You keep amazing me. 🙂
It turned out so cute! Your technique of painting over the letter and then pulling them up is awesome!
You make this just look so easy…I doubt I’d be able to recreate such fantastic work…but I’m loving looking at yours!
OMGoodness! That is such a beautiful art project… I can already see ideas for “Personalized Christmas Present Projects” cooking in my brain… 🙂 Thank you so very much for sharing this. My husband recently got me a Silhouette Cameo for my Birthday & I’m just now starting to use it… I can picture eventually “selling” my work.
So, I have this CHRISTMAS Image of a pretty tree and inspirational wording. would I put in “the negative” (outer image) instead of placing the wording?
Thanks so much for the “Contact Paper” tip… YeeHa! I know I have a bunch from our old house that was destined for the Donation Box… Yeah, for repurposing & saving Money!!!
Question? – What type of paint did you use for the blue? Acrylic? You mentioned that the white was primer. Does that mean that you used Kilz? Sorry, I’m really new at this….
Hey there, KM_Designs. Your email isn’t enabled, so I hope you see this. The blue is just acrylic paint, but you could use spray paint as well. (That would make the letters a bit more crisp and clean, actually.) If you want to make the works look like the are “over” an image, you put them on the board first, then paint your image over the top of them. When you remove the letters, they’ll look like they’re written on the Christmas tree. Hope that helps.