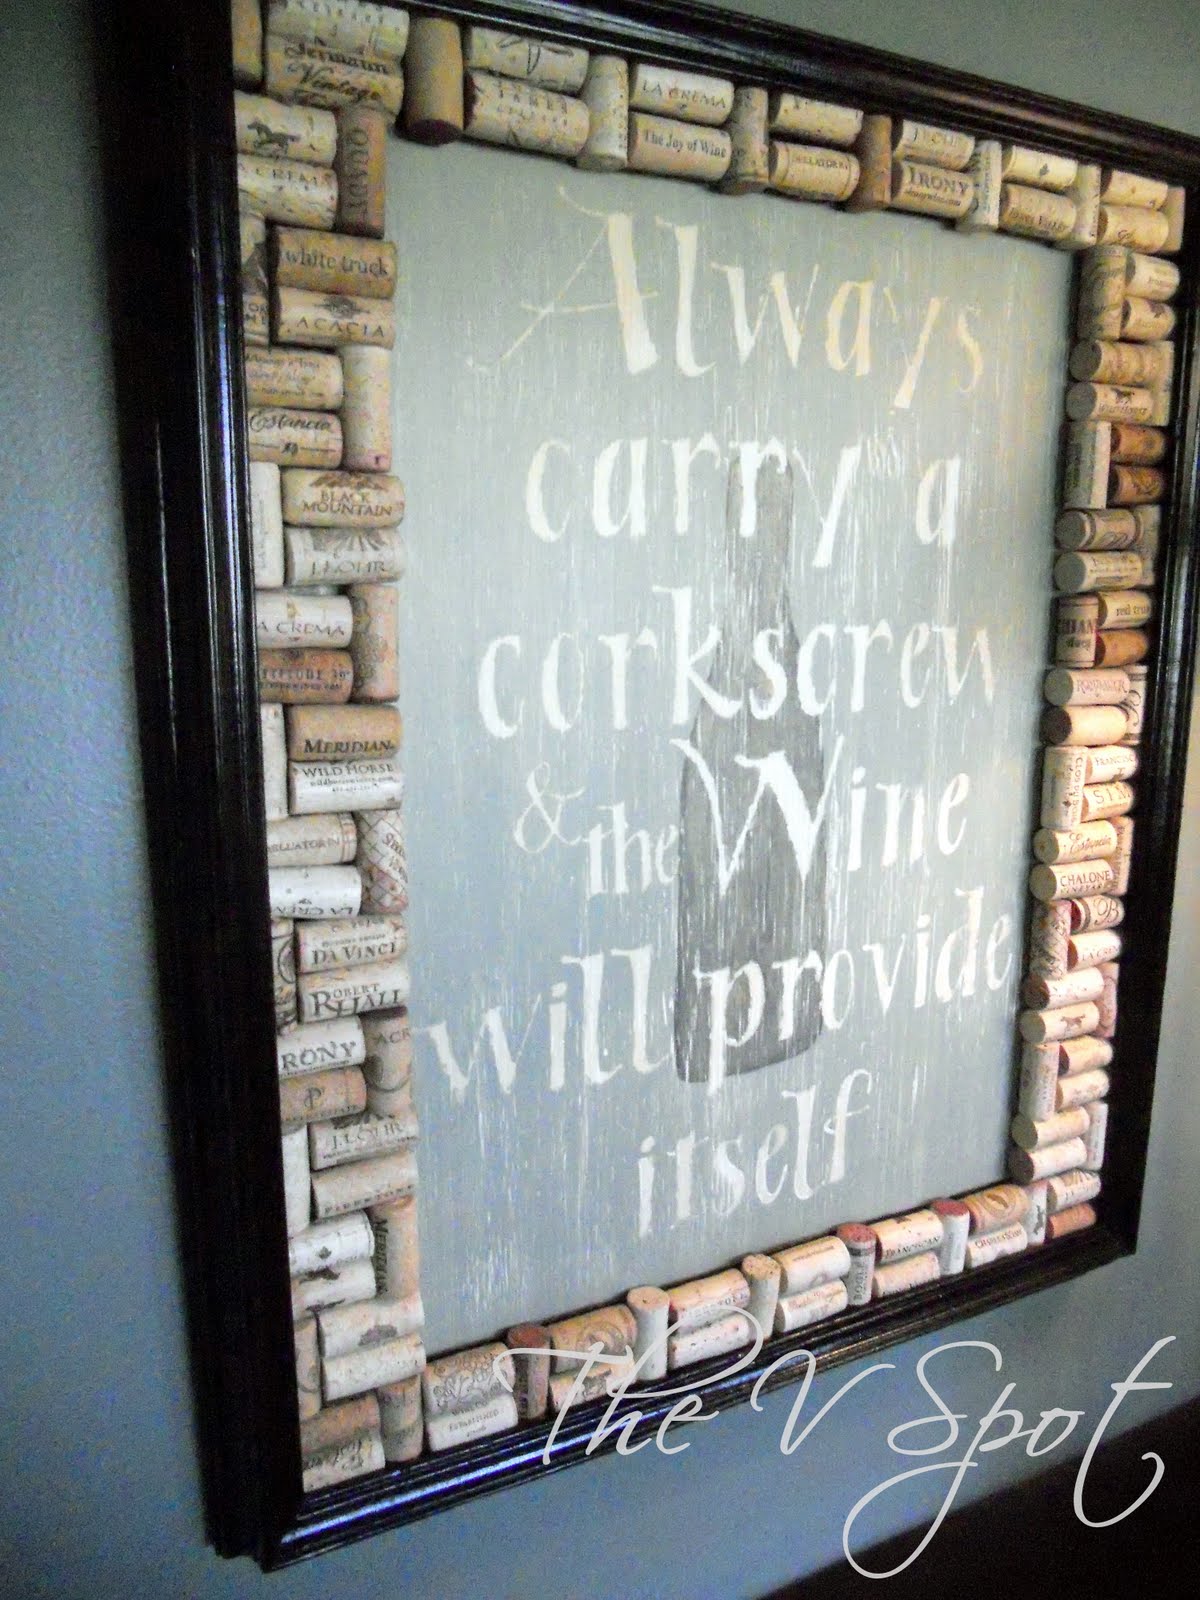
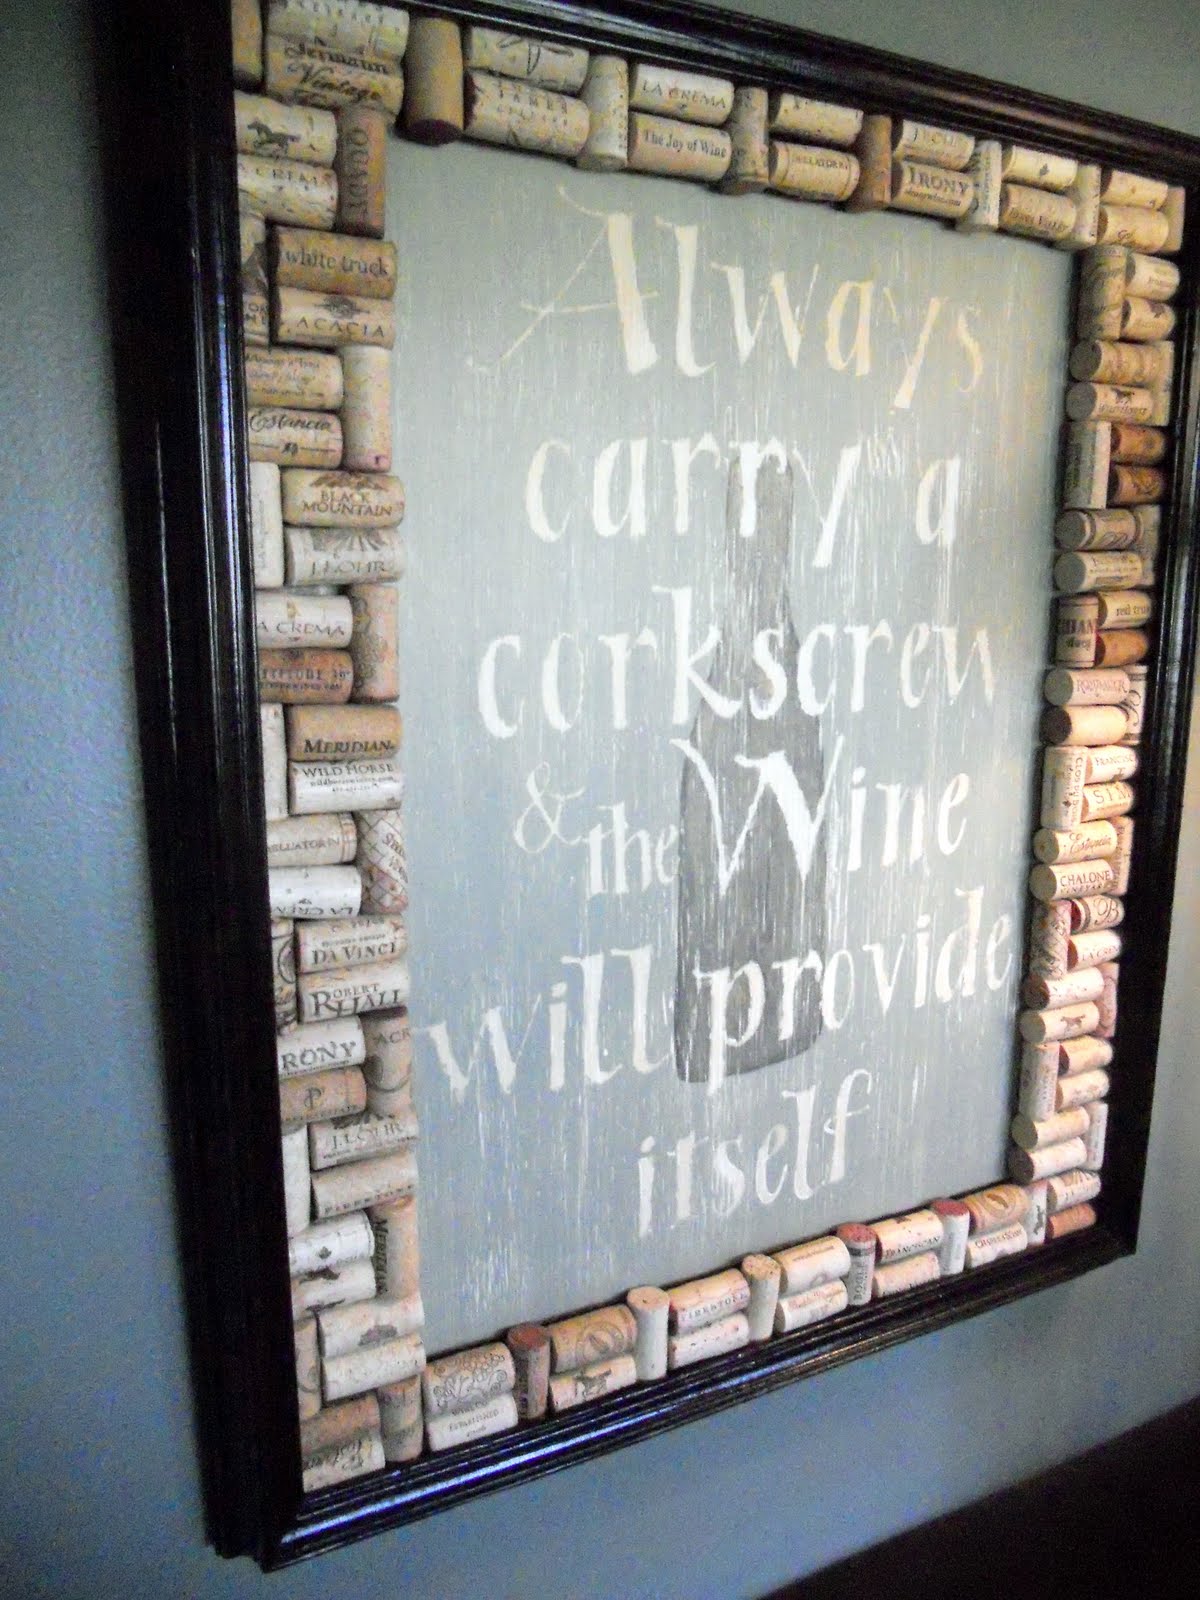
A few years ago I bought a friend a birthday card that said “Always carry a corkscrew and the wine will provide itself”. As much as it was the perfect card for her, it also resonated with me for a couple of reasons…
- I really like wine
- It reminds me to be ready for opportunity when it knocks on my door
- It reminds me to have faith that things will fall into place
- I really, really like wine
This is the project I did for the first week of the One Month To Win It contest. I made a distressed painting with this phrase and created a “mat” out of wine corks.
The first step in this project is to drink a lot of wine and save the corks. I have been saving wine corks for quite a while in order to get enough of to do this project. I also had my friends save them for me, but I have heard it is possible to buy corks in bulk at some craft stores. (But I’ve never needed to do buy them, so I can’t confirm that.)
 1.) Starting with a $5 thrift store frame, I had it fitted with a piece of 1/4 inch plywood and then primed it using a basic brush on primer like Kilz.
2.) Using acrylic paint I had on hand, it was painted a golden-taupe color. You can use any color that you like on this step. Whatever color you choose is the color your letters will end up being.
3.) Next I used my Cricut to cut the letters out of contact paper. If you don’t have a Cricut or a Silhouette you can use pre-cut scrapbook stickers. You can buy them at Michael’s or JoAnn’s. The next step is to arrange them how you want them and adhere them to the board. I am a big fan of the “just eyeball it” Letter Placement Technique, especially if you’re using a script-style font.
4.) Once the letters were adhered to the board, I covered the entire board with sage green acrylic paint went. While the green paint was still slightly wet, I free-hand painted a wine bottle right over the top of it all (and like a dork, did not take a photo of this part.) I used black paint to do this and it blended a bit with the still slightly wet green. I also got a little bit of gold paint and put little streaks of gold over the bottle.
5.) While it was still wet, I peeled off the letters. If you wait until everything is dry to pull the letters off, there is a very good chance that the paint will peel up with it. While this can still happen while it’s wet, at least if it’s still wet you can blend the paint to “fix” the problem areas. Once it’s dry, you’re kinda screwed. (That’s a technical artist term, by the way.)
I painted a black border around the perimeter of the bard. My thinking was that there would probably be gaps between the corks and that black showing through would be better than the green.

6.) I allow these distressed art pieces to dry overnight. Once completely dry, I use a light to medium grit sandpaper and go over it with the hand sander until I achieve the distressed look I wanted.
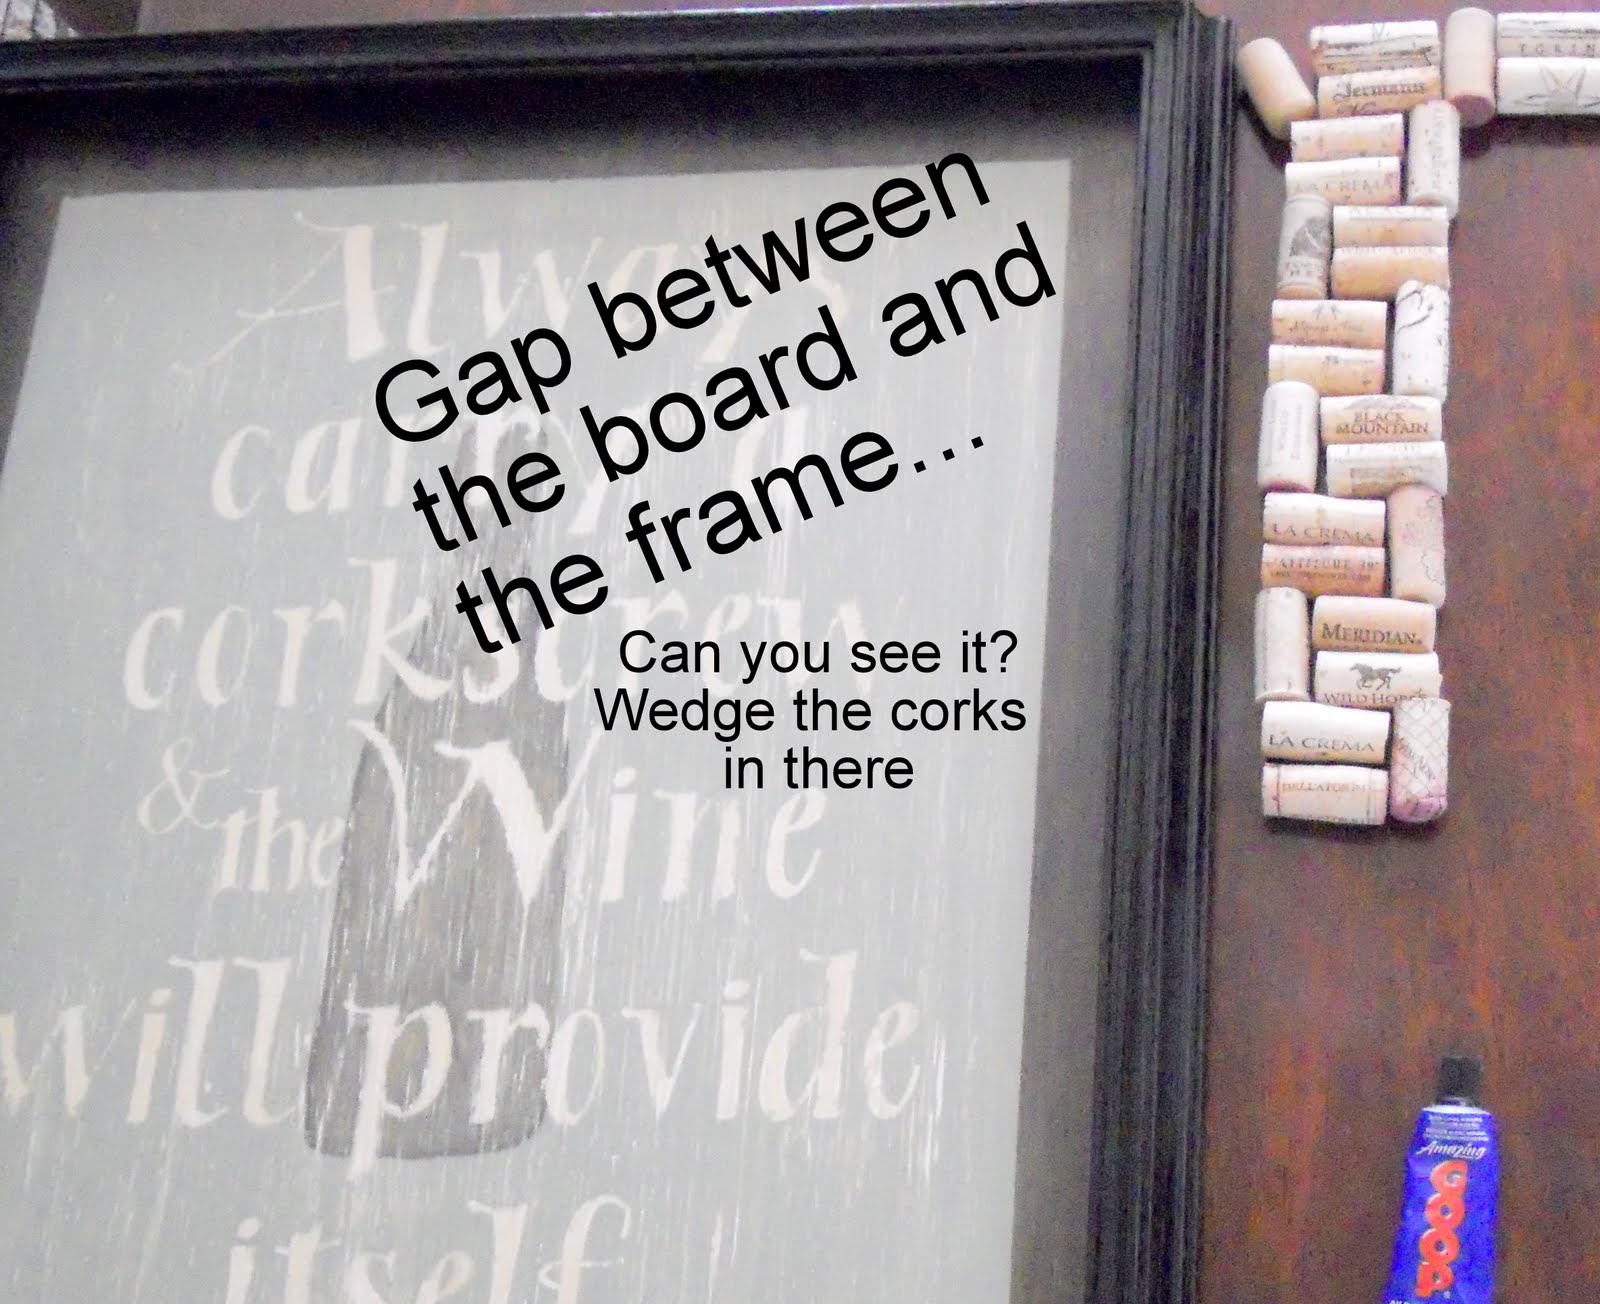
7.) Wipe down the board. I usually put a metallic wash over these pieces. It softens the look of the piece and adds to the distressed look. In this case, I just water down a little gold paint and brush it over the top. Once this dried, I place the board into the frame. There was a gap between the board and the back of the frame that was just the right space for the corks.
8.) Figuring out the placement of the corks was quite a puzzle. They are all just a little bit different. Some are slightly shorter than others, some are a little fatter, etc. Once I got them in the pattern I wanted, they were wedged and glued into place one at a time. DO NOT USE HOT GLUE FOR THIS. Use an epoxy of some kind. Hot glue dries too quickly and you will most likely need to wiggle them around or re-position some of them. A strong, but slow drying epoxy works best.

9.) Then to make sure they were really secure, whatever was handy and heavy was used to weigh them down while they dried. (In this case, Mexican Train Dominoes and ceramic candle holders.)
I hung it against a green wall in a funny little niche that is always tricky to decorate because it is small and rather dark. This feels like it works here because this art seems to add more texture than it does color, and it has created sort of a layered look.


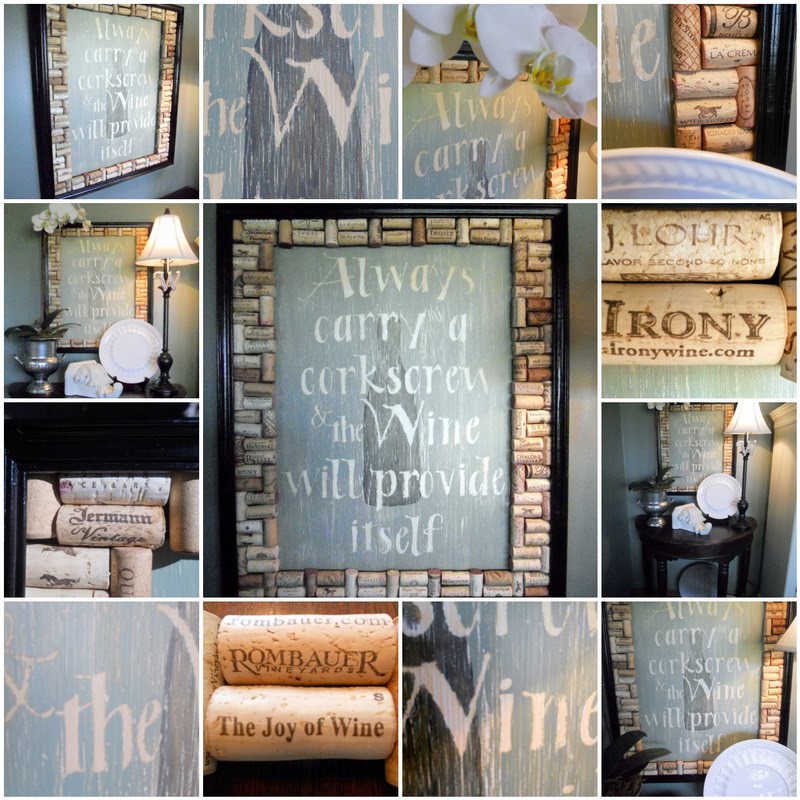
I’m really happy with how it turned out. I hope you all like it too!

Pin It
looks fantastic! 🙂 we have all of our wine corks saved since we moved in together, and i have them all hanging up in shadow boxes so i think this is perfect!
So cute! Great tip on peeling up the letters while the paint is wet! Love it!
Wow! Darling, amazing super awesomeness! Love it! Great job, seriously.
I love, love, love this. A girl gotta do something with the corks.
This is fabulous! Great idea!
I like it a lot! I also like the reminder to have faith…
A darling project I love it…. turned out great!!
xoxo
Karena
Art by Karena
I love this! What a great quote too….I love wine!
That looks so good. I know so many people who save wine corks and what better use that this!
Really great project – I think it turned out so elegant!
Loved the paint effects!! Very cool! Turned out beautifully!
Hugs
SueAnn
This is awesome! We have a load of wine corks just waiting for something like this, thanks for sharing!
gorgeous result! thanks for the tips on peeling up the letters, i always wanted to do this but now i see your tutorial, it helps!! thanks
i’m your newest follower from the Bloggers Party and Hop at TypeA
Susan at http://tea-diary.blogspot.com
Really love how this turned out! Love all the layers…your hard work paid off 🙂 Laurel@chippingwithcharm
LOVE this! Great job!
So glad you made it through to another week, I really do love this project. I just voted for my fave week 2 entry, although I had about 3 that I wanted to vote for!
Haven’t read word one, I’m still taken by the new profile picture!!!
You know how much I love this picture! Gorgeous!
I like it!!
And I’m off to vote!
Love the pattern in which you place the corks! lovely!
I am having a fine art photography giveaway by Melanie Alexandra. A SF based artist who has an etsy store. Do check it out. Just tell me which is your favorite image to win.
http://houseonashwelllane.blogspot.com/2011/04/fine-art-photography-giveaway-by.html
This is a really neat idea! Thanks for sharing.
That is so cute! I love the corkscrew matte! Very creative & fun.
Very cute project. I have bought some wine corks in a craft store, but I haven’t made anything with them yet. Would have been more fun to drink my way through the project though!
I don’t have a cricut or sillhouette but I would love to try some contact paper and exacto knife. Love this project. The distressing is perfect!
I loooove this 🙂 and I love wine…thanks for sharing this!! Cheers!
Lina
Fancy Frugal Life
It looks great. (I really really like wine too. So much so I’ve just spilled it on the sofa whilst blogging. Sigh)
Love this idea and I love the saying!!
I LOVE this project! I am a wine lover myself 🙂 Found your link @ Craft-O-Maniac…I’m your newest follower!
Gorgeous. Love the quote too….as well as your passion for wine. I am right there with ya!! This would be a great gift for some wine lovers I know!! Thanks for linking up!!
Okay, let me get this straight. You’re not actually going to TELL us which project is yours?
You want to be all fair and crap?
I tried really hard to tell which person was you by the writing!
But I voted…I hope it was your project! Also…it really WAS my favorite project…just so you know.
Also, I’m lame and forgot to compliment you on THIS project…but it turned out fabulous as usual!
I love your frame! I am your neighboor over at DIY party:) I love how your picture turned out.
This is such a super duper idea…love the look of it!!!
Blessings,
Linda
Shawn=RUDE! At least READ the post first! Gah! 😉
I’m in love with this frame. I want one. I need one for my kitchen. Make me one. I’ll pay for it. I’m good for the money. Actually, MY MOM could use this as a gift for Mothers Day! So…get busy! Kthanks.
PS. I voted for my favorite. I hope yours was the CHAIR!
Oh my goodness, I love this! I also LOVE wine and always keep the corks in hope to find something to do with them some day. I might just borrow this idea from you!! Thanks!
Jen
Scissors & Spatulas
I loved this! You are awesome, I know you know this because I tell you often. I am nervous to vote for the next one, I can’t decide between two different ones I am nervous I will pick the wrong one. LOL. Maybe tomorrow I will have a clearer head & go back to vote.
Very cute!
I’ve been collecting corks for a while….I need to do something like this with them.
I voted. I think it might be your project but I’m not sure….
Awesome! I really need to make some things with my corks…they are out of control!
Kristen
Turning a House into a Home
Great job making a creative frame out of corks! Thanks for linking it up at Creative Bloggers’ Party & Hop 🙂
Very cute idea! We certainly have enough wine corks to make one (or more!) 🙂
Thanks for the tutorial.
Visiting from Wow us Wednesday. It’s great to find your blog.
Pam
so cute! I have always wanted to do something with wine corks, what a creative idea!
I love this almost as much as the glass of wine that I am guzzling…I mean, sipping!
P.S. You can also sometimes find wine corks at Goodwill.
Love everything about this! I’d love for you to come link this up at my Tuesday Time Out Linky Party! The link is below!
Smiles,
Melanie
Reasons To Skip The Housework
Tuesday Time Out Link Up Party
This is so beautiful! I think corks always look so artsy and cool in whatever way you display them, and this really does do them justice!!
I’d love for you to link this up to my link party, Your Whims Wednesday! http://mygirlishwhims.blogspot.com/2011/04/your-whims-wednesday-2-and-features.html
U are so creative, i hope u won the contest…..This would awesome over any wine rack, or in the kitchen……..Bonnie
This is just as cute as it can be. You did a great job. Thanks for the good instructions. I would have letters on my forehead and corks in each ear. I am sooo not crafty.
Sure enjoyed looking at your craft, tho. 🙂
I am your newest follower..come over and sign up for a chance to win an awesome enamel house sign.
xo bj
ha ha! love it. thanks for sharing this at my party!
Great job! thanks for linking this up to our Wicked awesome Wed. link party. what a creative idea!
Such a cute idea! And great way to use the corks I’ve been saving!
I always save our corks for some project, someday! I think this is the prefect thing to do with them. Thanks for the inspiration!
Well, I can definitely handle the “drink a lot of wine” part! LOL! This truly is such a neat project Vivienne and we are so glad you linked it up to Inspiration Friday this week! 🙂
Vanessa
This is such a cool piece. Love the lettering, too. you did a great job! Thanks so much for linking up with Vintage Inspiration Friday! xo, Debra
I absolutely adore this project! I am hosting a Springtime Craft and Project linky party today and I would love it if you would particpate.
There is a giveaway involved. 🙂
Nice idea – love how you wedged those corks in the frame – perfect piece & quote!!
Fabulous project! I’ve been collecting corks too (and having fun doing it!) Hope you don’t mind, but I’m totally copying this for myself!
You’ve got a new follower!!
this is awesome. really cool idea.
kathryn
http://www.thedragonsfairytail.blogspot.com
I love this !!!!! SO SO SO SO SO SO CUTE!!!
http://sailingwithbarefeet.blogspot.com/
Absolutely love your project, love wine and art, this is something that I will be making for sure. Thank you for the great tutorial!
XXX Ido
OK, I know you’re going to be totally surprised, but I LOVE THIS! Should I even bother coming to tell you I’m featuring your project, or do you just want to assume that your rockin’ ideas have a a place on my Saturday Favorites list? HAHA!
Thanks for linking up at The Little Birdie, you know you always have a huge fan in me! 🙂
Awesome……I too love my wine……
This is perfect!!
I am so going to copy you!!!!
Now do you need to drink wine while making this…..
This is great, I work for a winery and have a ton of corks. Thanks for sharing!
oh wow!! this looks lovely!
Okay this a new kind of AWESOME! Like the kind I’ve never seen before. Where did you even think up this idea?
It is fantastic~ so creative and what a great conversation piece too!! Well don! Thanks for sharing at FNF! 🙂
Love it! Thanks for the tutorial! 🙂 Thanks for stopping by and linking, have a great weekend! 😉
This is a great idea. Love the way it came out. It would make a great frame for a lot of things!
This looks lovely, hope to see you at My Dream Canvas.
Love it!!! Seriously, and love wine too…fab idea…. new follower..
blessings, julie
lifeatfirelakecamp.com
I wanted to let you know that I featured this on my weekly bookmarks post – stop by and check it out. Grab a button too.
danielle
Hey girl!! Thanks for linking up to my party!!!!
I can’t tell you how much I love this! I have an Etsy shop where I make handmade wine accessories, I run a weekly post every Wednesday called Winey Wednesday and I love Wine! This is amazing! I am a brand new follower. I found your blog through your link up on WhipperBerry.
http://www.theelephantstrunk42.blogspot.com
viviene! great job! It looks super
gail
Such a clever idea!! It turned out so great. I think for those of us who don’t like wine, corks are also available on Ebay…or so I’ve been told.
If you have time for one more link party, I just started one (on Sundays) over at Addicted 2 Decorating. I’d love for you to link this up!!
(And do you have a new blog design? It looks different from what I remember. Anyway, it looks really nice.) 🙂
Wowzers! That looks fantastic! Thanks for sharing such a great tutorial!
Visiting from the Creative Crate – this looks great! Awesome way to re-purpose a cork collection!!
http://megschmitt-neveradullday.blogspot.com/
Beautifull!!!!!!
so creative… I love it! I am soooo in love with cork right now.
kisses
heather
Well apparently I voted for you in the wall art week because this is what I voted for. Like you, I love me some wine. I’m having some of my frequent wine-drinking friends save me wine corks so I can do one of these for my biggest wine-drinking friend’s birthday! 🙂 I featured you today on my favorite things 🙂
http://sunshineandchaucer.blogspot.com/2011/04/my-favorite-thangs.html
I am loving this! It would look great in my kitchen! I have a feature scheduled for this morning!
Denise
Extreme Personal Measures
I LOVE this!!! Thanks so much for sharing this idea. It will make the perfect gift for my son’s (Wine Guy) new home. Heading to the garage now for plywood…
Jane (artfully graced)
This is beautiful! I really love the quote….and haha, I feel the same way! only I’m more of a beer girl! lol I would love for you to come link up to my Sew Crafty Party !
Vivienne, this is such a COOL project!! And I also like that you highlighted your reasons for wanting to do the project. 😉 T’s aunt gave us a “hot plate” made of wine bottle corks and it is so cool looking that I keep it up on display. 🙂
Thank you so much for joining my “I {Heart} My Crafty Cutter” party. 🙂 (and for linking back–I REALLY appreciate your help with that) 🙂
This is awesome! Love the corks around the edge! SO fun!
Time to start saving the corks! 🙂
Andrea
http://www.addicted2tutes.blogspot.com
Really cool…my parents would adore this as well. Thanks for sharing how you made it!
Frickin Fantabulous!!! I don’t like wine, but if I did, this would be my next project. Great tutorial!
Hey Miss V! Your creativeness is so inspiring! Thanks so much for linking up to Terrific Under Ten today!
I love this. love. love. love.
I am loving this! Thanks for sharing at Fantastic Friday.
I have at least a dozen friends that would LOVE to have this in their home!! Fantastic job!
smiles!
Jami
I don;t think I commented on this yet…I feel like I have…but too cute. I like wine too…maybe I will be making one next. Great job!
I’ve been eyeing this little gem all week….I’m only jealous that I can’t add to our cork collection right now (4 months preggers) I’ll be bookmarking to make as a celebration project! love your blog…it’s just makes me smile 🙂
I LOVE this… I have a big glass container full of corks and I may have to make this for our dining room!! YOU are sooo creative! 🙂
~Alison
Looks great!
PS found you at Its a Hodgepodge Life!
I love this. We are wine lovers, too and this would look great in our cellar!
Omg totally adorable. I have some art that I’ve made out of wine labels, but this would be a great addition to the wine art in my dining room. Thanks for the inspiration!
I saw you on OMTWI, I love the writing!
Carlee
http://www.ladybirdln.com
Found you on the blog hop. I’m a follower now 🙂 Love the wine board, I really like whine too.
I love how it turned out! love the quote and the way you arrange the corks, now i need to save all the corks after i finished the wines to make something like this! great idea and thanks for sharing the tutorial!
I’m following you from homemakeronadime Creative Bloggers’ and Hop!
Susan @ http://tea-diary.blogspot.com
How fun is that? It turned out great! Thanks for linking up again!
hugs-
Tiff
I love this too soo creative! And the quote fits it perfectly. I am really thinking about making one for my father in law for fathers day.
newest follower from Creative Bloggers Hop. Please follow http://sweetcalifornialiving.blogspot.com/
Featured this today!
http://www.wildflowersandwhimsy.com/2011/04/sew-crafty-saturday-features-x-2.html
Visiting from DIY Showoff Parade — LOVE this idea!!
I love this! I hope you’ll come over and link it up with us…
http://embellishinglifeeveryday.blogspot.com/
Awesome! I love this idea!
Cute project, Vivienne!
I love this project! My mom is really into cork-craft. I am sure she is going to like this when I show it to her in a couple of days! Great job! Cheers!
I know this is late, but I wanted to comment. I tried this but in a bit of a different format. It went great and I gave it my sister for here screened in porch 2 years ago(which is more like and outdoor living area and where she does ALOT of entertaining). After about 6 months, the corks started falling off. Planning to try this again, but looking for a better approach for use outdoors in the south (very humid) – Maybe a specific type of epoxy? THANKS
Hi there, I like E6000. Maybe try Gorilla Glue..? Sorry, I just don’t have the experience with humidity like that. Good luck!
Can anyone tell me what size the frame is and font style and size? thanks
Very good article! We are linking to this particularly great content on our
website. Keep up the good writing.