We host a Halloween Party every year, and one of the things I really enjoy doing is making the invitations. (Here are the invitations I made last year. Super easy.) While I did do a “Save the Date” over Facebook at the beginning of the month, I think there’s just something special about getting an actual invitation in the mail. Even if it’s just one item in a the middle of a dozen bills and junk mail pieces, at least it’s a fun item, right?
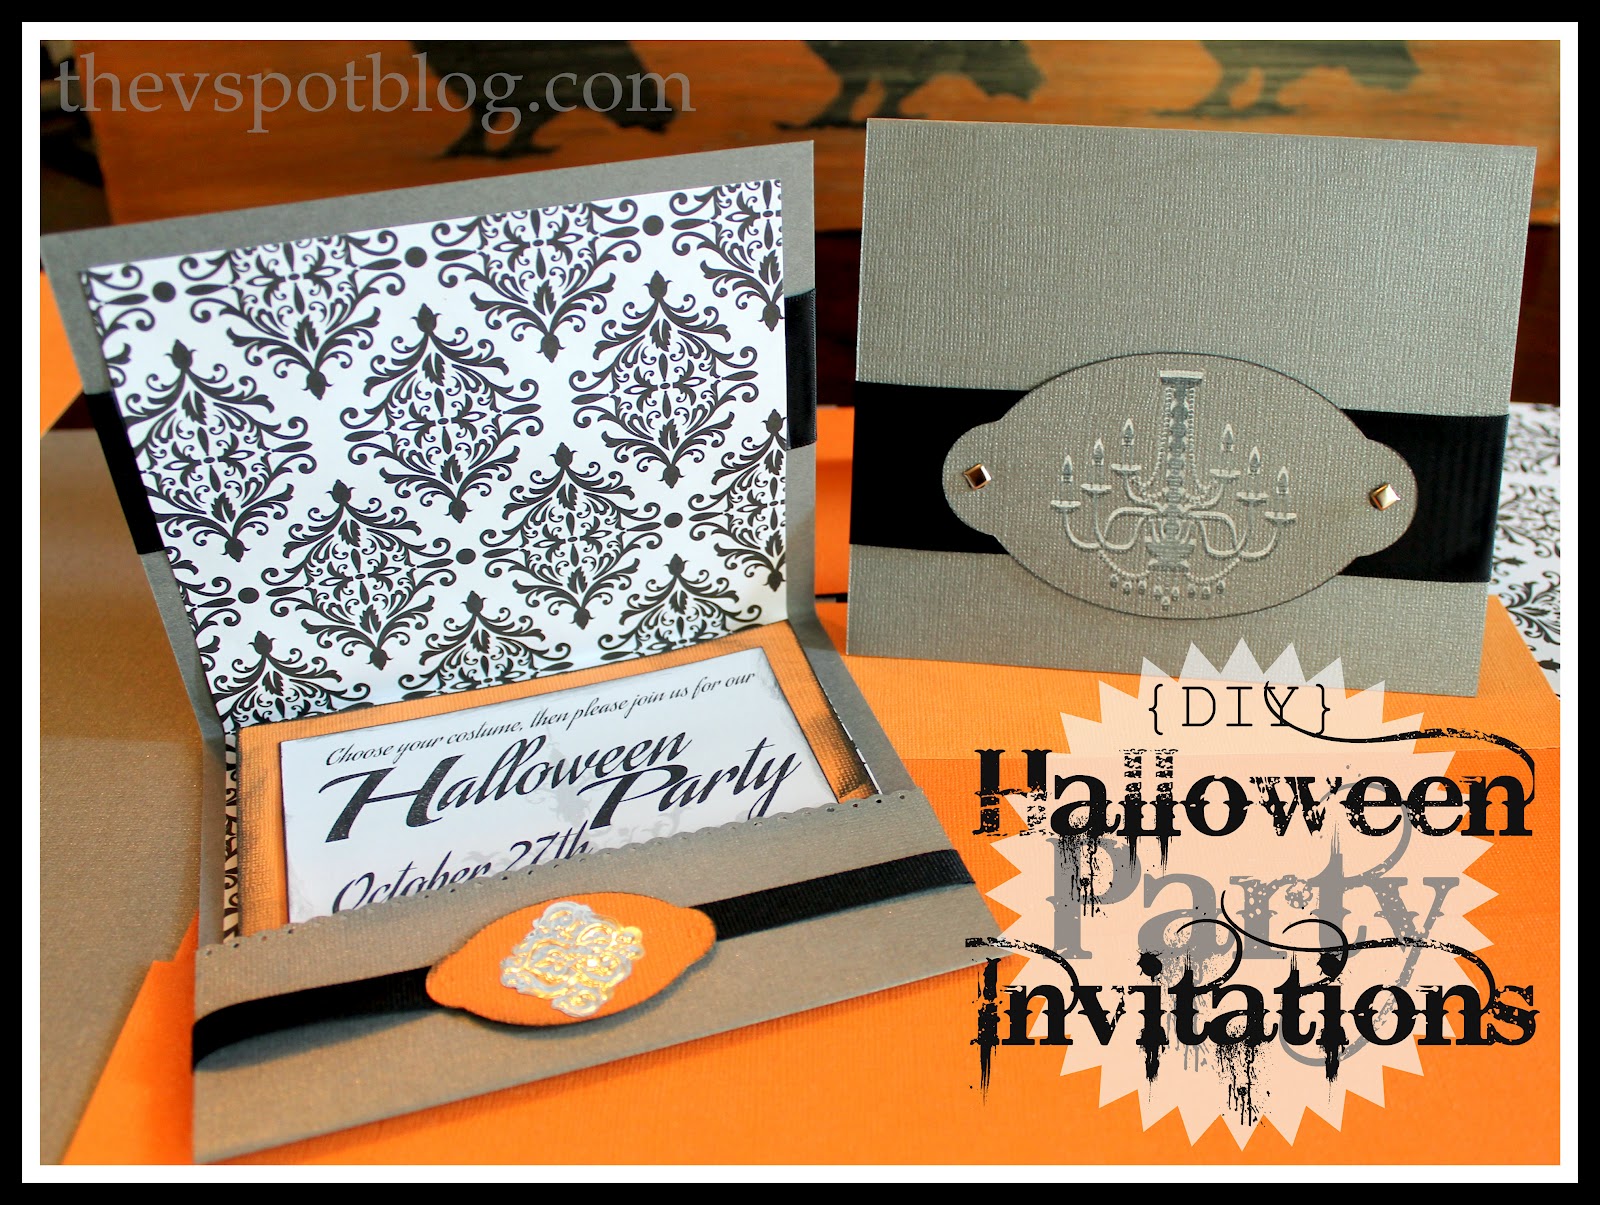
These are the ones I made this year:
Here are the supplies needed for basic construction. Makes 20 invitations.
(Of course you can substitute your own color scheme, patterns, etc. The colors listed are for your shopping list/measuring purposes, m-kay?)
- 10 pieces of 12 x 12 cardstock in a silvery gray
- 10 pieces of 12 x 12 cardstock in a black & white pattern
- 5 pieces of 12 x 12 cardstock in orange
- 8 to 12 pieces of letter size white cardstock
- transparent tape
- double sided tape
- glue stick
- spool of 3/8 inch black grosgrain ribbon
- spool of 1& 1/2 inch black satin ribbon
- black and white stamp pads
- chandelier stamp
- electronic cutting machine or decorative edge scissors
- foil stickers


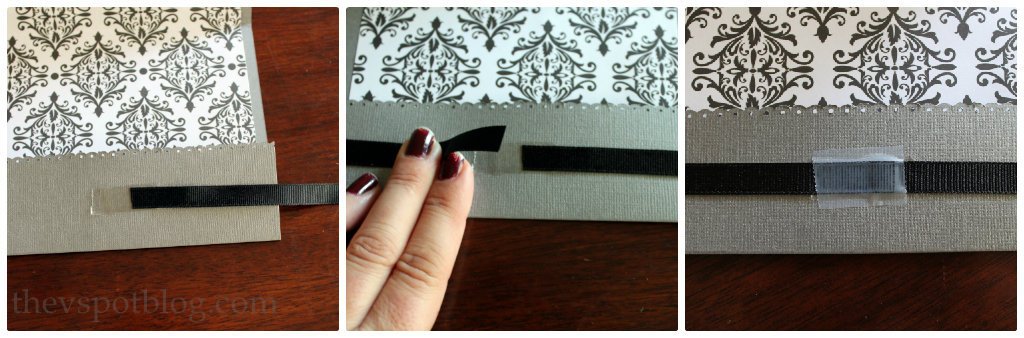

To make both the little orange embellishments that went on the inside, and the larger gray embellishment on the front of the card, I used my Cricut machine. (This was from the Classic Font Cartridge, 1.75 and 2.5 inches, respectively.)
The front shape was stamped with chandelier shaped stamp, first with a white ink, then black ink slightly off-set right over it. I put brads through the holes on the front, and didn’t worry about the tiny holes on the smaller shape inside.
As far as the actual invitation inside, the orange cardstock was cut into 5 1/4 x 4 3/4 inch pieces. I printed the information on white cardstock and then cut it out so that it was slightly smaller than the orange piece. I distressed the edges of both pieces with black ink from the inkpad, then I used the glue stick to adhere the white invitation to the orange piece. Done.
By the way, don’t be like me and forget to put any RSVP or contact info on the invitation. If that happens, you are going to have to print up a separate piece and tuck that into the pocket too and pretend that you meant to do it that way.
I’m pretty happy with how they turned out.

By the way, you might be thinking it’s kind of weird that I have chandeliers on my Halloween invitations. I am more of a eerie/Poe kind of Halloween person than a gory Halloween person. I am envisioning a party with chandeliers and candles everywhere and kind of spooky and Victorian/Gothic. That’s why chandeliers…

Those are just gorgeous! Love the chandy, reminds my of the Haunted Mansion. I’m sure your party will be fabulous!!
Just from how you describe your Hallowe’en personality type (and yeah, I totally think that should be an online multiple choice test!!) I’d LOVE to party with you on October 31st! Nailed it… chandeliers, top hats, Nevermore and creaky floor boards. That’s all I need!
Love your cards, they are classy and elegant. One of my future purchases (after the sudden, unexpected windfall that I just know must happen one day) is a full kit of scrapbooking materials. I love digiscrapping, but something to stick into an envelope and mail to loved ones via snail mail would be fantastic!